 PMSDEMO · fictitious data
User guide
OCA PMS · the chain’s PMS
Front desk, bookings, housekeeping, food and beverage, purchasing and accounts for every hotel in one place, explained section by section with screenshots of the demo. The guide grows with the demo: each release brings the chapters for its sections.
Getting started
Getting started
What this demo is, how to sign in with the account for each role, the parts of the screen, how to choose a hotel and a language, where to find help and why each role sees different things.
OCA PMS is the hotel management system (a PMS, the software each hotel runs on: bookings, front desk, invoicing…) being built for OCA Hotels. It brings together the front desk and the room planner, bookings, invoices, payments and tills, housekeeping, food and beverage, purchasing and stock, management reports and administration in one place, for every property in the chain.
This chapter is the starting point: what this demonstration is, how to sign in, what the screen looks like and where to find help. What it explains applies to every section.
#What this demo is
What you have in front of you is a demonstration, and that shows in four ways:
- It is a proposal for OCA Hotels, with made-up data. The two sample companies, their four properties (from 101, “OCA Gran Hotel Atlántico”, to 202), the users, the bookings with their guests, the invoices, the payments and everything else are made up by a generator. No data comes from OfiCloud or OCA CRM.
- The demo always starts “today”. Dates are relative to the day the data is generated. The published demo goes back to its starting data every morning at 08:00 (Madrid time): try whatever you like, because anything you change during the day is lost then.
- The integrations are simulated. The booking engine and the channel manager (which shares availability out among the sales channels), SES.HOSPEDAJES, the INE (Spain’s National Statistics Institute), the Spanish Tax Agency (Verifactu and SII), the surveys, the payment gateway, the card terminal, the locks and the accounting (a3innuva) imitate the real service, but do not connect to it. Emails go to a capture mailbox and never go out to the internet. In Settings → Connectors and queues, the administrator can switch on each hotel’s simulated activity: made-up channel bookings that keep coming in on their own and room attendants who clean rooms during the day, so you can see the demo in motion. Survey responses also arrive on their own.
- It is always flagged: the DEMO · fictitious data badge goes with the title of every screen.
The demo grows in releases. Each one comes with its fictitious data, its help and its chapters of this user guide in all four languages. D0, D1, D2, D3 and D4 are available now, with all the sections; only D5, the showcase, is still to come:
- 1D0 · FoundationsRole-based sign-in, the screen in four languages and two themes, the sample chain, permissions, the event log and help. Available now.
- 2D1 · Front deskInventory, rates, bookings, room planner, check-in and check-out, guest folio, night audit, invoices with Verifactu, payments and tills, guests and agencies, and the channel manager (simulated). Available now.
- 3D2 · Housekeeping and managementHousekeeping with the mobile app (and the shared tablet, also offline), the management dashboard, reports, guest care, surveys and guest emails. Available now.
- 4D3 · POSThe restaurant and café point of sale, with the POS app for the tablet, which keeps selling offline; allergens, the guest history and setting up hotels. Available now.
- 5D4 · Purchasing, accounting and legalPurchasing and stock with recipe costing, accounting with its export to a3innuva and the legal obligations: SES.HOSPEDAJES, the INE survey, Verifactu and SII, and GDPR. Available now.
- 6D5 · ShowcaseThe showcase website, the complete user guide, the language review and simulated activity during the day.
#Signing in to the demo
OCA PMS runs in the browser, on a computer or a tablet, with nothing to install. Everyone signs in with their own user, because what they see depends on their role: their hotels and what their access profile allows. In the demo you do not need to ask for a user: the sign-in screen offers one demo account per role, and one click is enough.
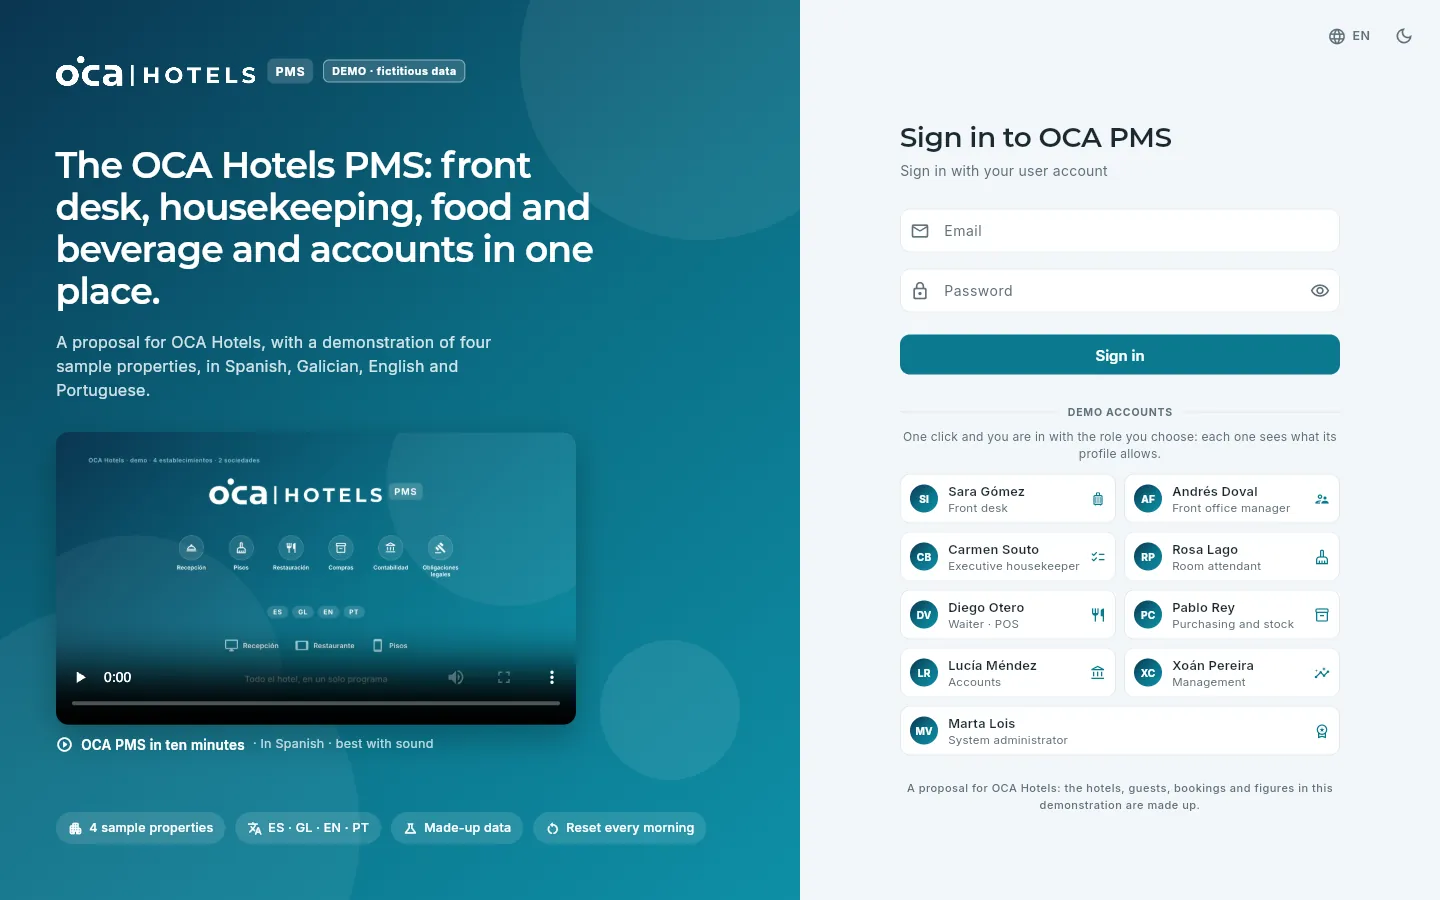 123456
- 1The DEMO · fictitious data badge: everything you are about to see is made up.
- 2What OCA PMS is and what this demo is: a proposal for OCA Hotels with four sample properties, in four languages, that goes back to its initial state every morning.
- 3Your email and password, if you have a user of your own.
- 4Sign in. Pressing Enter in the password also works.
- 5The demo accounts, one per role: click one and you are in with that role, without typing anything.
- 6Language and light or dark mode, right from here. Once inside you can change them whenever you like.
Open the demo address in your browser.
If you like, choose the language and theme at the top right.
Under Demo accounts, click the role you want to try: front desk, executive housekeeper, management…
Room attendants and housekeepers also have the housekeeping app, designed for mobiles and tablets: the same address as
the demo, ending in /pisos/ (see Room attendant and Executive housekeeper). Waiters have the POS app,
for each outlet’s tablet: the same address ending in /tpv/ (see Waiter).
In the published demo, a notice above the form reminds you what time the data is reset to its starting state. If the email or password is wrong, Invalid email or password appears in red.
#The parts of the screen
Every section shares the same layout: on the left, the sidebar to move around; at the top, the top bar with what works on any screen; below, the section’s content. This is what the administrator sees right after signing in:
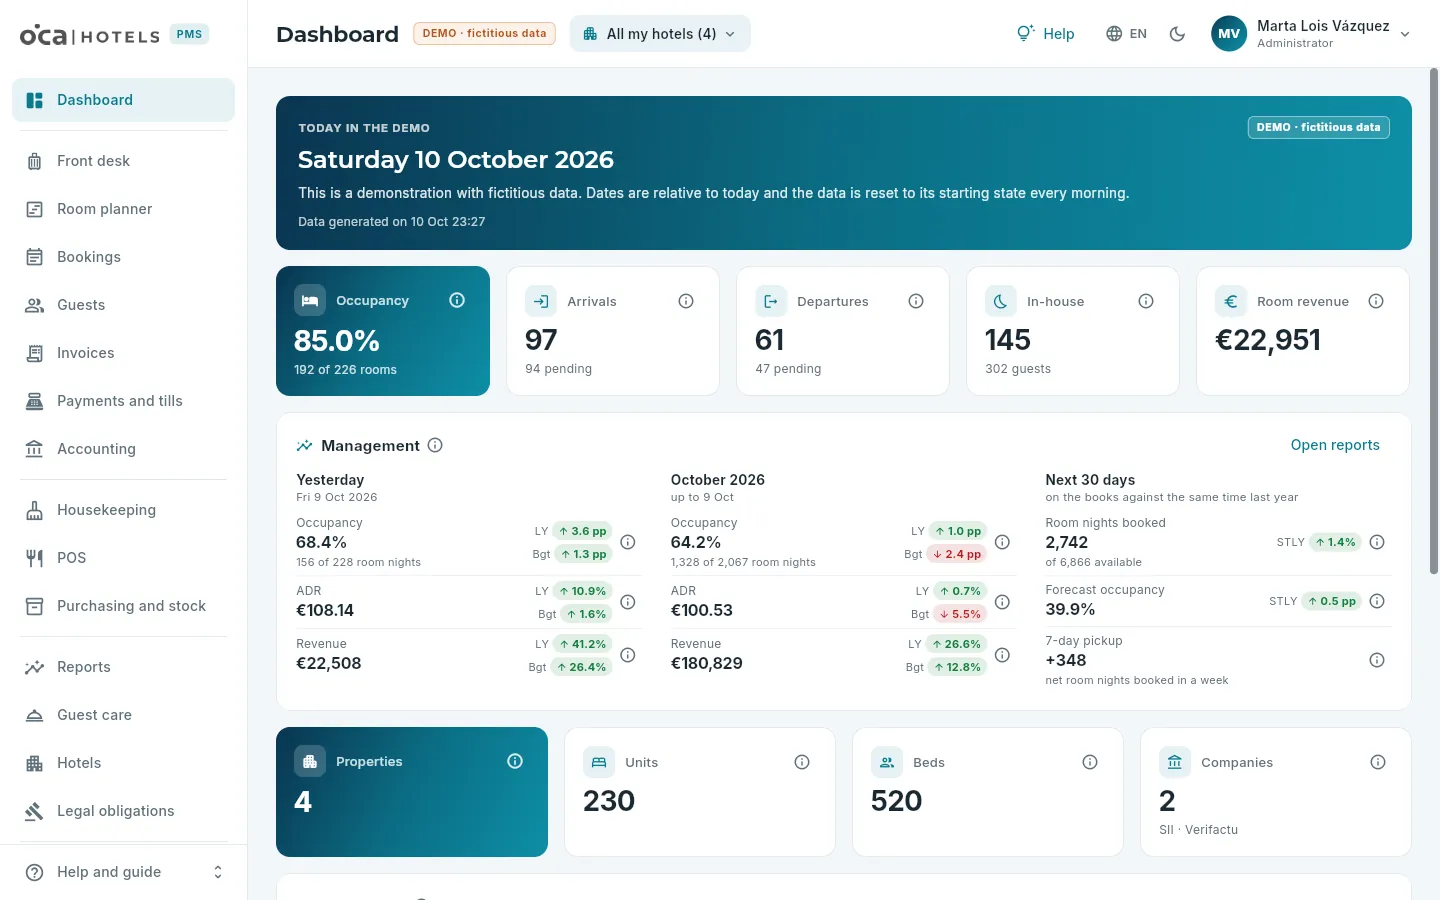 12345678
- 1The sidebar, with the sections for your role. The one you have open is highlighted.
- 2Help and guide, fixed at the bottom: this user guide and the animated guides.
- 3The DEMO · fictitious data badge. Hovering over it reminds you that the data is reset to its starting state every morning.
- 4The hotel selector: all your hotels or just one.
- 5Help for the screen you are on, with its animated guides (also with F1).
- 6The language (Spanish, Galician, English or Portuguese) and the theme: the moon switches to dark mode and the sun back to light.
- 7Your user menu, with your name and your access underneath.
- 8An ⓘ: it explains where the thing next to it comes from.
The sections are grouped as in a hotel’s day-to-day work, with a line between each group:
| Group | Sections | Arrives in |
|---|---|---|
| General | Dashboard | available now |
| Front desk and bookings | Front desk, Room planner, Bookings, Guests, Invoices, Payments and tills and Accounting | available now |
| Departments | Housekeeping, POS and Purchasing and stock | available now |
| Management | Reports, Guest care, Hotels and Legal obligations | available now |
| Administration | Settings and Users, only for the administrator | available now |
If the window is medium-sized (a tablet, a small laptop), the sidebar narrows and shows only the icons; hovering over one shows its name. On a narrow screen it hides behind the menu button.
Next to every indicator and every block there is an ⓘ 8. Clicking it opens a note in three parts: What it shows, How it is calculated and How to read it. If a figure surprises you, start with its ⓘ: the answer is nearly always there. It closes with Esc or by clicking outside.
Your user menu 7 has three options: Profile (your role, your access, how many hotels you see and, once again, the language and theme, which can follow your computer’s: Same as system), About (the version that is running, the result of its tests and the reminder that the data is fictitious) and Sign out.
#Choosing a hotel and a language
The hotel selector decides which hotels’ data you see. When you sign in it shows all your hotels (with how many in brackets); if you choose one, every section shows only that hotel until you change it again. Only your user’s hotels appear: the administrator sees all four in the chain; the room attendant, only theirs.
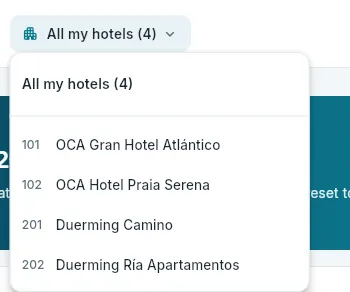 12
12
- 1All my hotels: all at once. In brackets, how many you have.
- 2Each property, with its code: 101 and 102 are hotels; 201 is a guest house and 202 a set of holiday apartments.
Click the hotel selector in the top bar (it says All my hotels and how many there are).
Choose the hotel; for example, 101 OCA Gran Hotel Atlántico.
To see them all again, open it once more and choose All my hotels.
Click the language button in the top bar: the globe with the letters of your current language (EN).
Choose Castellano, Galego, English or Português.
For the theme, click the moon (dark mode) or the sun (light mode), to its right.
#Help: animated guides and this user guide
There are two kinds of help, always to hand:
- Help for the screen: the Help button in the top bar or the F1 key, on any screen (even with a record or a dialog open). It opens a panel on the right that tells you where you are, links to its chapter of this user guide and offers animated guides: on screenshots of the demo itself, a pointer goes to the spot, highlights it and performs the action while each step is explained; you can pause, go forward or go back.
- This user guide, from the Help and guide menu at the bottom of the sidebar: the chapter for the section you are in or the complete guide, in a new tab and in the language you are using in the app.
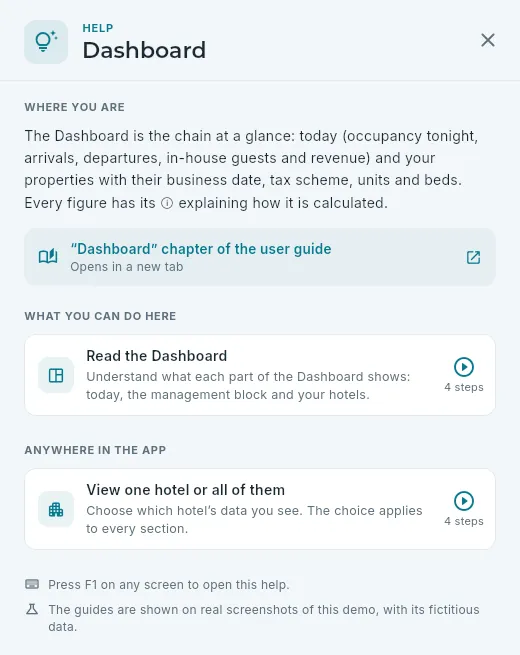 12345
12345
- 1Where you are: what the screen is for.
- 2Its chapter in this user guide, in a new tab.
- 3The guides for this screen (here, how to read the Dashboard); if it has none yet, it says so.
- 4Guides for what works anywhere in the app: click one to watch it step by step.
- 5Closes the panel (also Esc or clicking outside).
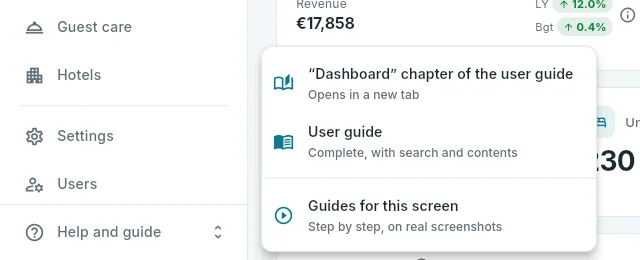 1234
1234
- 1The chapter for the screen you are on (here, the Dashboard).
- 2The complete user guide, from the cover.
- 3The animated guides (the same as Help or F1).
- 4The menu opens from here.
#Each role sees its own
OCA PMS shows each person only what concerns them. Compare the administrator’s screen (the figure in The parts of the screen) with the room attendant’s:
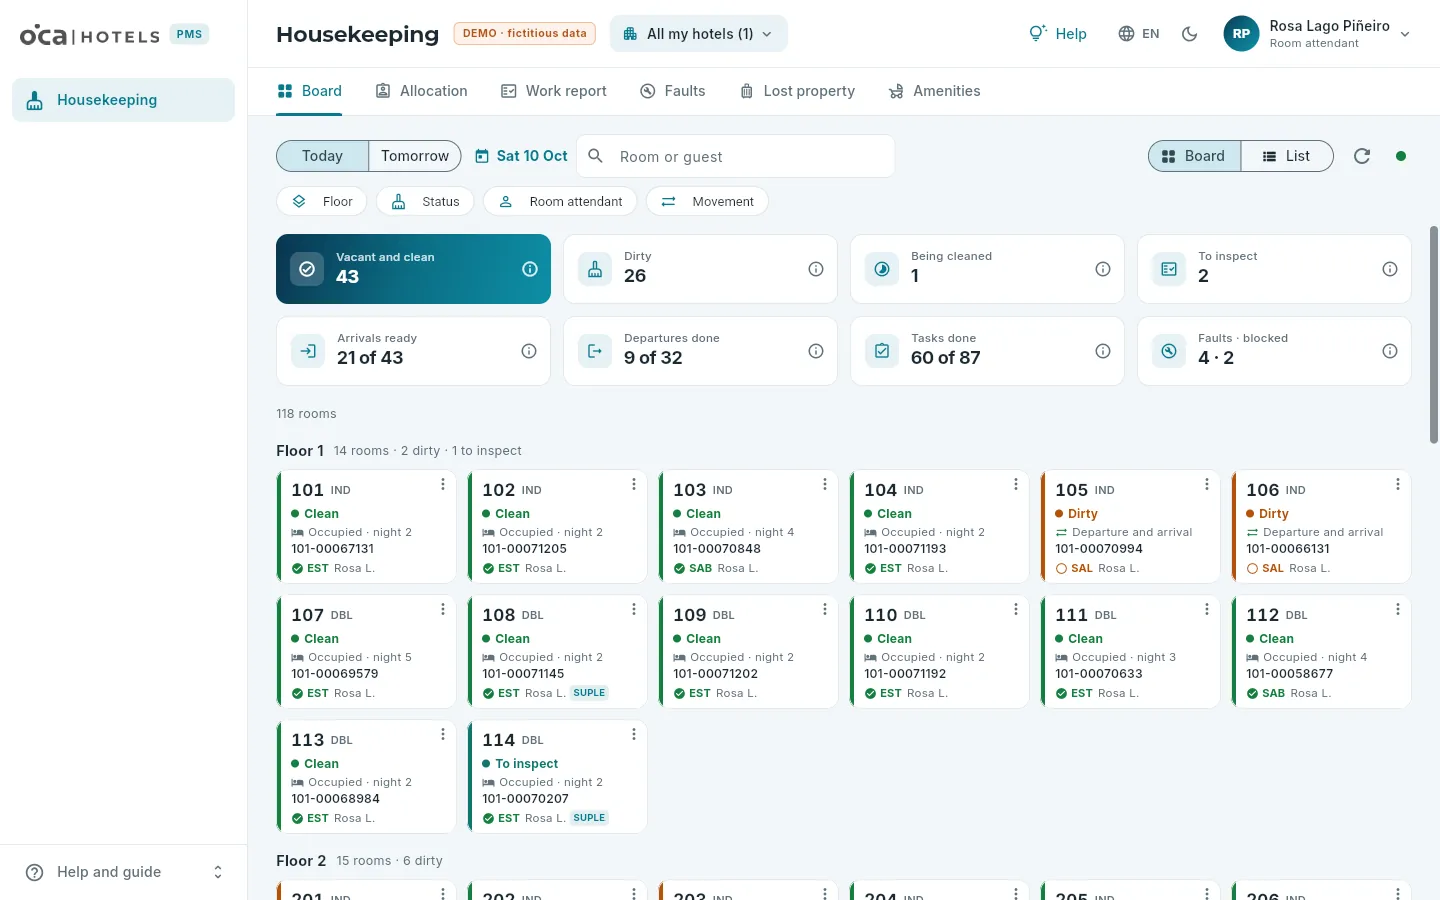 1234
1234
- 1A single section, Housekeeping: the one for their work.
- 2A single hotel: 101, where they work.
- 3Its tabs, read-only; without Settings, which belongs to the executive housekeeper. For their daily work they use the housekeeping app on their mobile.
- 4Their role, under their name.
- Sections. Each role’s access profile decides which sections appear in the sidebar. The administrator sees them all, including Settings and Users; the room attendant, only Housekeeping.
- Hotels. Each user sees only their own: the others do not exist for them, neither in lists nor in totals.
- What can be seen and done within each section. Some permissions are not sections: seeing amounts, seeing guests’ personal data, downloading lists, seeing technical data, changing a hotel’s business date, creating, changing or cancelling bookings, assigning and moving rooms or blocking them.
- Hiding a button is not enough: the database applies the same permissions to every query and every operation.
These are the demo accounts and what each one sees:
| Account | Hotels | What it sees |
|---|---|---|
| Front desk | 101 | Dashboard, Front desk, Room planner, Bookings, Guests, Payments and tills, Guest care and Hotels, with amounts and personal data. |
| Front office manager | 101 and 102 | Everything in Front desk plus Invoices, Reports and Legal obligations (submits and corrects SES.HOSPEDAJES); it can also download lists, see technical data and change the business date. |
| Executive housekeeper | 101 and 102 | Dashboard, Room planner, Housekeeping and Hotels, and the housekeeping app. |
| Room attendant | 101 | Only Housekeeping and the housekeeping app: their rooms for the day. |
| Waiter · POS | 101, 102 and 201 | The POS app on their outlet’s tablet and, here, only the POS section: Live and the Menu, without amounts. |
| Purchasing and stock | 101 and 102 | Dashboard, Purchasing and stock and Hotels, with amounts. |
| Accounts | all four | Dashboard, Bookings, Guests, Invoices, Payments and tills, Accounting, POS, Purchasing and stock, Reports, Hotels and Legal obligations (the INE survey); it can change the business date. |
| Management | all four | Every section for all its hotels, with amounts, personal and technical data. |
| System administrator | all four | Everything, including Settings and Users. |
#About the data
In Settings, the administrator has the About the data tab, which explains in detail what this chapter covers at the start: where the demo data comes from, what the four properties are like, when they are reset to their starting state and which integrations are simulated.
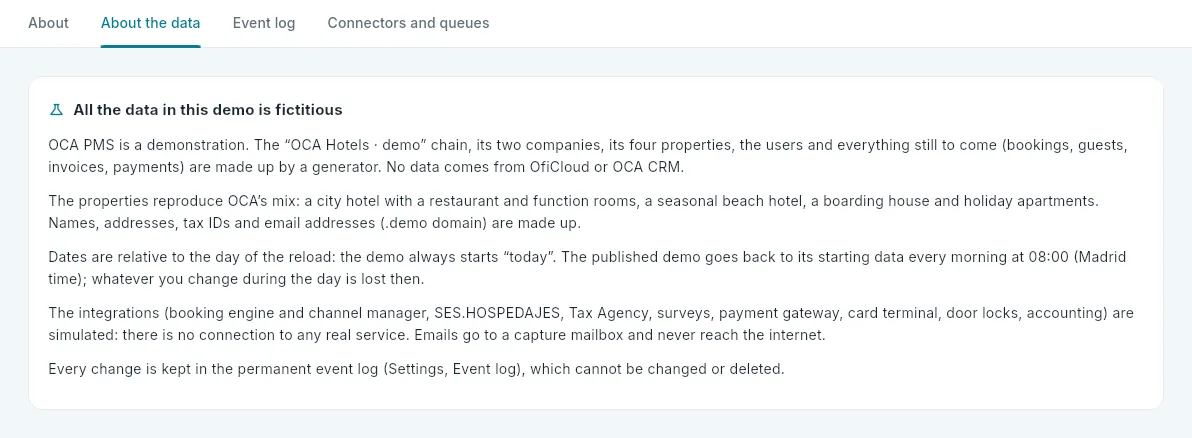 123
123
- 1The About the data tab.
- 2What is made up, what the dates are relative to, what time everything is reset to its starting state and which integrations are simulated.
- 3Every change is kept in the event log, which cannot be changed or deleted.
Next to it are About (the version that is running and the result of its tests), Event log (every change, with what happened, when and who) and Connectors and queues (the simulated integrations and the messages waiting their turn). Any user can see the version and the reminder that the data is fictitious in About, in their user menu.
Overview
Dashboard
The first screen when you sign in: today at your hotels (occupancy, arrivals, departures, in-house guests and revenue), the management summary and the chain at a glance, each figure with its explanation.
The Dashboard is the screen you land on when you sign in to OCA PMS (except for roles that only work in Housekeeping or the POS). On a single screen it sums up how the chain is doing today – or the hotel you choose in the hotel selector in the top bar – and takes you to each property’s record. All the figures are calculated by the database on the spot, only with the hotels you have access to, and each one has its ⓘ with what it shows, how it is calculated and how to read it.
#The chain at a glance
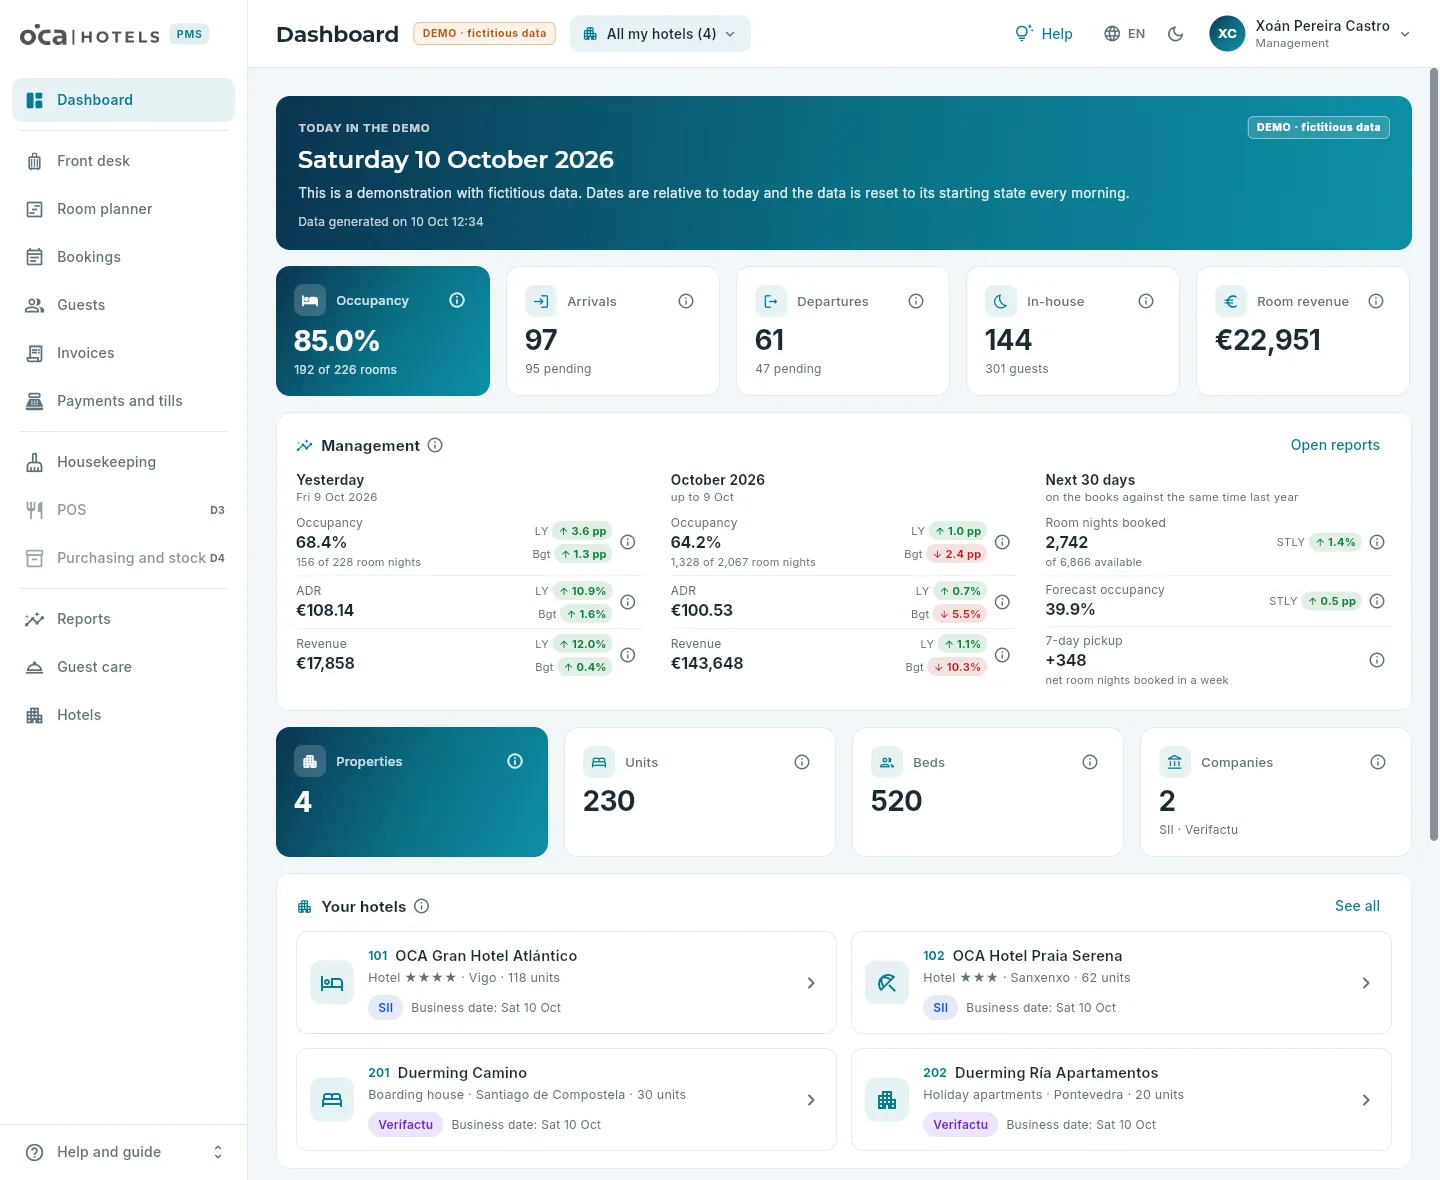 12345678
- 1Which hotels the Dashboard covers: all of yours or the one you choose.
- 2Today in the demo: the date, the reminder that the data is fictitious and when it was generated.
- 3Occupancy (tonight’s rooms): the percentage and, below it, how many rooms out of how many.
- 4Today’s arrivals and departures, with those still pending, and the rooms in-house with how many guests are staying.
- 5Room revenue: what has been sold for tonight, including VAT (only with the Amounts permission).
- 6The Management block: yesterday, the current month and what is on the books for the next 30 days, excluding VAT (with the Reports and Amounts permissions).
- 7The chain: properties, units, beds and companies.
- 8Your hotels, with their business date and tax scheme: click one to open its record.
From top to bottom:
- Today in the demo: today’s date, the reminder that the demo has fictitious data that goes back to its starting state every morning, and what time today’s data was generated.
- Today: five indicators of what is happening today at the hotels you can see (see Today).
- Management: how yesterday went, how the month is going and what is already booked for the next 30 days, against last year and the budget (see The Management block). Only those with the management reports see it.
- The chain: Properties, Units (rooms or apartments that are sold), Beds (people who fit in fixed beds) and Companies (the invoicing companies, with their tax scheme: SII or Verifactu).
- Your hotels: one card per property, with its type, its municipality, its units, its tax scheme and its business date. If a hotel still shows yesterday’s date, it has not run its night audit yet. Click a card to open its record, or See all to go to Hotels.
- The demo, release by release, at the end: what each release of the demo brings and which ones are already available or in progress.
#Today
For each hotel, “today” is its business date: the day it has open, which the night audit normally moves forward. The indicators add up the day of each hotel you can see. With a single hotel chosen in the selector, they are that hotel’s figures; the Room planner shows the same ones, hotel by hotel, above the grid, and Front desk shows them with the details of each arrival and each departure.
 1
1
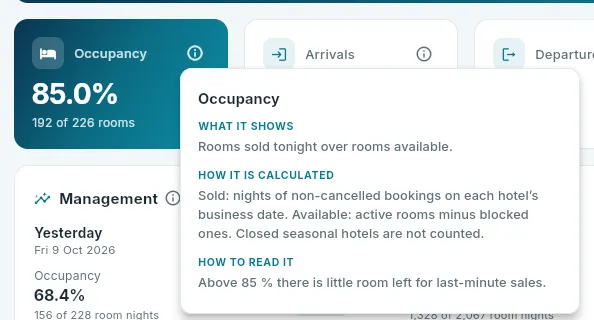
- 1What it shows, how it is calculated and how to read it. It closes with Esc or by clicking outside it.
#The Management block
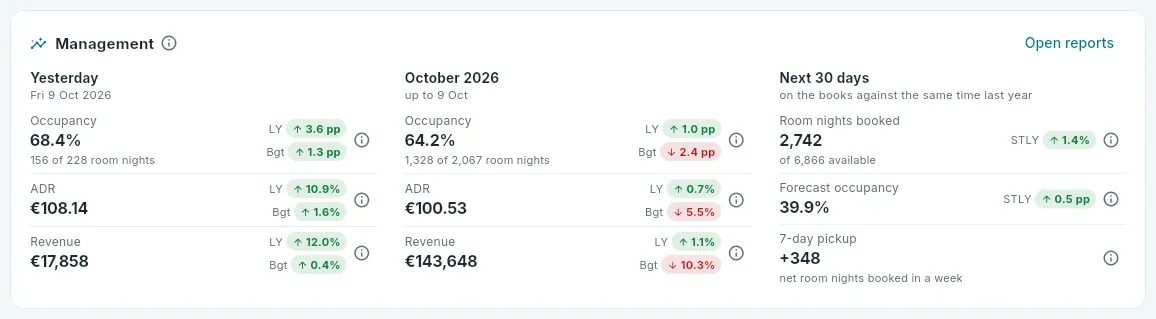
Below today’s figures, anyone with the Reports section and the Amounts permission sees the Management block: a summary of the Management dashboard in three columns. All amounts are excluding VAT (what really stays with the hotel) and without the tourist tax.
 1234
1234
- 1Yesterday, the last closed day: occupancy, ADR and revenue.
- 2Each figure, against last year (LY) and the budget (Bgt): in green if it is doing better and in red if it is doing worse. The ⓘ explains how it is calculated.
- 3The next 30 days: what is already booked against what had been booked at this point last year (STLY) and what was booked in the last week (pickup).
- 4Open reports opens the full management dashboard.
- Yesterday is the last day the hotel has closed (with several hotels, the sum of all their closed days). It is compared with the same weekday last year (364 days earlier) and with the month’s budget spread over its days.
- The month adds up the closed days of the current month and compares them with the same days last year and with the part of the budget for those days.
- Next 30 days is what is on the books: the room nights already sold for the next 30 nights. STLY (same time last year) is what had been booked at this point last year for the same nights; the 7-day pickup, what has been booked (minus what was cancelled) in the last week.
- Occupancy variances are in percentage points (pp): from 64% to 68% is 4 points.
#What each role sees
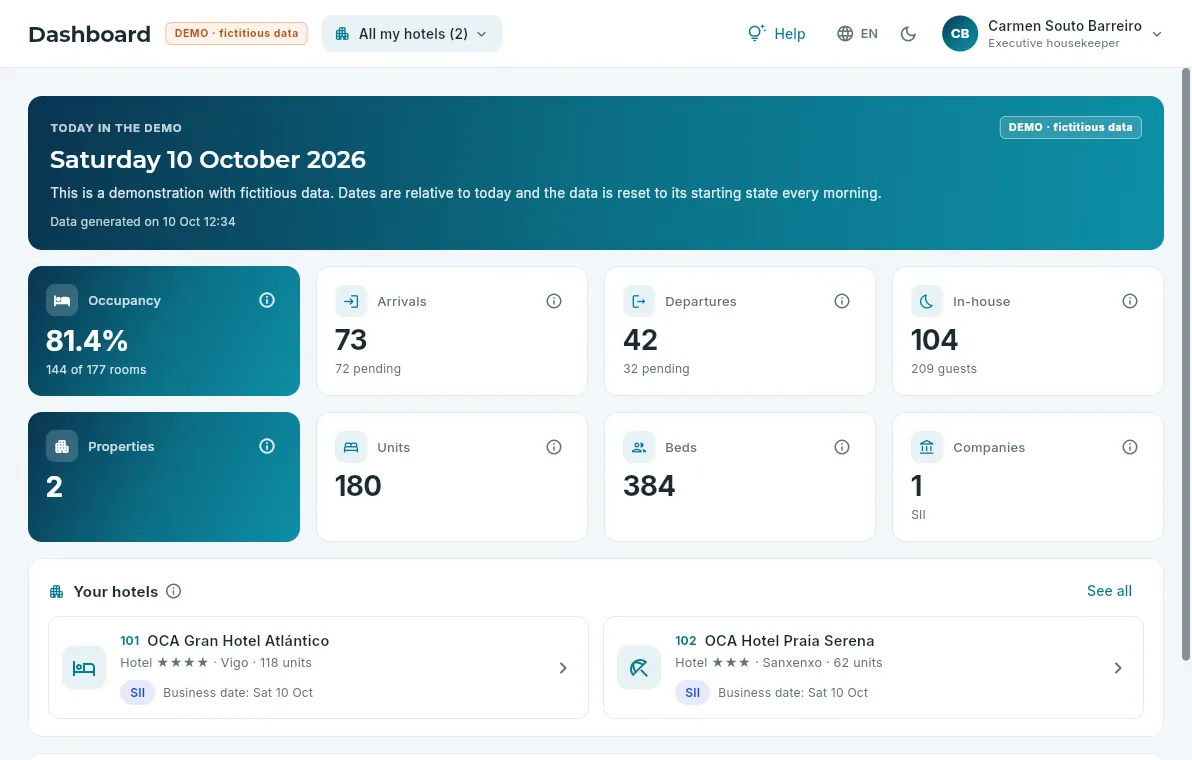
Each person’s Dashboard counts only their hotels: front desk’s, 101; the executive housekeeper’s, 101 and 102; management’s, all four. Room revenue only appears with the Amounts permission, and the Management block, with the management reports (management, accounts and front office manager).
 123
123
- 1Their two hotels.
- 2Four indicators for the day: without Amounts, there is no revenue.
- 3A single company: the one for their two hotels.
Front desk and bookings
Front desk
The day-to-day at the desk: who is arriving, who is leaving and who is in-house; check-in with the traveller register details, check-out with the folio, and the night audit.
Front desk is the desk screen: it shows the hotel’s day – who is due to arrive, who is due to leave and who is staying – and everything that happens at the desk is done from it: check-in (the guest’s arrival, with their details registered), check-out (the departure, with their folio invoiced and paid) and, at the end of the day, the night audit.
Front desk always works with one hotel and its business date: the day that hotel has open, which need not be the calendar date (after midnight, the hotel stays on the previous day until the day is closed). If the selector in the top bar shows all your hotels, the screen asks you to choose one.
- 1Check-inThe room, the guests’ details and, if the hotel has PIN locks, its door code.
- 2In-houseEvery night the audit posts the accommodation (and the tourist tax, if there is one) to their folio.
- 3Check-outWhat is outstanding is invoiced, payment is taken and the guest is checked out.
- 4Night auditWith all the departures done, the day is closed and the business date moves on to the next one.
#The hotel’s day
 12345678
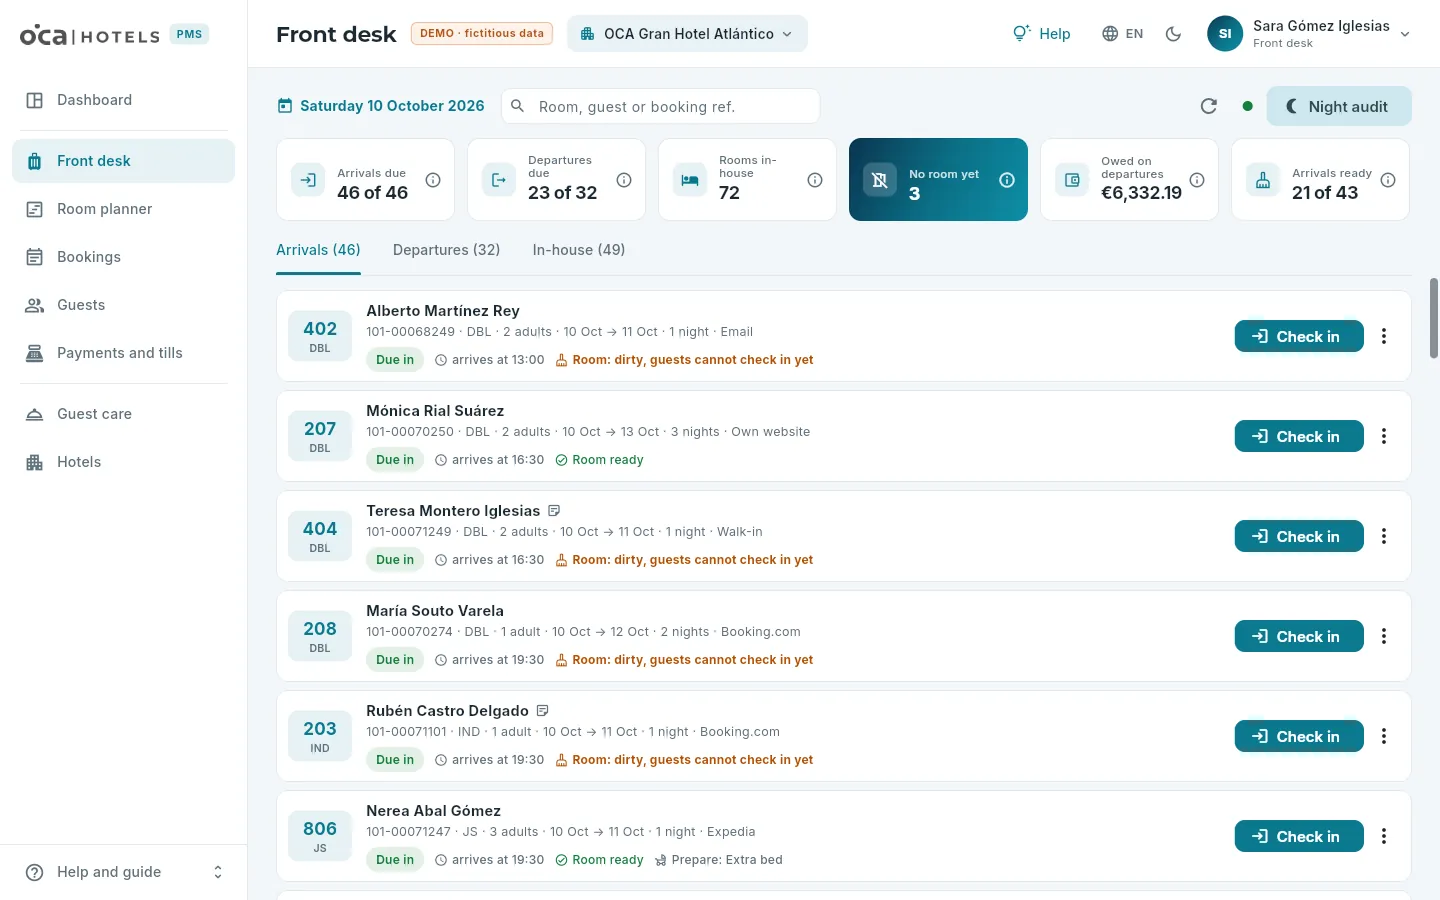
- 1The hotel’s business date: the day being worked on.
- 2Search by room, guest or locator across the three lists.
- 3Refresh and the green live dot: what others do appears automatically.
- 4The night audit.
- 5The day’s indicators, each with its ⓘ; the last one, Arrivals ready: how many arrivals already have their room clean.
- 6The three lists: arrivals, departures and in-house, with how many rooms each one has.
- 7Each booked room: its number and type, the lead guest, the booking, its status, the expected arrival time, whether the room is ready (clean), what needs preparing, the registered guests and the folio balance. Click it to open the booking.
- 8The action that is due (Check in, Check out or Folio) and More actions: open the booking, view the folio, early check-out or undo.
- Arrivals: the rooms arriving today. Those that have already checked in stay on the list, as Checked in, with the time they arrived.
- Departures: those leaving today and also overdue ones (those that should have left earlier and are still in-house), because they prevent the day from being closed. Those that have already left stay as Checked out.
- In-house: the rest of the rooms with guests staying, with the day they leave.
A booking with several rooms appears once per room: each one checks in and out on its own. When a new booking comes in from the channel (Booking.com, Expedia…), a message says so straight away.
#Check-in
Check-in is the guest’s arrival: they are given the room and the details the law requires of every accommodation provider are registered. It can only be done on the arrival day (the hotel’s business date) and with a room assigned; if there is none, you choose it during the check-in itself, from the rooms that are free for the whole stay.
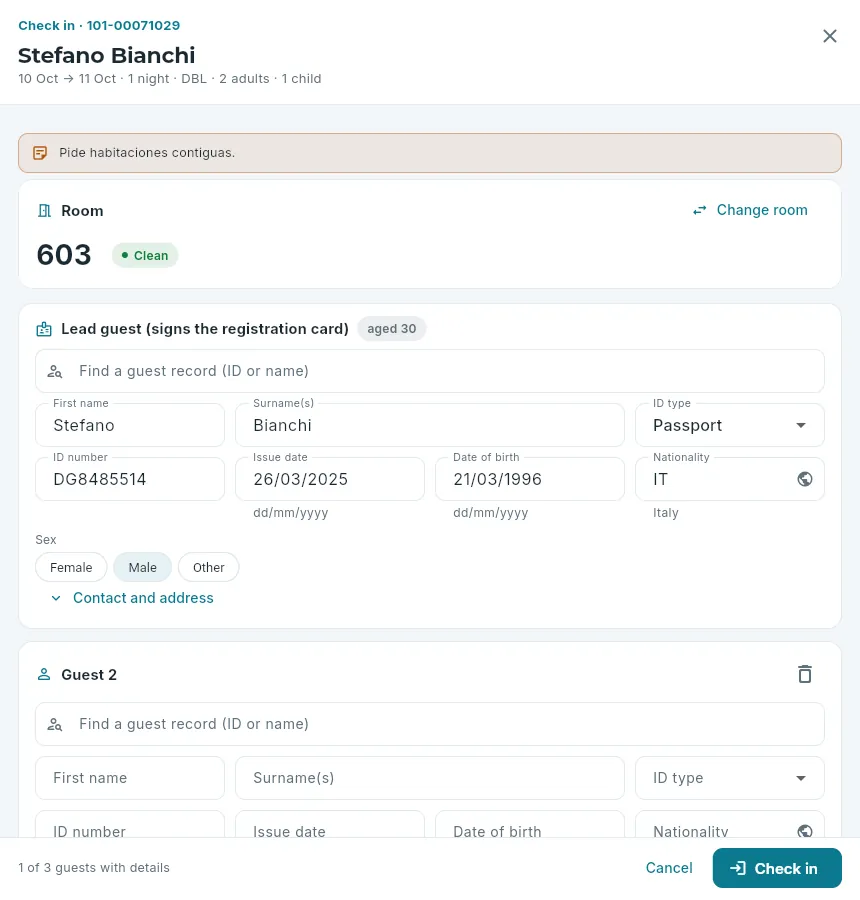 12345678
- 1The booking: locator, guest, stay, type and occupancy.
- 2The room: the assigned one or, if there is none, the one you choose. Change room shows those free for the whole stay.
- 3Find a guest record by ID document or name: if the guest has stayed before, their details are filled in automatically.
- 4The lead guest, who signs the registration card, with what is already known from their booking or record; whatever is missing (the document, its issue date…) is filled in here.
- 5Nationality (with the globe, from a list) and sex.
- 6Contact details and address, which are not required.
- 7One block per guest; add or remove them depending on who comes.
- 8Check in, when the details are complete. On the left, how many guests already have their details.
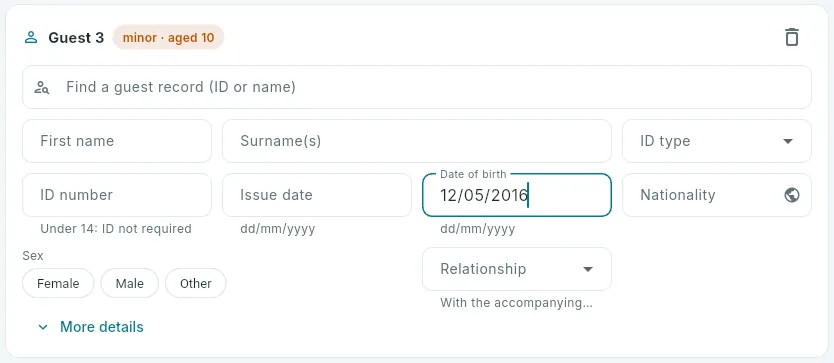 123
123
- 1The age, calculated from the date of birth.
- 2Under 14, the ID document is not required.
- 3The relationship with the accompanying adult, required for minors.
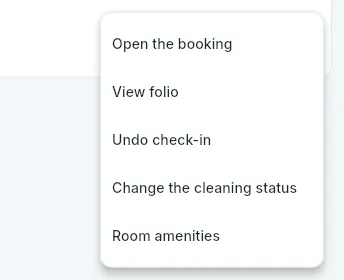 1
1
- 1Undo the check-in, with the relevant permission.
In Front desk, Arrivals list, click Check in on the room (or, in the room planner, right-click its bar → Check in).
Check the room. If it has none or you want another one, click Change room and choose one from the list.
For each guest, find their record by ID document or name; if it does not come up, fill in their details: first name and surname, ID type and number, issue date, date of birth, nationality and sex. For a minor, the relationship.
Add any missing guests with Add another guest (or remove those who are not coming).
Click Check in. Any missing or incorrect fields are marked in red, guest by guest.
#Data protection and SES at check-in
Below the guests, check-in has two more blocks: data protection (what the guest must be told when their details are collected and what they consent to) and what has been submitted to SES.HOSPEDAJES for that booking.
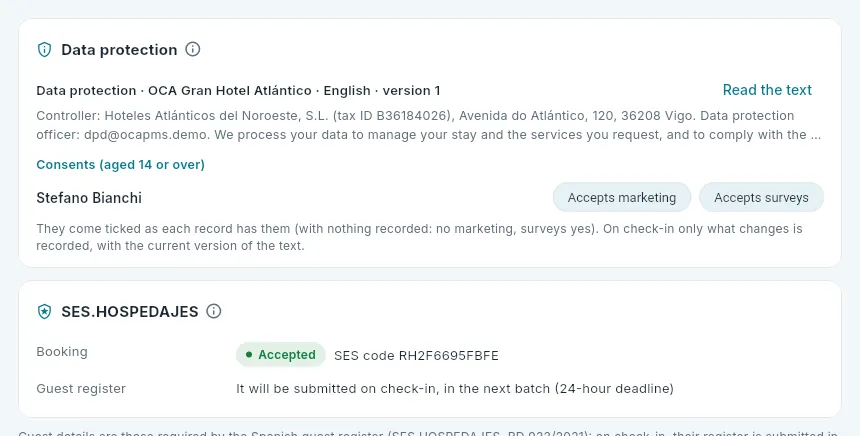 1234
1234
- 1The hotel’s data protection information, in the booking’s language, with its version.
- 2Read the text expands it in full, so you can read it out or show it to the guest.
- 3For each guest aged 14 or over, whether they accept marketing and the satisfaction survey: they come as set on their record.
- 4The booking, already submitted (with its status and its SES code), and the guest register, which will go out on check-in.
- The information. GDPR requires the guest to be told, when their details are collected, who processes them, what for, for how long and how to exercise their rights. The text is the hotel’s (or its company’s), in the booking’s language; if there is none in that language, in Spanish. It is changed in Legal obligations.
- Consents. With nothing recorded, the guest does not receive marketing but does receive the survey (on legitimate interest). If they say otherwise at the desk, change their tick: on check-in only what changes is recorded, with the current version of the text, and it stays in the history on their record (see Guests).
- SES.HOSPEDAJES. The booking was submitted when it was confirmed; the guest register goes out in the next batch on check-in, with a 24-hour deadline. If it comes back with an error, it is corrected in Legal obligations.
 1
1
- 1How its guest register is going: pending, sent, accepted or with error (and whether it is overdue).
In the In-house list and among the arrivals already checked in, each room shows how its register is going; on the booking record, the SES.HOSPEDAJES block in its summary shows the booking and each room’s register.
#Check-in only into clean rooms
Front desk sees for each arrival whether its room is ready: clean (and inspected, if the hotel inspects rooms) according to Housekeeping. At hotels set up that way – in the demo, 101 and the 202 apartments –, check-in can only be done into a clean room: the database itself enforces this. The list warns about it (“Room: dirty, guests cannot check in yet”) and so does the check-in, with two ways out: choose another clean room with Change room or, if the room is ready and housekeeping has not marked it yet, Change the cleaning status.
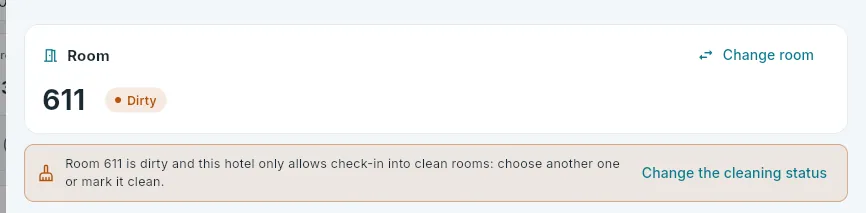 123
123
- 1The assigned room and its cleaning status: here, dirty.
- 2Choose another room, from those that are vacant and clean.
- 3Or mark it clean, if it really is.
At hotels that do not require it, you can check guests into a room that has not been cleaned, with the warning. In the arrivals list, each room also says what needs to be prepared in it (a cot, an extra bed…); More actions → Room amenities changes them.
One record per person. Each registered guest has their own guest record, recognised by their ID document: if someone comes back, searching for them by ID document or name fills in their details and their record is reused (and completed if anything is missing) instead of a new one being created. And if the booking’s lead guest already had a record without an ID document (the one created with the booking), the check-in completes it with what is registered. That way, each guest has a single record with all their stays (see Guests).
#PIN keys
The 202 apartments have code locks: on check-in, OCA PMS asks the lock for a six-digit PIN for that room’s door, valid until the departure day. The code appears on the check-in screen as soon as it arrives and, afterwards, next to the room in the front desk lists, so it can be given to the guest. In the demo the lock is simulated.
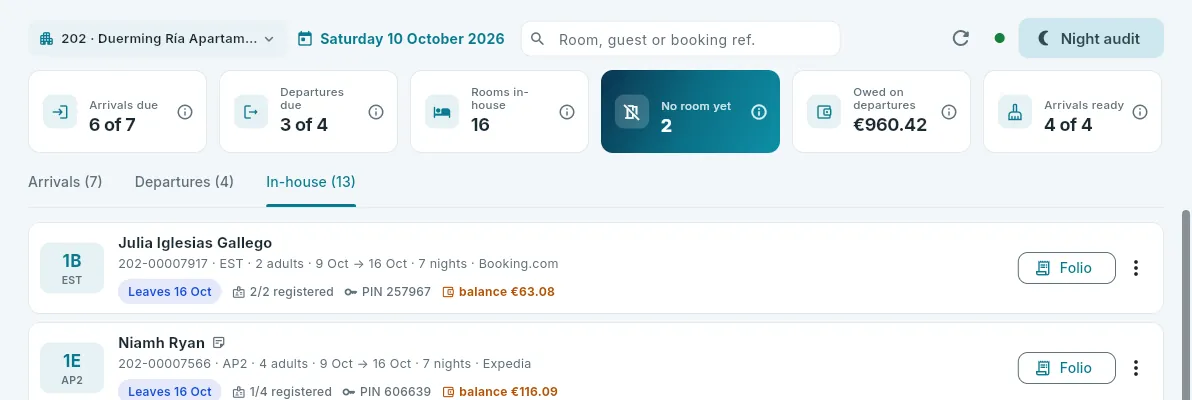 12
12
- 1Each in-house room with its PIN (the door code, with the key icon) and how many guests are registered.
- 2For in-house rooms, the main action is the folio.
#Check-out
Check-out is the guest’s departure. Before it is done, everything that has been charged to them must be invoiced and, at hotels that require it (all those in the demo), paid. Check-out shows the booking’s folio with those steps marked at the bottom.
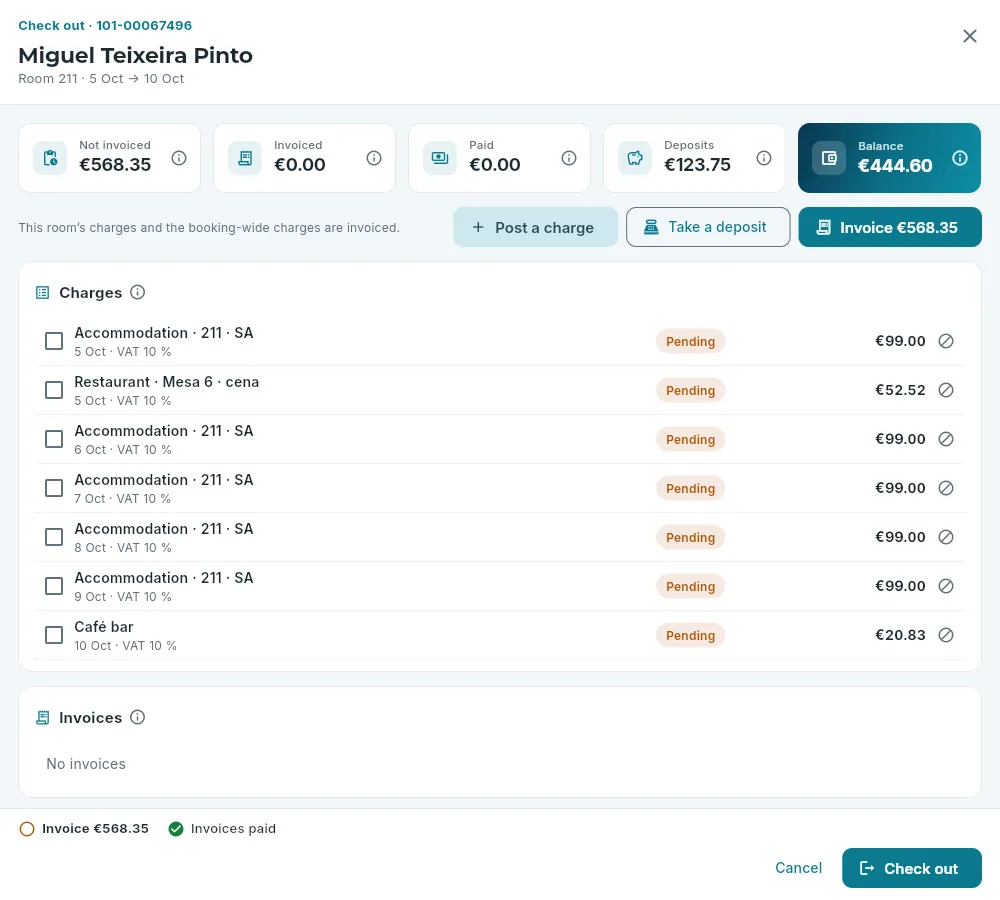 12345678
- 1The folio’s totals: not invoiced, invoiced, paid, deposits and the balance.
- 2Post a charge: an extra (minibar, laundry, parking…) before invoicing.
- 3Take payment: for what has been invoiced or, if there is no invoice yet, on account.
- 4Invoice what is outstanding.
- 5The booking’s charges: the night, the tourist tax, the extras.
- 6The invoices and, further down, the payments and deposits (a deposit is applied automatically to the invoice).
- 7The steps still to do: invoice and take payment; an empty circle means pending.
- 8Check out: the database rejects it if any step is missing.
In Front desk, Departures list, click Check out (or, in the room planner, right-click the bar → Check out).
Review the charges. If anything is missing, add it with Post a charge.
Click Invoice with the outstanding amount, choose who to invoice and issue the invoice (see Invoices).
Click Take with the invoice amount, choose the payment method and take the payment (see Payments and tills).
With the steps at the bottom in green, click Check out.
- Invoicing on credit. If the stay is invoiced to an agency or company with credit, the invoice is not paid at the desk: it stays outstanding until its due date and does not prevent the guest from checking out.
- Several rooms. What is invoiced is the departing room’s charges and the booking-wide charges; the other rooms stay in-house and check out on their own (the booking stays as Partial check-out until the last one leaves).
- Early check-out. If the guest leaves before their date, More actions → Early check-out… opens the same check-out with a warning you must confirm by ticking the box: on check-out, the stay and its price are shortened (the unused nights disappear from the booking).
 12
12
- 1The planned departure date and what will happen: the stay and its price are shortened.
- 2The box to confirm it.
#Undoing a check-in or a check-out
If a check-in or a check-out was done by mistake, More actions offers Undo check-in (on the arrival day itself) or Undo check-out (on the departure day itself), always before the night audit and with a reason, which is kept in the booking’s history. Undoing the check-in puts the room back to due in and deletes its guests’ registration; undoing the check-out puts it back in-house. It can be done by anyone with the Undo check-ins and check-outs permission (front desk, front office manager and management).
#The night audit
The night audit (called the “end of day” in some other systems) ends the hotel’s day: it posts the night each in-house room is about to sleep to that room’s folio, saves the day’s snapshot and moves the business date on to the next day. You open it with Night audit, at the top right, and it first shows what is still missing and what it is going to do.
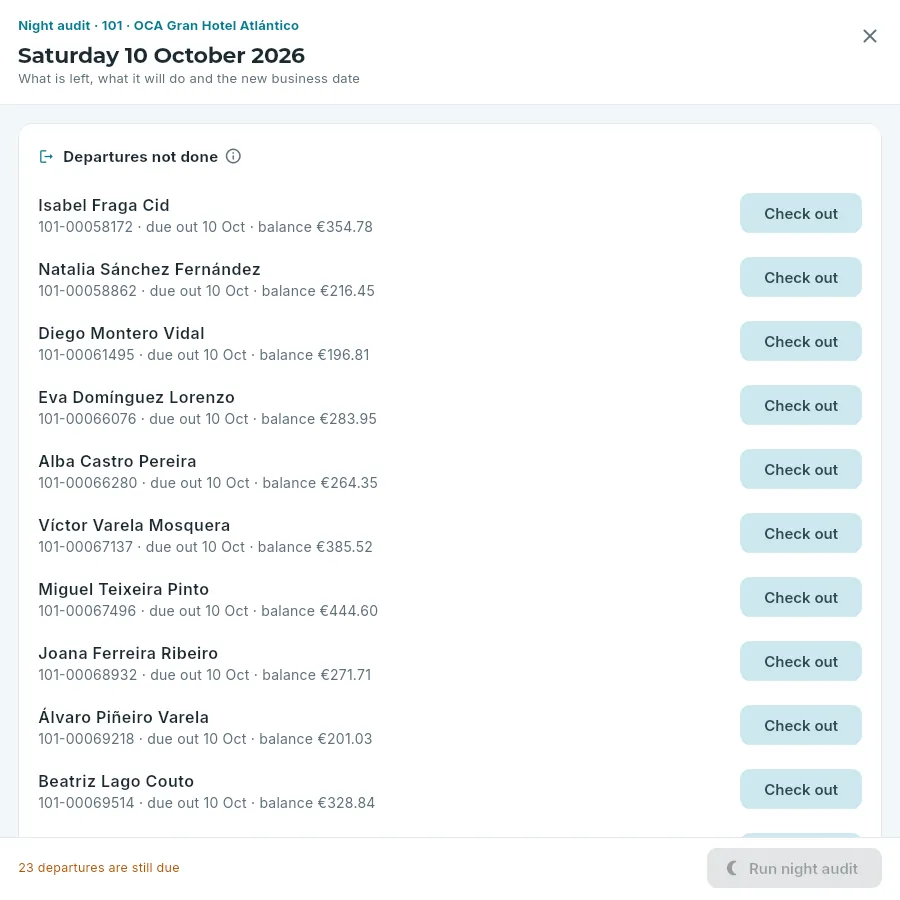 12345
12345
- 1The hotel and the day being closed (its business date).
- 2Departures not done: while any remain, the day cannot be closed.
- 3The check-out for each one, right from here.
- 4What is stopping the day from being closed, summed up.
- 5Run night audit, disabled until nothing is missing.
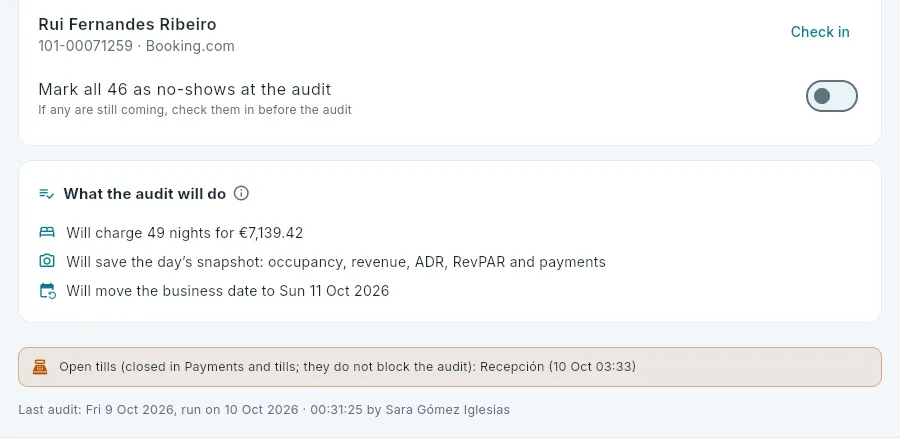 1234
1234
- 1Arrivals that have not come are marked as no-shows at the audit; if any of them is still going to arrive, check them in first.
- 2What it will do: charge the nights (with their amount), cancel expired provisional bookings, mark the no-shows, save the day’s snapshot and move the date on.
- 3Open tills are closed in Payments and tills; they do not prevent the day from being closed.
- 4The last audit: when and who.
Check out all the rooms in Departures not done (or extend their stay from the booking, if they are staying on).
Check in the arrivals still due that are going to come; leave the rest marked as no-shows with the switch.
Review What the audit will do.
Click Run night audit and confirm. It cannot be undone.
What the audit does, all in a single operation (all or nothing):
- No-shows: today’s arrivals that have not checked in become no-shows, if you confirm it with the switch (at the 202 apartments, which are set up that way, the audit marks them automatically). Unless you confirm it, those arrivals prevent the day from being closed.
- Expired provisional bookings: provisional bookings whose “provisional until” date has passed are cancelled.
- The night: each in-house room gets that night’s accommodation charge on its folio, at its booking’s price.
- The tourist tax, at hotels that charge it: in the demo, the 201 guest house in Santiago, one euro per adult per night, for the first five nights, plus its 10% VAT (€1.10): the tax is part of the taxable base of the accommodation (DGT, binding ruling V0507-26).
- The day’s snapshot (see the note below) and the on-the-books snapshot for the management reports.
- Housekeeping: occupied rooms are left dirty for tomorrow, tasks that were not done are closed and, at hotels with the automatic plan, the next day’s cleaning plan is made and allocated.
- The new business date: the next day’s; and the daily report is emailed to whoever receives it.
Running an audit again does not duplicate anything: each night is charged only once. The 202 apartments close the day on their own, at 03:00, with the automatic night audit set in their record (see Hotels).
#What each role can do
Front desk and bookings
Room planner
A hotel’s rooms day by day, with each booking as a bar: what is occupied and what is free, what is still to be assigned, and how to assign or change rooms, move dates and block rooms.
The room planner is a hotel’s chart with the rooms in rows and the days in columns: each booking is a bar running from the arrival day to the departure day in its room’s row. At a glance you can see what is occupied and what is free, who is arriving and who is leaving, which bookings do not have a room yet and which rooms are off sale. And you work on it: assigning and changing rooms by dragging the bars, moving a stay to other dates, creating a booking on a free night or blocking a room that is out of order.
The bookings are the same ones as in Bookings: clicking a bar opens its record.
#The grid
The room planner shows one hotel: the one chosen in the hotel selector in the top bar or, if you are viewing all of them, the first of yours (you change it with the room planner’s own selector). When you open it, it starts from yesterday and shows two weeks.
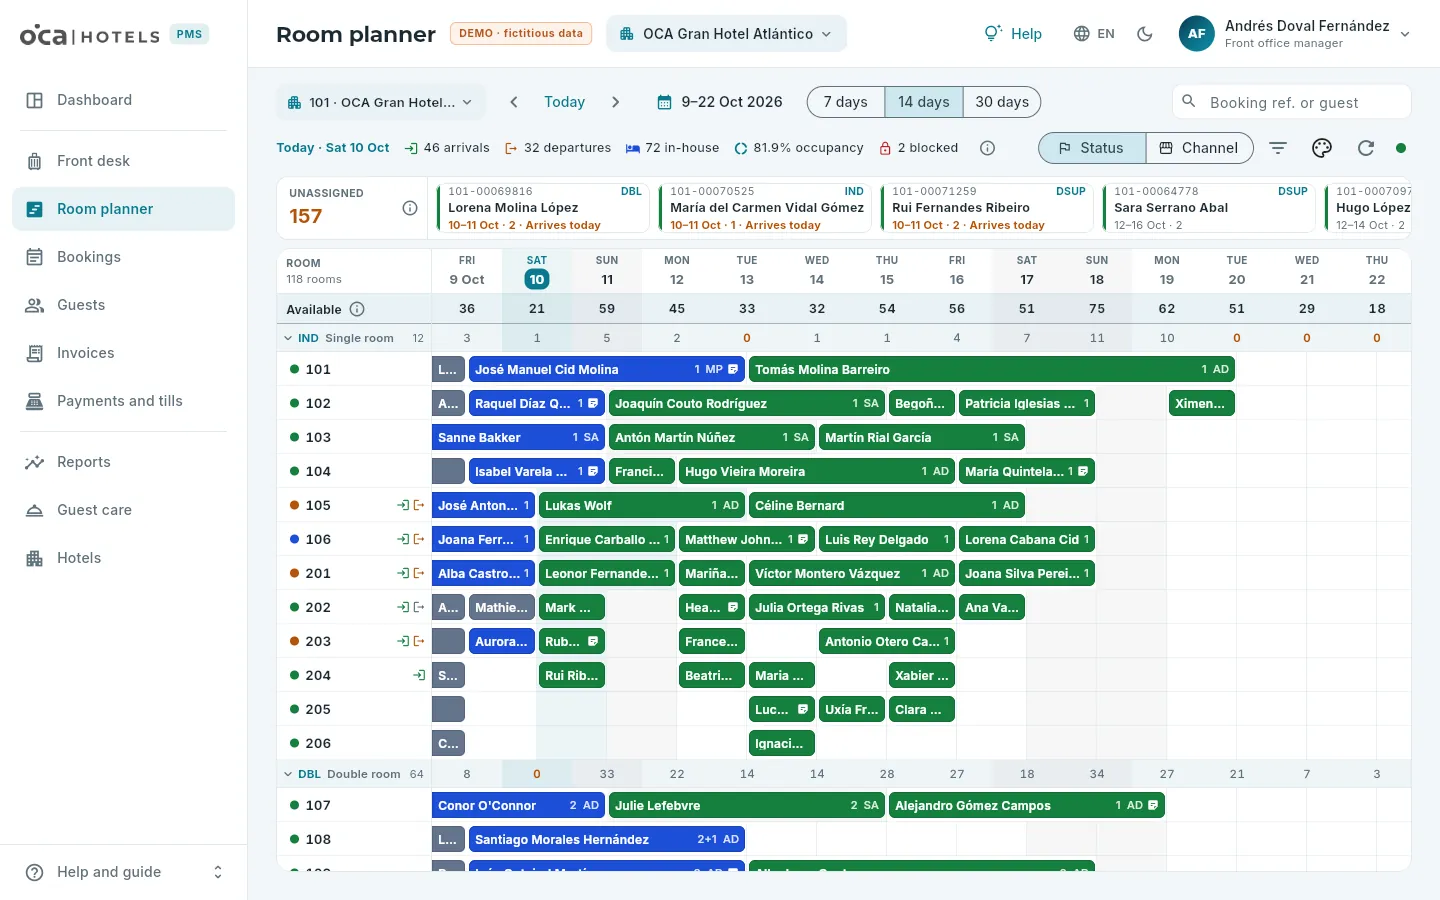 12345678
- 1The hotel and the dates: days earlier, Today (goes back to the business date), days later and the calendar to jump to a date.
- 2How many days are shown: 7, 14 or 30.
- 3Search for a booking by its locator or by the guest’s name.
- 4The hotel’s today: arrivals, departures, in-house rooms, occupancy and blocked rooms, with their ⓘ.
- 5Colour by status or by channel, filter and group, the key, refresh and the green live dot.
- 6Unassigned: booked rooms that do not have a specific room yet, arrivals first.
- 7Available: how many rooms are left for sale each night; in each type’s header, those of that type.
- 8The days, with today highlighted; weekends, slightly darker.
- The bars. A stay starts halfway through the arrival day and ends halfway through the departure day, as in any
hotel room planner: that way, on the day one booking leaves and another arrives, both fit in the same room. Each bar shows
the lead guest, the occupancy (
2+1: two adults and one child) and the board; a note icon if it has notes and an arrow if the stay changes room halfway through. Hovering over it shows the details: locator, status, channel, nights, agency… - The colours are those of the status (Provisional, Confirmed, In-house or Checked out) or, if you choose, those of the channel (Booking.com, Expedia, own website, phone, company…). Blocks are striped in red, with their reason.
- Next to the number of each room, a coloured dot shows its cleaning status, according to Housekeeping: orange, dirty; blue, being cleaned; teal, to inspect; green, clean. A red spanner warns of an open fault. And a green arrow marks that someone arrives today and an amber one that someone leaves; in grey, already done. The cleaning status changes by itself when a room attendant finishes or the executive housekeeper inspects the room.
- By type. Rooms are grouped by type; each type’s header, with its code, its name and how many rooms it has, folds up with a click and shows the available rooms of that type. Clicking a room number shows its short record: type, floor, beds and features.
- The days when a seasonal hotel is closed are shaded, with a padlock in the header and no available rooms.
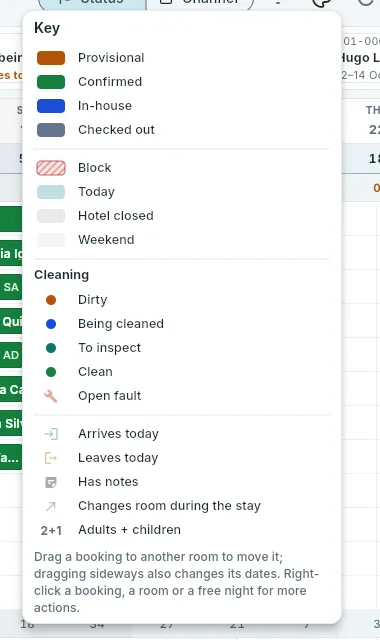 12345
12345
- 1The colours for each status (or each channel).
- 2Block, today, hotel closed and weekend.
- 3The rooms’ cleaning status and open faults.
- 4The icons on the bars and on the rooms.
- 5What you can do with your role.
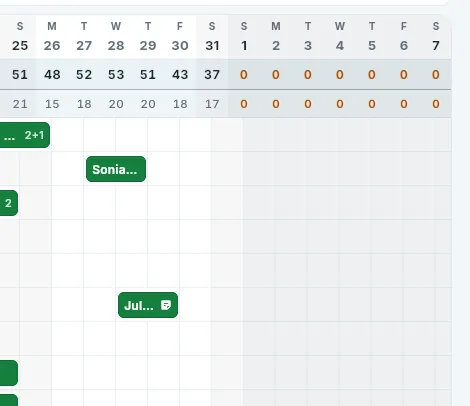 1
1
- 1The days when the hotel is closed, shaded and with 0 available: you cannot book or assign rooms on them.
#Moving through the dates and searching
- The arrows move forward or back one week (two, at 30 days); Today goes back to the hotel’s business date, and the calendar (the dates shown) jumps to any day. The grid scrolls with the mouse wheel or the touchpad, vertically and horizontally.
- 7, 14 or 30 days: at 30 you see the whole month, with narrower bars. The room planner remembers your choice (and the colour and grouping) for next time.
- Search: type a locator or part of the guest’s name. As you type, the matching bars are highlighted and the rest are dimmed; when you press Enter, the grid goes to the first one. If the booking is not on the dates you are viewing, the room planner looks for it across the whole hotel and jumps to its arrival.
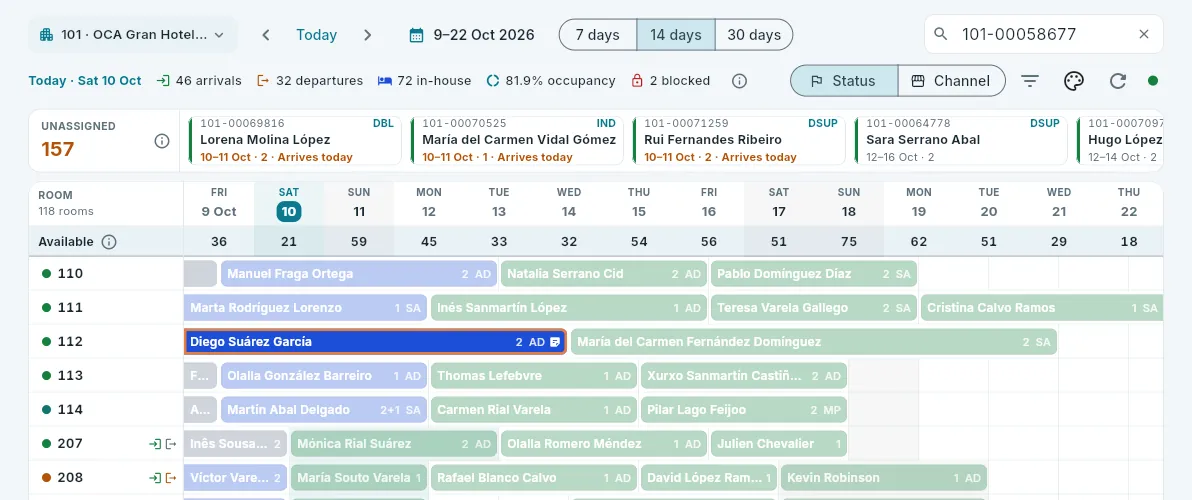 12
12
- 1The locator searched for (the ✕ clears the search).
- 2Its bar, highlighted in orange; the others, dimmed.
The funnel button (Filter and group) lets you see only some room types or some floors – useful for preparing a whole floor or seeing only the suites – and turn off grouping by type. With filters on, the button shows a number; Clear filters shows everything again.
#Assigning and changing rooms
Assigning means deciding which specific room a booking sleeps in. In the room planner you do it by dragging:
- From the Unassigned strip to a free room: the booking is assigned to that room.
- A bar to another row: the booking changes room (with the guest in-house, from today: the nights already slept stay where they were).
- A bar to the Unassigned strip: the booking is left without a room.
While you drag, the destination lights up with a shadow: turquoise if the booking fits, with the room and the dates, and red if it does not, with the reason: Room 214 is taken on those nights, Room 214 is blocked on those nights, Room 214 cannot take 3 guests or Cannot move to past dates. If you drop it on red, nothing happens. The shadow is only a warning: the database has the final say, checking everything again when you drop the bar – capacity, blocks and that nobody has taken that room a second earlier – and, if something does not add up, it says so and changes nothing.
You can do the same without dragging, with the keyboard, with a screen reader or on a mobile: right-clicking a bar (or a long press on a mobile, or the screen reader’s Move to another room… action) opens its menu. The same menu offers check-in on the arrival day and check-out on the departure day, which open the ones in Front desk.
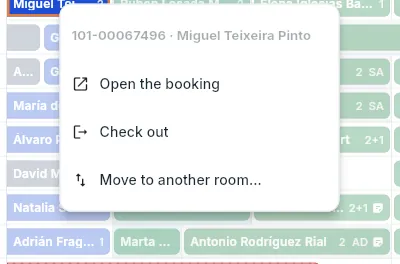 123
123
- 1The booking’s record (also with a click on the bar).
- 2Check-out, because it departs today (on the arrival day, check-in).
- 3Choose the room from a list. Before arrival, the menu also offers Unassign the room.
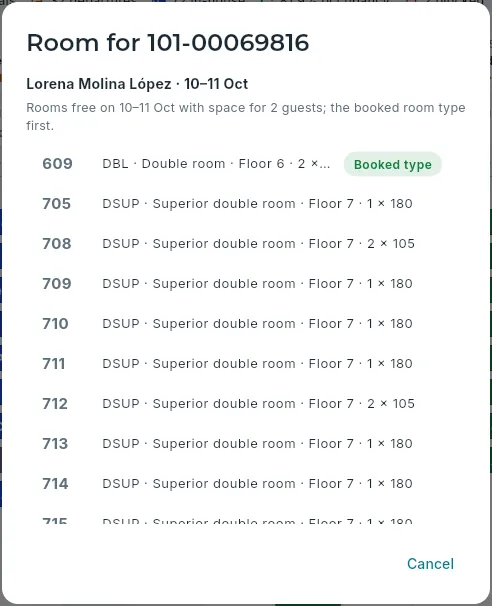 12
12
- 1Only rooms that are free on those nights and have space for the occupancy.
- 2The booked type first. Click one to assign it.
In the Unassigned strip, find the booking (those arriving today are in amber).
Drag it to the row of a free room, on its dates, and drop it when the shadow turns turquoise. Or right-click it, choose Assign a room… and click one in the list.
#Changing dates by dragging
If you drag a bar horizontally, the dates change as well as the room: the booking keeps its nights and starts on the day where you drop it. Before doing so, the room planner asks Change the booking dates?, with the Before and After dates and the destination room; Change dates confirms it and Cancel leaves everything as it was. It is the same as Change in the booking’s record: availability is checked for the new nights, the price is adjusted with the hotel’s re-rating rule (see Changing and confirming) and the change is recorded in the lifecycle.
Only the dates of single-room bookings that have not arrived yet can be changed this way, and you need the Change bookings permission. With the guest in-house or with several rooms, the bar only moves vertically (to another room).
#New booking from a free night
Clicking a free night in a room opens its menu (with whatever your role allows): New booking in this room opens the new booking form in Bookings with the hotel, that room’s type and that night as the arrival; when you create it, the booking is assigned to that room. If in the end the booking does not fit in it (other dates, more guests), it is created anyway and goes to Unassigned, with a message saying why.
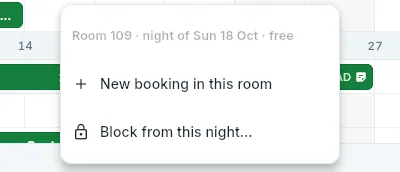 12
12
- 1New booking in that room, from that night.
- 2Block the room from that night.
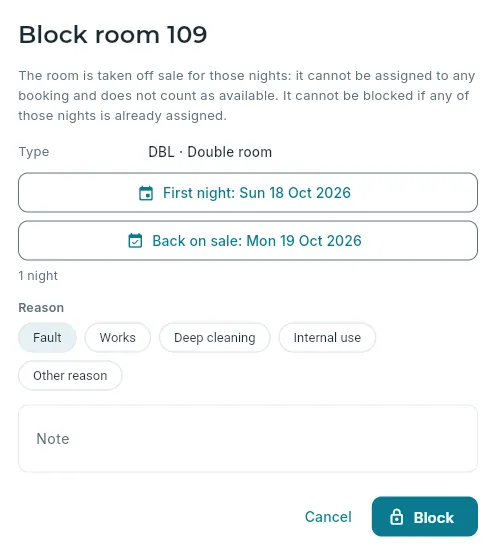 1234
1234
- 1The first blocked night and the day the room goes back on sale.
- 2The reason.
- 3A note for the rest of the team.
- 4Blocks it.
#Blocking and unblocking rooms
A blocked room is off sale for some nights: because of a fault, works or a deep clean, or because it is being used for something else. While the block lasts, it cannot be assigned to any booking and does not count among the available rooms. You cannot block a night that already has a booking assigned: you first have to move that booking to another room.
Click a free night of the room (or its number, on the left) and choose Block from this night… (or Block the room…).
Set the First night and the day the room is Back on sale (the day the block ends: that night can already be sold).
Choose the reason – Fault, Works, Deep cleaning, Internal use or Other reason – and, if you like, write a note.
Click Block.
 12
12
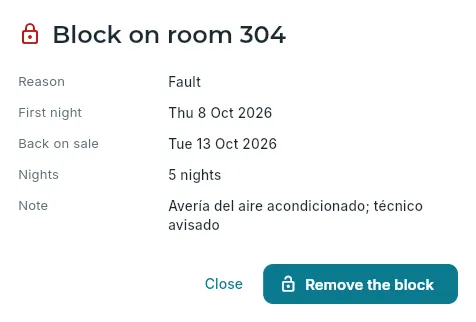
- 1The block’s reason, dates, nights and note.
- 2Remove the block: it asks for confirmation (Yes, remove it) and the room goes back on sale.
To unblock a room, click the block in the grid: it opens with its reason, its dates and its note. Remove the block asks for confirmation and the room goes back on sale for those nights. Blocking and removing a block are recorded in the hotel’s event log. Each hotel’s blocks can also be seen in its record, under Inventory.
#Room cleaning status
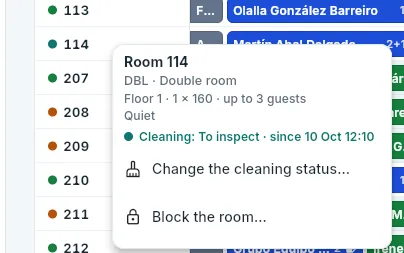
Clicking a room’s number shows its short record – type, floor, beds, features – with its cleaning status and since when, its open faults and, depending on your role, Change the cleaning status… and Block the room…. Changing the cleaning status by hand is useful, for example, to mark as clean a room that housekeeping has prepared without a task; marking it clean closes its open tasks. The executive housekeeper can do it and, so as not to hold up a check-in, so can whoever does check-ins.
 12
12
- 1Its type, floor, beds and features, and its cleaning status with the time since when it has been like that (the same colour as the dot next to its number).
- 2Change the cleaning status… (and, with the relevant permission, block it).
#Several people at once
The room planner is live: if someone else assigns a room, creates a booking, cancels one or blocks a room, your grid updates itself in under a second, without you clicking anything. The green dot next to the buttons shows this (Live: changes made by other users appear automatically); if the connection drops, the dot goes out, and when it comes back the grid catches up with what changed in the meantime. If you are dragging a bar when a change arrives, the grid waits until you drop it. The Refresh button reloads by hand, and hovering over it tells you what time the data is from and how long it took to draw.
Two people trying to put two bookings in the same room at the same time is not a problem: the database only accepts the first one, and tells the second person that the room is already taken.
#What each role can do
 1
1
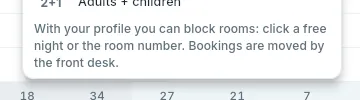
- 1The executive housekeeper blocks rooms, but bookings are moved by the front desk.
#On a mobile
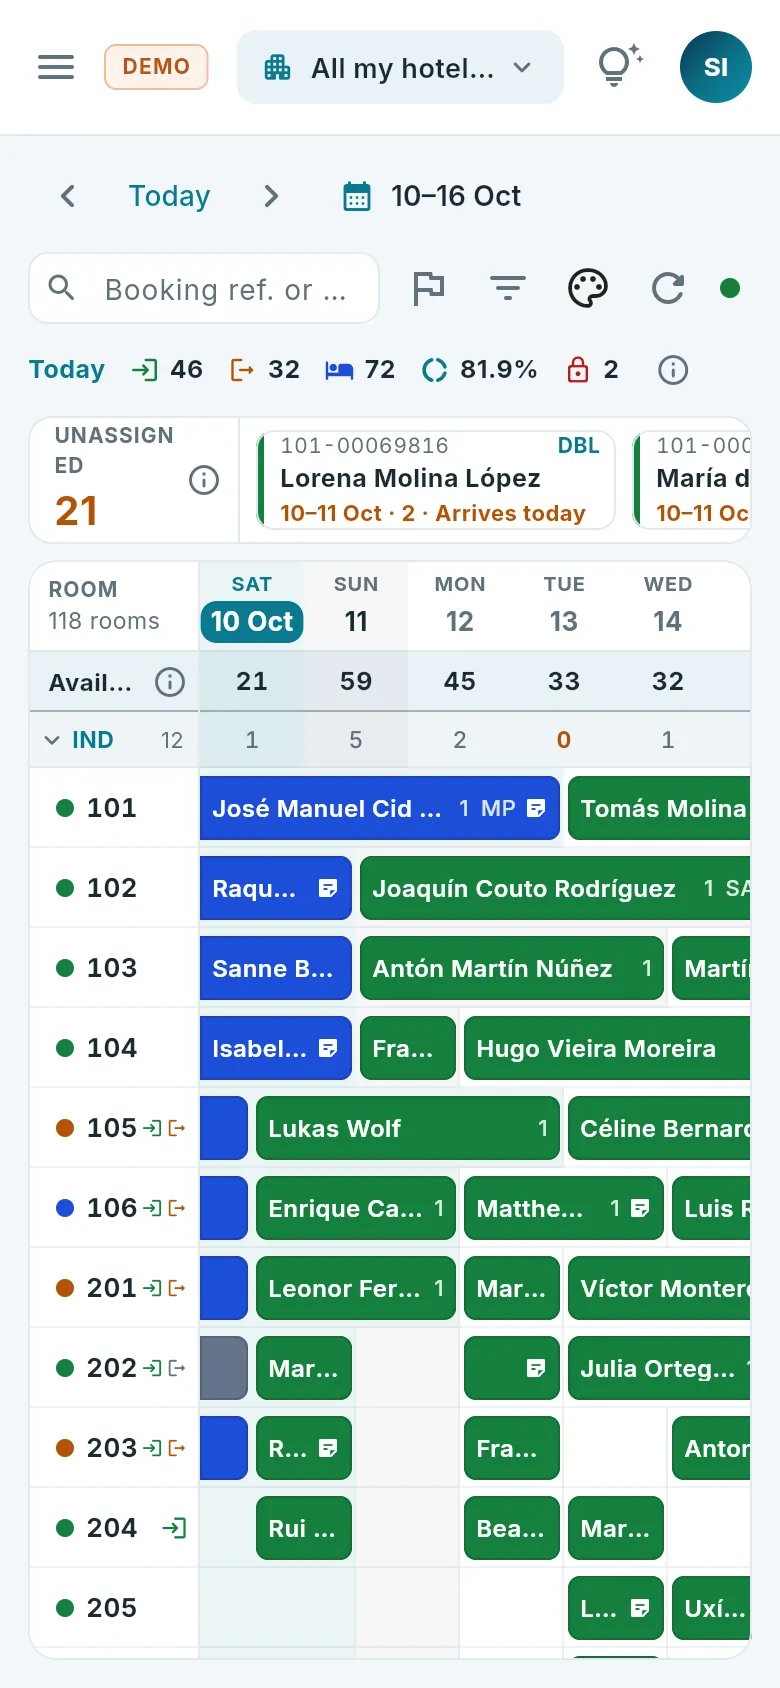 1234
1234
- 1Dates: previous week, today, next week and calendar.
- 2Search, colour, filters, key, refresh and live, as icons.
- 3The “Unassigned” strip.
- 4Seven days, which you can swipe with your finger.
On a narrow screen the room planner always shows seven days and the buttons shrink to icons. To move a booking, press and hold its bar until it lifts, then drag it; or, more comfortably with a finger, open the booking and use Change room in its Rooms tab.
Front desk and bookings
Bookings
All the bookings at your hotels, from the channel and direct: how to search for them, what their record tells you and how to create, change, confirm, cancel them and assign them a room.
A booking is the commitment to accommodate someone at a hotel on specific nights: who is coming, when they arrive and when they leave, in which rooms, on which board and at what price. The Bookings section brings them all together: those that come in by themselves from Booking.com, Expedia or the hotel’s own website and those created at the hotel, by phone, at the desk or for a company. Each one has its record, with everything that has happened to it since it was created.
This chapter explains what each piece of booking data means, how to find a booking, what its record tells you and how each operation is done. The Room planner shows the same bookings room by room and day by day.
#What a booking is
- Locator: the booking’s code, for example
101-00070831: the hotel code and an eight-digit sequential number, with no gaps. It is what you give the guest and what you search for. - Guest: the person in whose name the booking is made. It links to their guest record.
- Stay: the arrival date and the departure date. The nights are those in between: someone arriving on the 7th and leaving on the 10th sleeps three nights (the 7th, the 8th and the 9th).
- Rooms: how many and of which type (Single room, Double room, Junior suite…), each with its occupancy (adults and children; infants are counted separately, in a cot) and, once it is known, the specific room assigned to it (214, 305…).
- Board: what the price includes besides the room: Room only (SA), Bed and breakfast (AD), Half board (MP: breakfast and one meal), Full board (PC) and All inclusive (TI). Each hotel offers its own; 101, for example, offers SA, AD and MP.
- Rate: the price list it is sold at: the public rate, the corporate rate, the group rate, an offer… See Rates.
- Cancellation policy: up to how many days before arrival it can be cancelled free of charge and what is charged after that: nothing, the first night or the full amount. Non-refundable rates have no free cancellation.
- From the channel or direct: channel bookings come in by themselves from Booking.com, Expedia or the hotel’s own website through the channel manager (the software that shares the hotel’s availability out among the sales channels; simulated in the demo) and bring their price and the channel’s commission with them. Direct bookings are created in OCA PMS (walk-in, phone, email, company, agency or group) and their price is calculated by the database with the hotel’s rates.
- Amount: what the stay costs, including VAT: the sum of the price of each night of each room.
Each booking goes through several statuses, shown as a coloured pill in the list, in the record and in the room planner:
| Status | What it means |
|---|---|
| Provisional | Booked but not confirmed: it holds the room until the Provisional until date (seven days after it is created). |
| Confirmed | Firm: the guest will come. It is a booking’s normal status before arrival. |
| In-house | The guest has already checked in and has not left yet. |
| Partial check-out | With several rooms, one has already left and another is still in-house. |
| Checked out | The guest has checked out: the stay is over. |
| Cancelled | Cancelled before arrival, with the date, the user and the reason. |
| No-show | The guest did not turn up on the arrival day (what the trade calls a no-show). |
- 1CreationIt comes in from the channel or is created at the hotel, confirmed or provisional.
- 2RoomA specific room is assigned to it, from the record or by dragging in the room planner.
- 3Check-inThe guest checks in at the front desk and the booking becomes “In-house”.
- 4Check-outWith the folio invoiced and paid, the guest checks out: the booking becomes “Checked out”.
#The booking list
When you open Bookings you see those arriving in the next seven days at your hotels (or at the one you have chosen at the top, in the hotel selector). Above, the search box and the filters; below, the indicators and the list.
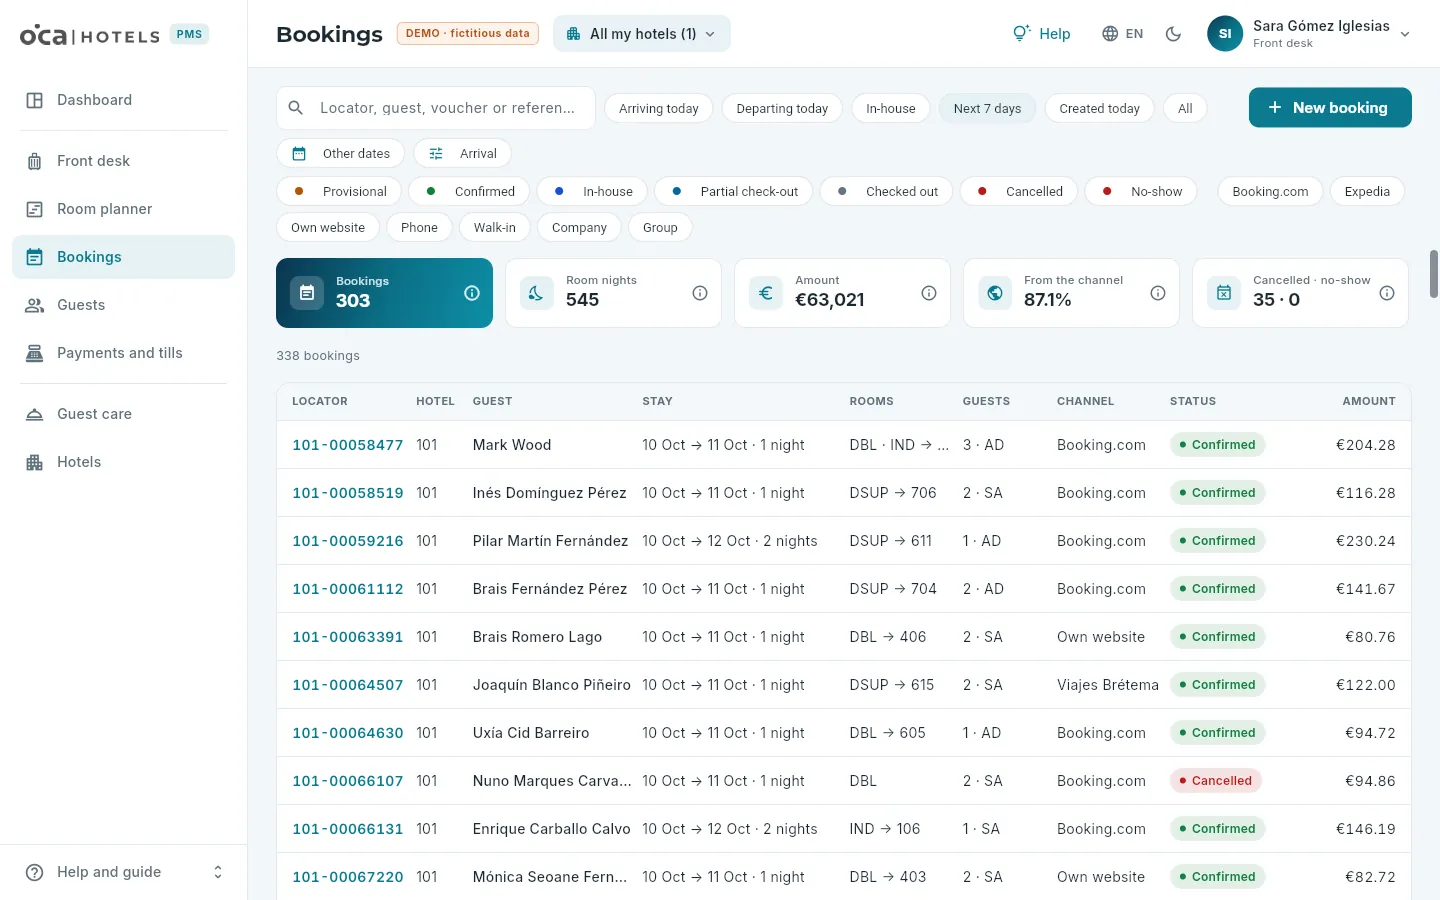 12345678
- 1The search box: type part of the locator, the guest’s name, the voucher or the channel reference. It searches as you type.
- 2The day-to-day shortcuts: Arriving today, Departing today, In-house, Next 7 days, Created today and All.
- 3Other dates: any period, chosen in the calendar.
- 4Which date counts for that period: arrival, departure, stay or creation.
- 5New booking: the form for a direct booking (only if your role can create them).
- 6Filters by status and by channel: tick one or more; with none ticked, all are shown.
- 7The indicators for what you are viewing, each with its ⓘ.
- 8Each row, one booking: locator, hotel, guest, stay, type and assigned room, guests and board, channel or agency, status and amount. Click it to open its record.
- The shortcuts change the dates in one click: Arriving today and Departing today look at the arrival or the departure date; In-house, bookings with that status sleeping at the hotel today; Next 7 days, those arriving between today and a week from now; Created today, those created today, through the channel or at the hotel; All removes the date filter.
- The period and its date. With Other dates you choose a period, and the chip next to it decides which date must fall within it: Arrival, Departure, Stay (the booking has at least one night in the period) or Creation (the day it was created).
- Up to 500 rows. The list shows at most 500 bookings; if there are more, it says so above the list (“Showing the first 500 of…”) and you should narrow the search. The indicators, on the other hand, count all the bookings that match the filters.
- Export. With the Export permission, the Export CSV button downloads the list just as you see it, to open in a spreadsheet.
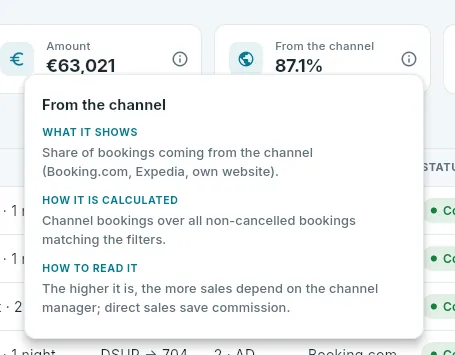 1
1
- 1What it shows, how it is calculated and how to read it.
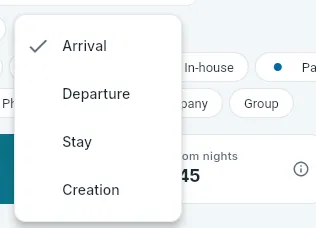 1
1
- 1The selected one is the one used.
#The booking record
Clicking a booking opens its record in a panel on the right. At the top, the essentials and the buttons for what you can do with it (depending on its status and your role); below, the tabs.
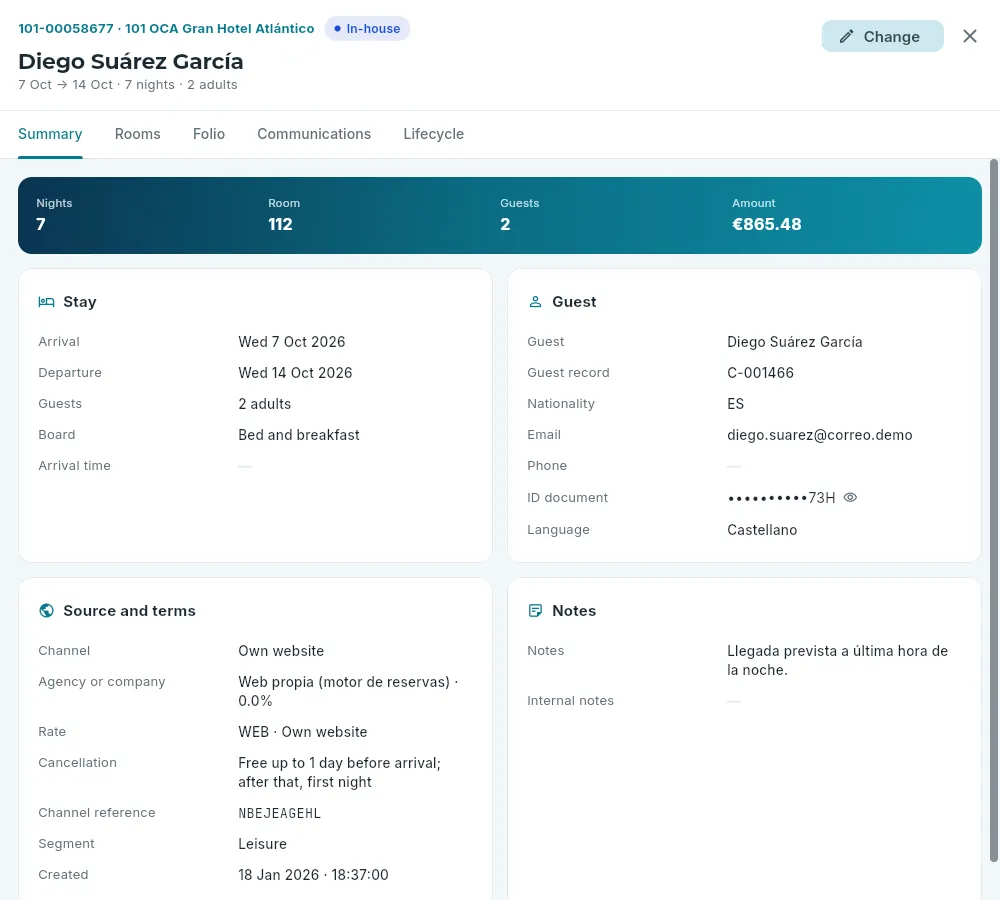 12345678
- 1Locator and hotel; below, the guest, the stay and the occupancy.
- 2The booking’s status.
- 3The actions allowed by its status and your role. With the guest in-house, only Change (and only the departure).
- 4The tabs: Summary, Rooms, Folio (with the Amounts permission), Communications and Lifecycle (and Technical, with the Technical data permission).
- 5The booking’s figures: nights, assigned room (or how many rooms it has), guests and amount.
- 6Stay: dates, guests, board and expected arrival time.
- 7Source and terms: channel or agency (with its commission), rate, cancellation policy, channel reference, segment, when it was created and the commission.
- 8Guest: their guest record, nationality, contact details, ID document (hidden until you click the eye) and language.
The Rooms tab has a card for each booked room: its type, its dates (with several rooms, each one can have its own), occupancy, board, status, the assigned room, the services to prepare (cot, extra bed, high chair…) and the price of each night. The Folio tab is the guest’s folio (see The booking’s folio) and Communications, what has been sent to them (see Communications with the guest). The Lifecycle tab tells everything that has happened to the booking – its creation, the assignments, the changes, the check-in… –, with the date, the time and who did it, taken from the event log, which cannot be changed or deleted. Technical shows the booking exactly as the database stores it.
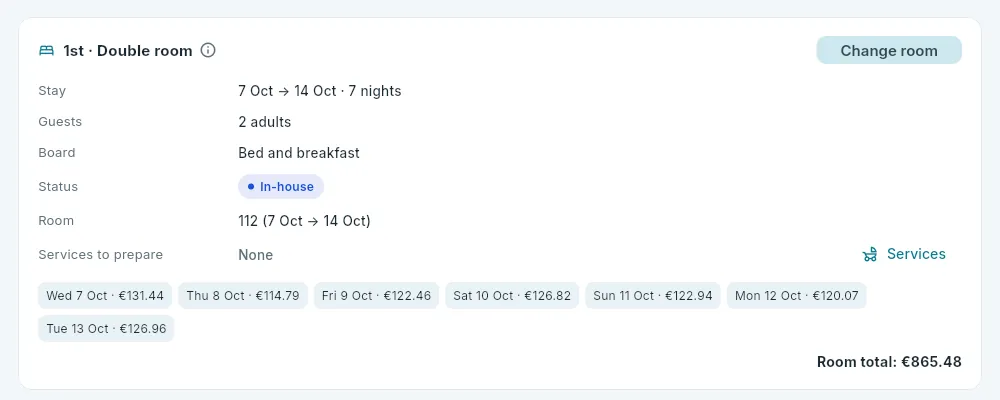 1234
1234
- 1The booked room (1st, 2nd…) and its type; the ⓘ explains where the price comes from.
- 2Assign or change the room.
- 3The assigned room and from when to when.
- 4Each night with its price, including VAT.
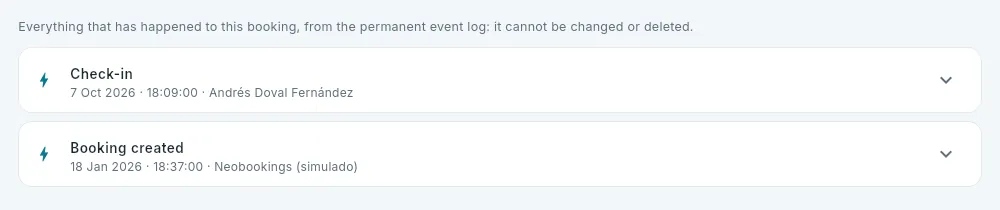 12
12
- 1It comes from the permanent event log.
- 2Each step, with when and who; expand it to see the details. The most recent at the top.
#The booking’s folio
The folio brings together what the booking is charged and how its payment stands: the charges (each night of accommodation and the tourist tax, posted by the night audit, and extras posted by hand), the invoices issued and the payments and deposits. You can see it in the record’s Folio tab and at check-out in Front desk.
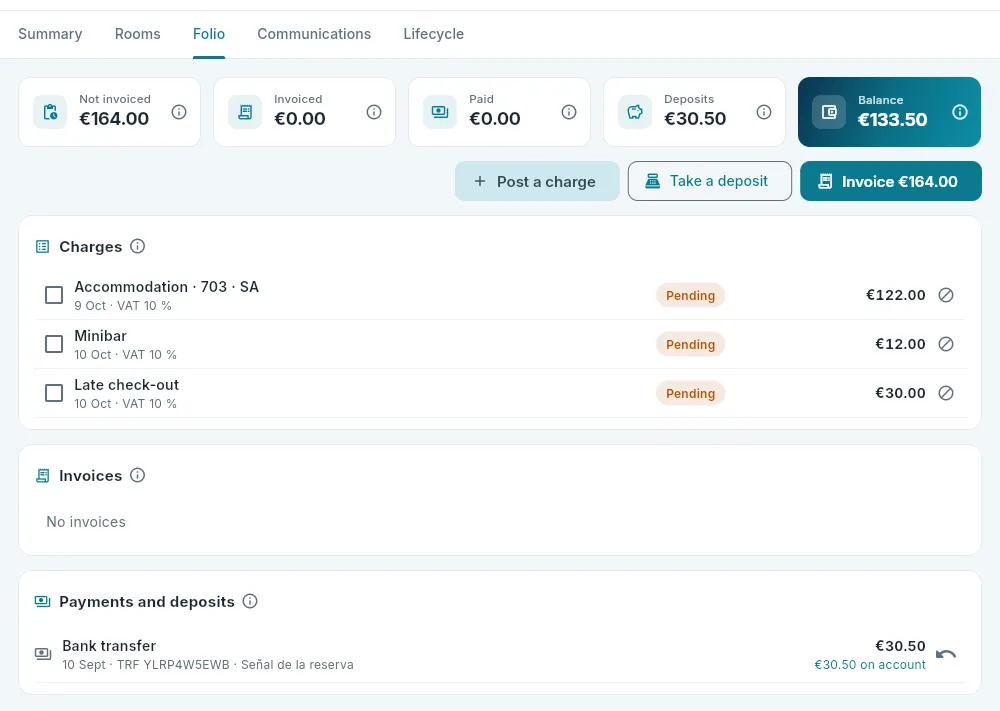 12345678
- 1The totals: not invoiced, invoiced, paid, deposits and the balance, each with its ⓘ.
- 2Post a charge: an extra with its item, quantity and price including VAT.
- 3Take a deposit: money on account, which will be applied automatically to the invoice.
- 4Invoice what is outstanding (or only what is selected).
- 5Each charge, with its date and VAT; the checkbox selects it to invoice it separately or move it to another room.
- 6Cancel an uninvoiced charge, with a reason: it is struck through.
- 7The booking’s invoices, with what is outstanding on each one, and its payments and deposits (what remains on account).
- 8Refund what remains of a deposit.
- Amounts include VAT, as is usual in the hotel trade; the base and the VAT amount are calculated by the database.
- A charge is never deleted and its amount never changes. An uninvoiced one is cancelled with a reason (it is struck through and no longer counts); one already invoiced only becomes outstanding again if a credit note is issued for its invoice (see Correcting an invoice).
- Moving charges to another in-house room at the same hotel (“charge it to 214”): select the charges and click Move.
- Refunding a deposit. What remains of a deposit (for example, if the guest leaves early) is refunded with Refund, by the same payment method it was taken with (see Payments and tills).
- Invoicing and taking payments are explained in Invoices and Payments and tills.
#Creating a direct booking
Direct bookings (walk-in, phone, email, company, agency or group) are created with New booking. While you fill in the form, the database quotes the booking: it calculates the price of each night with the hotel’s rules and tells you how many rooms of that type are still free, before anything is saved.
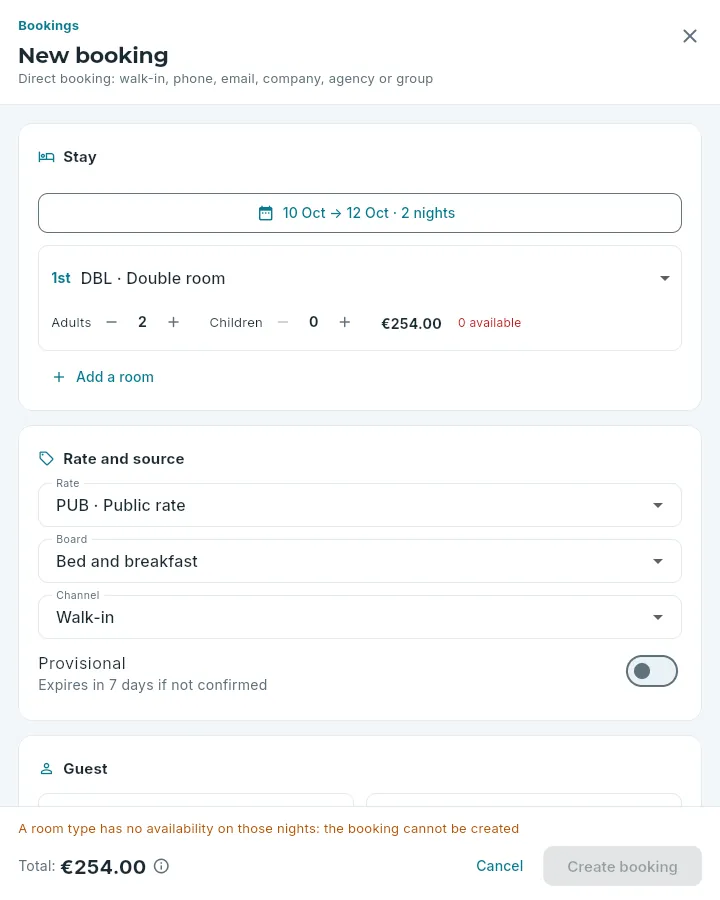 12345678
- 1The arrival and departure dates (by default, today and two nights).
- 2Each room: the type, adults and children; on the right, its price and how many rooms of that type are still available on those nights.
- 3Add a room: adds another room to the same booking (each with its own type and occupancy).
- 4Rate, board and channel (for a company or agency, also which one). Only the rates sold at the hotel are shown.
- 5Provisional: the booking stays unconfirmed for seven days.
- 6The guest: at least the first name is required. With a
.demoemail address, they receive the confirmation (in the demo, in the capture mailbox). - 7The total including VAT, recalculated with every change; the ⓘ explains the calculation.
- 8Create booking: enabled when the form is complete and the quote shows no errors.
In Bookings, click New booking. If you can see several hotels, choose the hotel in the first drop-down.
Click the dates and choose the arrival and departure days in the calendar.
For each room, choose the type and adjust adults and children with the − and + buttons. If you need more rooms, click Add a room.
Choose the rate, the board and the channel the request came through (Walk-in, Phone, Email, Company, Agency, Group or Other). For a company or agency, also choose which one.
If the guest has not confirmed it yet, turn on Provisional.
Type the guest’s first name and surname and, if you have them, their email, phone, language and notes.
Check the total and the available rooms for each room, then click Create booking.
If something does not add up, the quote says so in red, above the total, before anything is saved: that the hotel is closed on those nights, that the occupancy does not fit the room type, that the stay is longer than the hotel allows… If a room type has no room left on some night, its available count shows in red, with the message A room type has no availability on those nights: the booking cannot be created. When you click Create booking, the database checks everything again at that very instant – permissions, availability and price – so two people cannot sell the last room at the same time.
#Changing and confirming
Change, in the record’s header, changes the dates, the occupancy and the board, the arrival time and the notes. What can be changed depends on the booking:
- Before arrival (provisional or confirmed), everything.
- With the guest in-house, only the departure: extending or shortening the stay.
- With several rooms, only the general details (arrival time and notes); each room’s dates are changed in the room planner.
- Bookings that are checked out, cancelled or no-shows can no longer be changed.
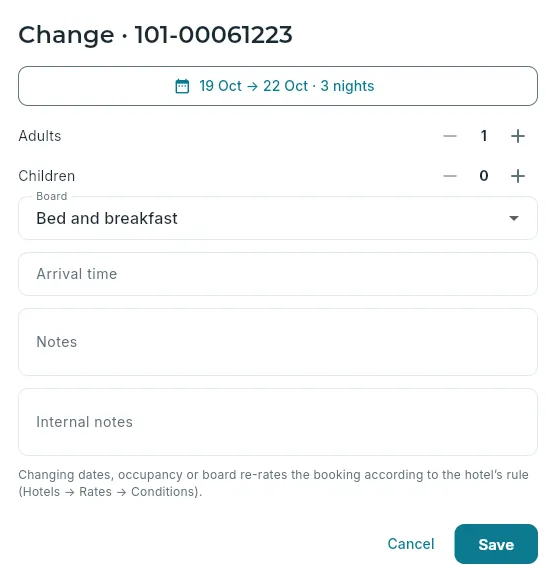 123456
- 1The dates: you choose both in the calendar.
- 2The occupancy.
- 3The board, from those the hotel offers.
- 4Expected arrival time and notes: the guest’s notes and the internal ones, which only staff can see.
- 5A reminder that the price is recalculated according to the hotel’s rule.
- 6Save applies the changes (if you have not changed anything, it just closes).
On saving, the database checks availability only for the new nights (those the booking already had were already sold) and recalculates the price with the hotel’s re-rating rule, which is in Rates, under Pricing conditions → When a booking changes:
- Unchanged nights keep their rate: only new nights, or those whose occupancy or board changes, are priced again. This is the usual option: what was agreed is respected.
- All nights are recalculated with today’s rates.
The change is recorded in the Lifecycle with what there was before and what there is after, and the guest receives confirmation of the changes by email (in the demo, to the capture mailbox).
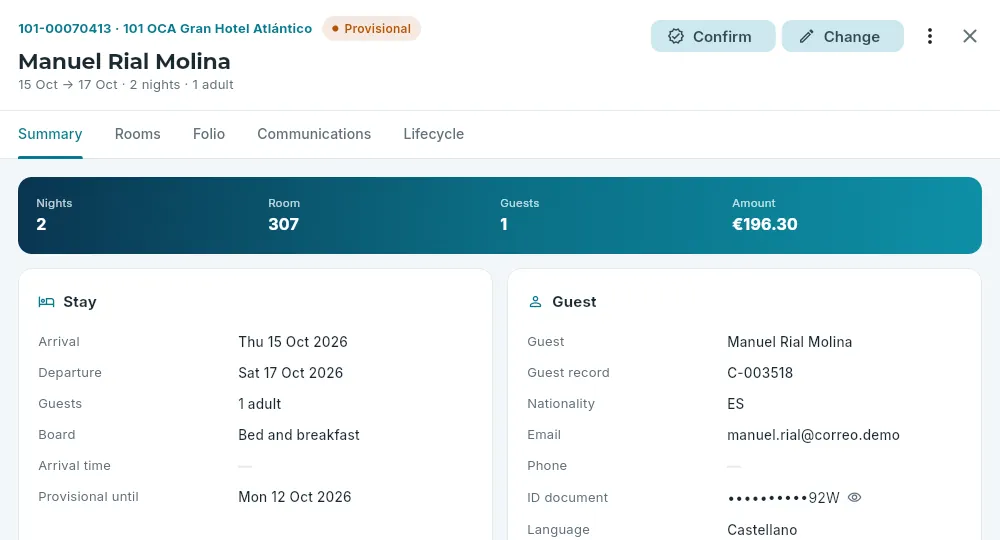 12345
12345
- 1Provisional status.
- 2Confirm: it becomes confirmed straight away, with no further questions.
- 3Change.
- 4More actions: cancel (and, from the arrival day, no-show).
- 5Provisional until: how long it is held without being confirmed.
Find the booking (in the list, filter by the Provisional status) and open it.
Click Confirm, in the record’s header.
#Assigning or changing the room
A booking is sold by room type; the specific room is assigned later, usually before arrival. You can do it from the record, as here, or by dragging the booking in the room planner, which is the easiest way when many bookings need fitting in.
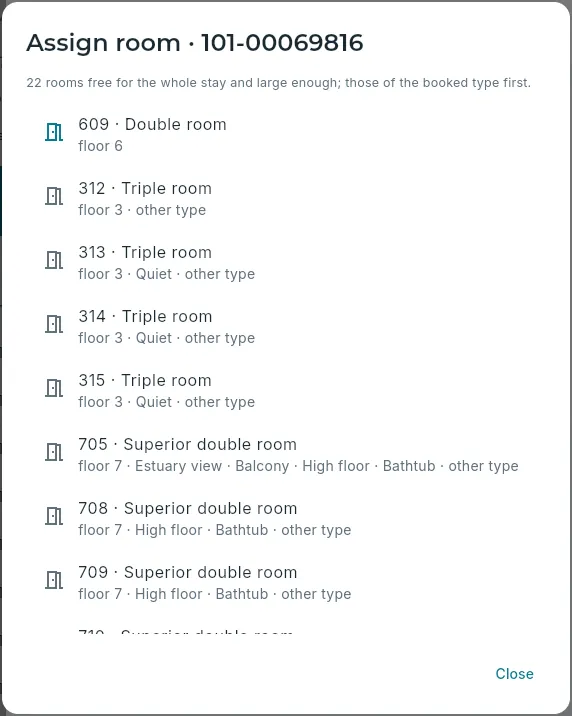 1234
1234
- 1How many rooms are free for the whole stay and have space for the booking’s occupancy.
- 2First, those of the booked type, with their floor and features.
- 3Then, those of another type with enough space (a change of type, for example an upgrade).
- 4Closes without assigning anything.
Open the booking and go to the Rooms tab.
On the room’s card, click Assign room (or Change room, if it already has one).
Click the room you want in the list. It is assigned straight away, with no further questions.
- With the guest in-house, the change applies from today: the nights already slept stay in the previous room (in the room planner they appear as two bars joined by an arrow).
- Unassign room leaves the booking without an assigned room (it goes back to the room planner’s Unassigned strip); this cannot be done with the guest in-house.
- Even though the list only shows free rooms, the database has the final say: if someone else has just taken that room, it says so (That room is already assigned to another booking on some of those nights) and changes nothing.
#Cancelling or marking a no-show
A provisional or confirmed booking is cancelled from More actions (the three dots in the header). On the arrival day (or later), the same menu also offers No-show, for when the guest does not turn up. In both cases a reason is required, and the room is released so it can be sold.
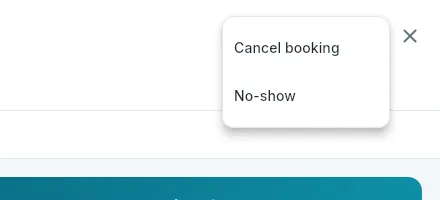 12
12
- 1Cancel the booking.
- 2No-show: only from the arrival day.
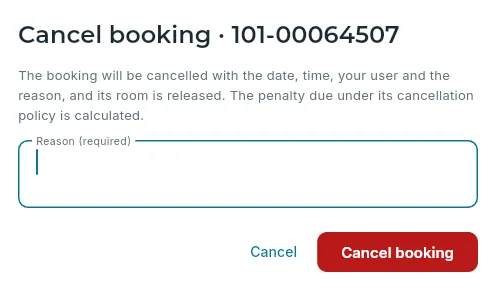 123
123
- 1What is going to happen.
- 2The reason, required.
- 3Confirms the cancellation.
Open the booking and click More actions (the three dots in the header).
Choose Cancel booking or, if the guest has not turned up, No-show.
Type the reason (at least three letters): “Cancelled by phone, illness”, “Did not turn up or call”…
Click the red button, Cancel booking or No-show.
#How the price is calculated
#Amenities to prepare
A cot, an extra bed, a high chair, a pillow menu… These are the services housekeeping has to prepare in the room before the guest arrives. They are shown in the booking’s Rooms tab and changed with Services. The cot for infants and the extra bed for anyone beyond the standard occupancy are added automatically, even if nobody asks for them.
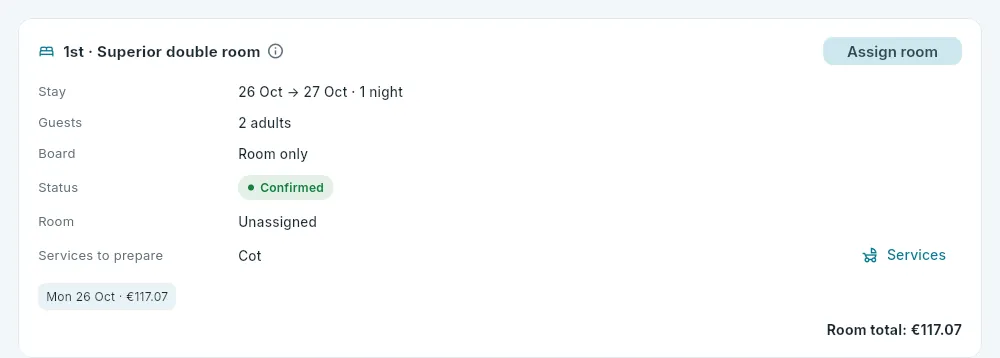 12
12
- 1The services to prepare.
- 2Services: change them.
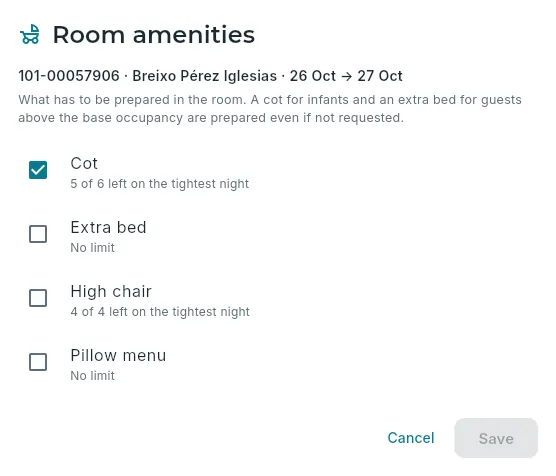 12
12
- 1What is added automatically (the cot for infants, the extra bed).
- 2Each of the hotel’s services; limited ones say how many are left on the tightest night of the stay.
#Communications with the guest
OCA PMS writes to the booking’s lead guest when it is confirmed, changed or cancelled, at check-in (the welcome
sheet, with their room and the Wi-Fi) and when the stay ends (the survey), using the templates in Guest care,
in their language. The booking’s Communications tab shows everything that has been sent to them, with its status. In the
demo, email is simulated: it goes to the capture mailbox and only to .demo addresses.
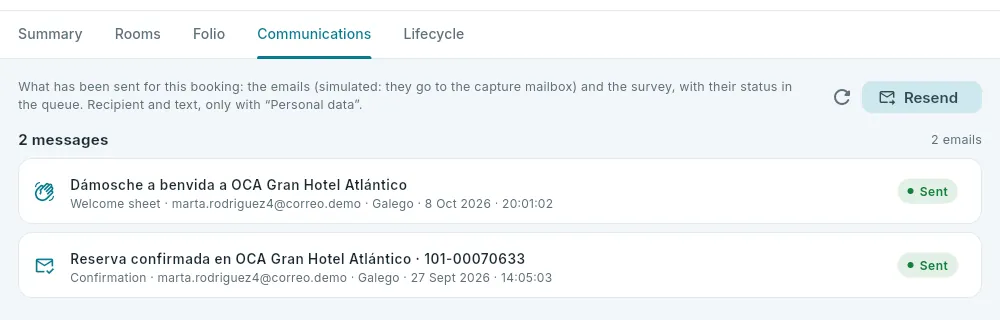 123
123
- 1The recipient and the text, only with Personal data.
- 2Resend an email.
- 3Each message: the subject, the type, the recipient, the language, when it was sent and its status in the queue (queued, sent, error…).
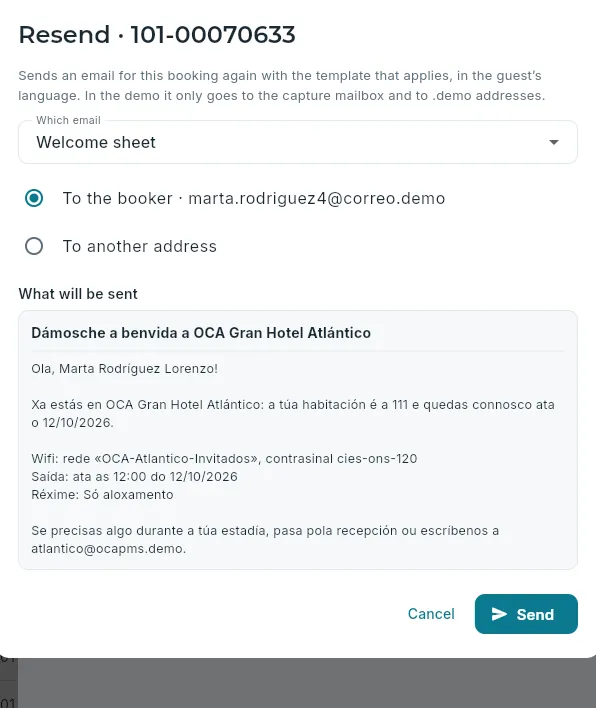 123
123
- 1Which email: the confirmation, the amendment, the cancellation or the welcome sheet.
- 2To the lead guest or to another address.
- 3What will be sent, exactly as it will go out, in the guest’s language.
Open the booking and its Communications tab.
Click Resend and choose the email (for example, Confirmation).
Leave To the booker or choose To another address and type it in.
Check What will be sent and click Send.
#What each role can do
What you see and what you can do depend on four operation permissions – Create bookings, Change bookings (also confirming), Cancel bookings (also no-show) and Assign and move rooms – and on two data permissions: Amounts (prices, amount, commission) and Personal data (the guest’s email, phone and ID document). Without them, the database does not even send that data to the screen.
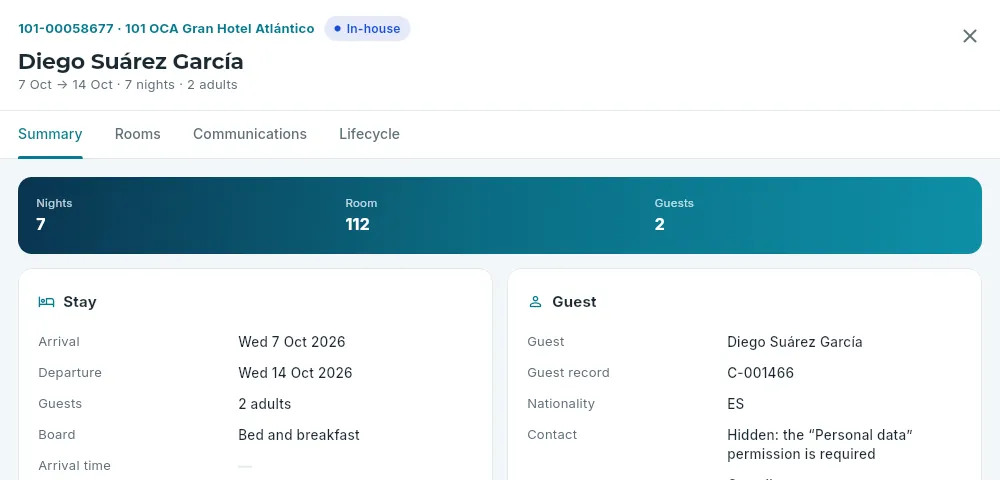 123
123
- 1No buttons: this role cannot change bookings.
- 2No amount.
- 3Contact details hidden: the Personal data permission is required.
#On a mobile
On a narrow screen the list turns into cards: locator, status, guest, stay, type, channel and amount. The shortcuts sit in a row you can swipe with your finger, and the status and channel filters fold away behind the Filters chip. The record takes up the whole screen.
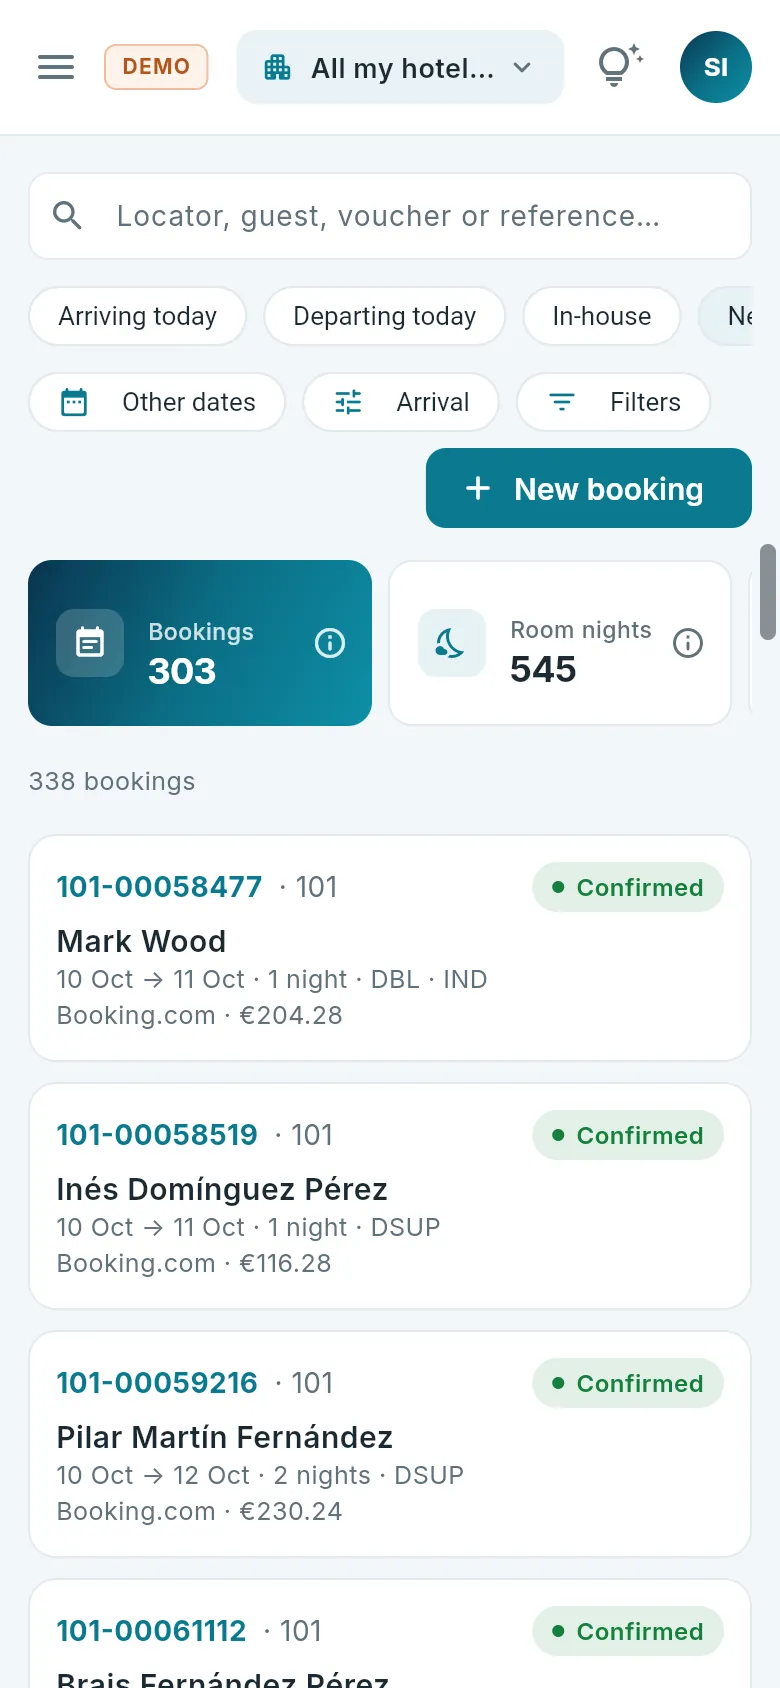 1234
1234
- 1The shortcuts, in a row you can swipe.
- 2The status and channel filters, folded away.
- 3The indicators, two by two.
- 4Each booking, a card.
Front desk and bookings
Guests
Each guest’s single record, with their stays and invoices, and the agencies and companies with their terms: commission, credit, payment terms and credit limit.
The Guests section has two tabs: Guests, the single record of each person who has stayed or will stay at any hotel in the chain, and Agencies and companies, the channels, agencies, companies and tour operators the chain works with, and their commercial terms.
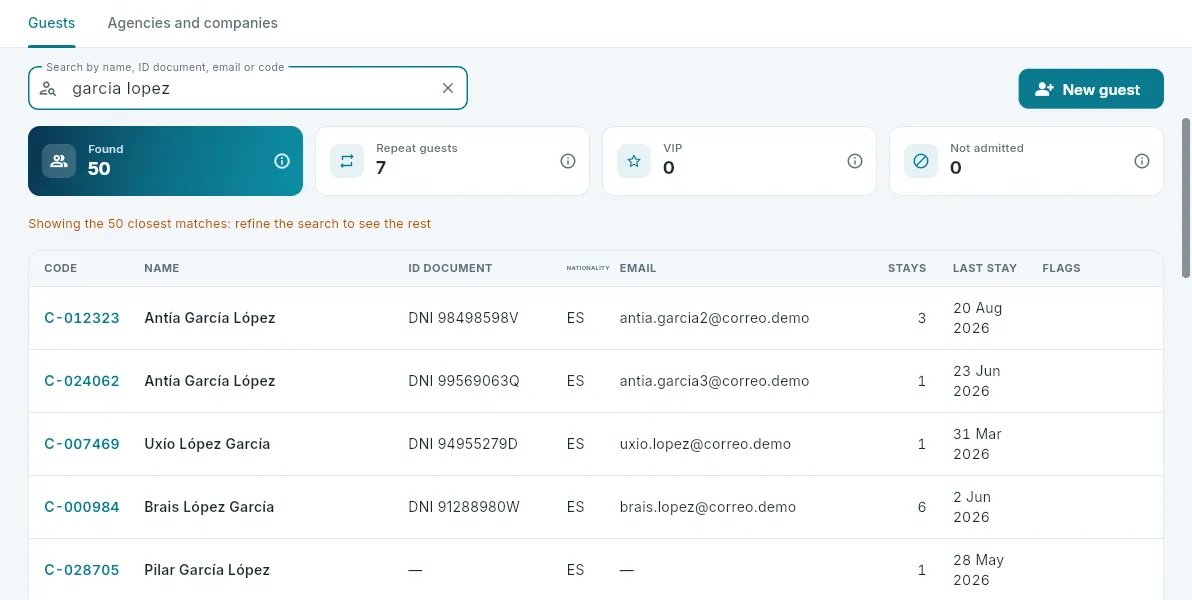
#Finding a guest
Each person has a single record for the whole chain: if they come back, they are recognised by their ID document and the
same record is used, with all their stays. To find it, type at least two letters of the name, the ID document, the email or
the record’s code (C-000123).
 1234
1234
- 1The search: it ignores capitals and accents and finds names even if they are not written exactly the same way or in the same order.
- 2New guest: search first, so as not to create a duplicate.
- 3How many have been found and, among them, how many are repeat guests, VIP or on the do-not-admit list.
- 4Each guest: code, name, ID document, nationality, email, stays and the last one; click it to open their record.
With the exact ID document, code or email, their record comes up first. By name, at most the 50 closest matches come up: if you are looking for someone specific, add the second surname or search by their ID document.
#The guest record
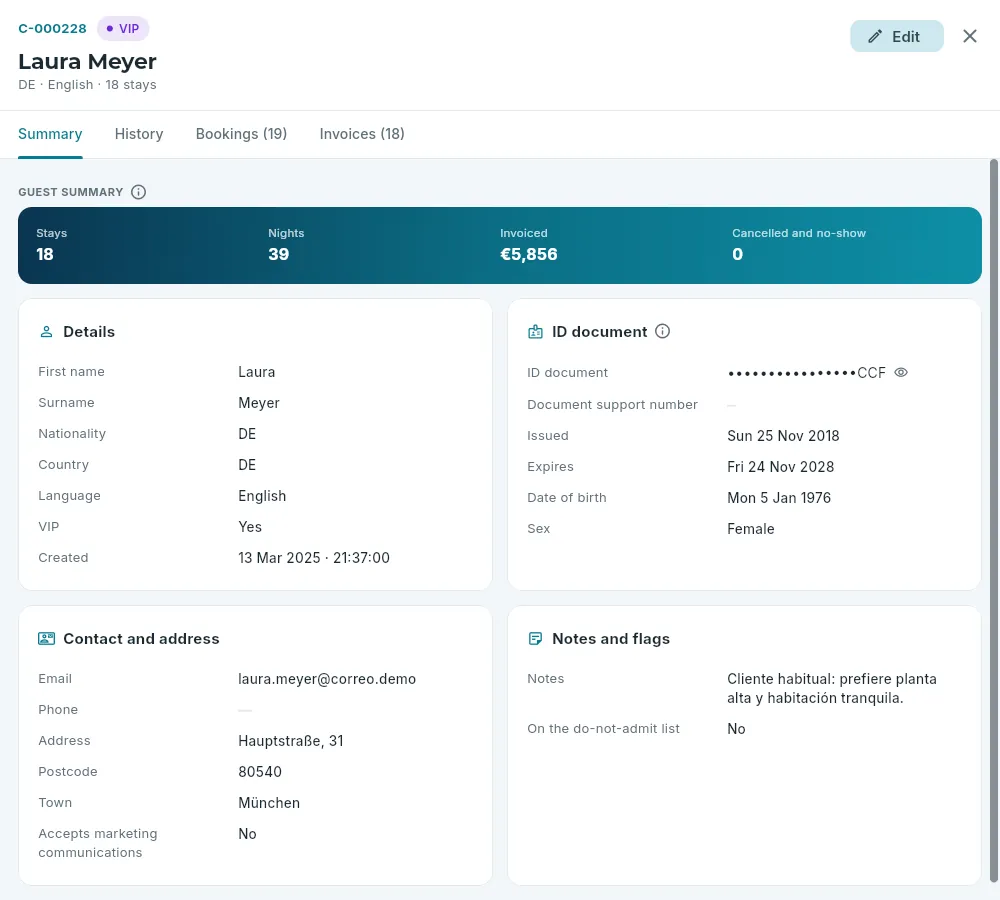 12345678
- 1The record’s code, its flags (here, VIP), the name, the nationality, the language and how many stays they have.
- 2Edit the record (with the relevant permission).
- 3The tabs: Summary, History (see below), Bookings and Invoices (with how many there are).
- 4The summary: stays, nights, amount invoiced, and cancellations and no-shows.
- 5Their details: name, nationality, country, language, whether they are VIP and when the record was created.
- 6The ID document (masked: the eye shows it in full) and the traveller register details.
- 7Contact details and address, and whether they accept marketing communications.
- 8Notes for the team and the do-not-admit list.
- Bookings: all their bookings at your hotels, as lead guest or as a guest registered at check-in, from newest to oldest, with Open to go to each one. It includes cancelled bookings and no-shows, so there may be more than the stays in the summary.
- Invoices: those issued in their name, with what has been paid and what is outstanding.
- Do-not-admit list: a flagged guest is highlighted when searched for and at check-in.
- Marketing communications: offers are only sent to them if they have expressly agreed to it (GDPR).
#History and preferences
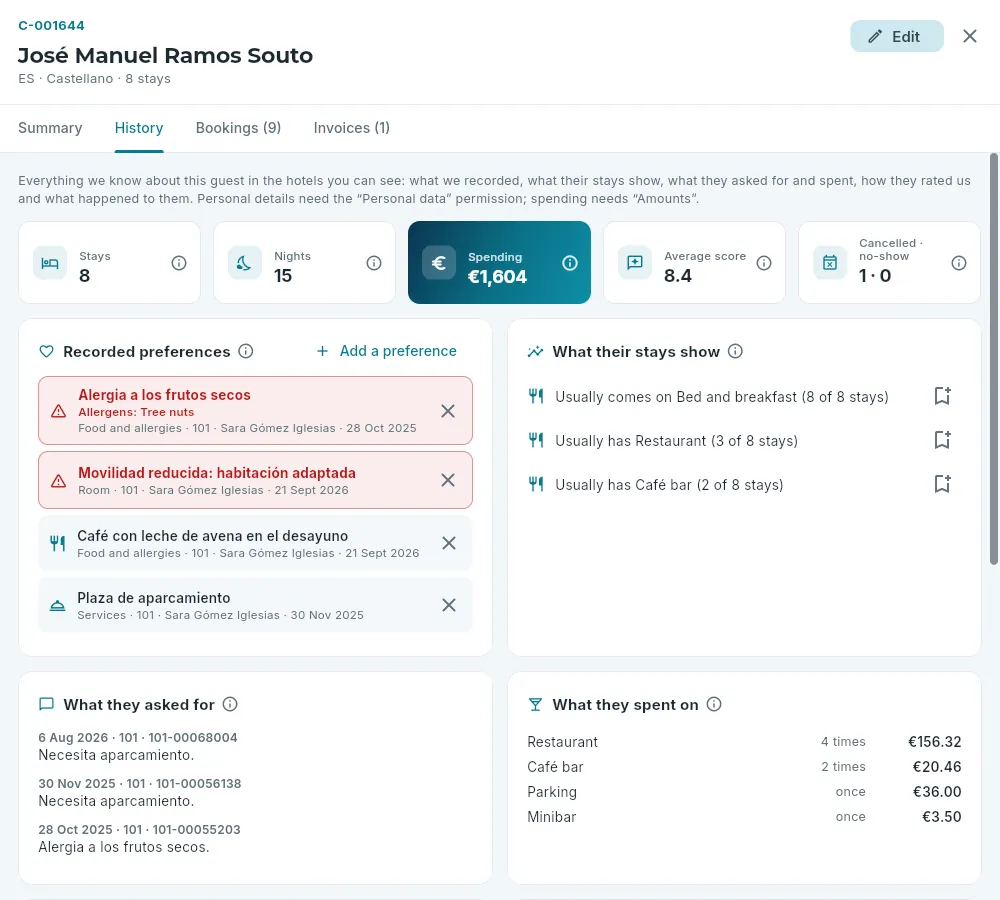
To welcome a returning guest the way they expect, you need to know what they asked for last time, what they like and, above all, what they cannot have. The History tab of their record brings it all together, at the hotels you can see: what staff have recorded, what their stays show without anyone having recorded it, what they asked for and spent on, how they rated us and what happened to them.
 123456
- 1The History tab.
- 2Their stays and nights with the chain, what they have spent, their average survey score and cancellations and no-shows.
- 3Recorded preferences, each with its type, who recorded it, at which hotel and when; important ones first and in red.
- 4Add a preference; the cross on each one removes it.
- 5What their stays show; the marker on each line records it as a preference.
- 6What they asked for on each stay and what they spent on; further down, their surveys, their incidents and items left behind, and their stays.
| Block | What it holds |
|---|---|
| Recorded preferences | What the guest wants taken into account, recorded by staff, by type: food and allergies, room, bed and pillow, services, attention and treatment, or other. Important ones (an allergy, an accessibility need) are highlighted everywhere. A preference is not deleted: it is removed, and stays in the log. |
| What their stays show | What they repeat without anyone having recorded it: amenities prepared for them (a cot, extra pillows), the floor and room they repeat, the time they usually arrive, the room type and board, and extras they have on two stays or more. |
| What they asked for | The notes on each previous booking and the amenities prepared for them, from the most recent to the oldest. |
| What they spent on | Their extras: restaurant, café, minibar, parking, laundry…, how many times and how much. |
| Their surveys | The score of each, the lowest-rated sections and their comment. |
| Incidents and lost items | Faults in their room while they were there and anything they left behind. |
| Their stays | All their bookings (including cancellations and no-shows), with the hotel, dates, room, channel, score and amount; click one to open it. |
The current booking does not count as a previous stay. Personal details (notes and comments) are shown with Personal data, and spending with Amounts.
 1234
1234
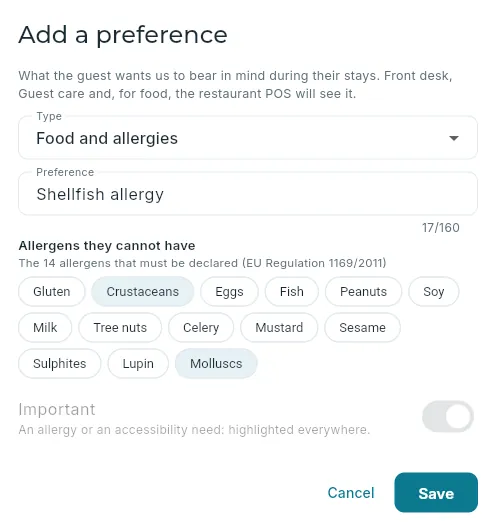
- 1The type.
- 2Under food and allergies, the allergens they cannot have.
- 3Important: with allergens it always is.
- 4Save.
Open the guest’s record on History (or, from Guest care or their booking’s summary, View history) and click Add a preference.
Choose the Food and allergies type and type what they ask to be taken into account, in their own words (“shellfish allergy”, “coeliac”).
Tick its allergens, from the 14 that must be declared: this is what the POS checks against the menu.
Click Save.
#Creating or changing a guest
Most records are created automatically: when a booking is created (the lead guest’s) and at check-in (each guest’s, which completes the lead guest’s). From here they are created by hand or corrected.
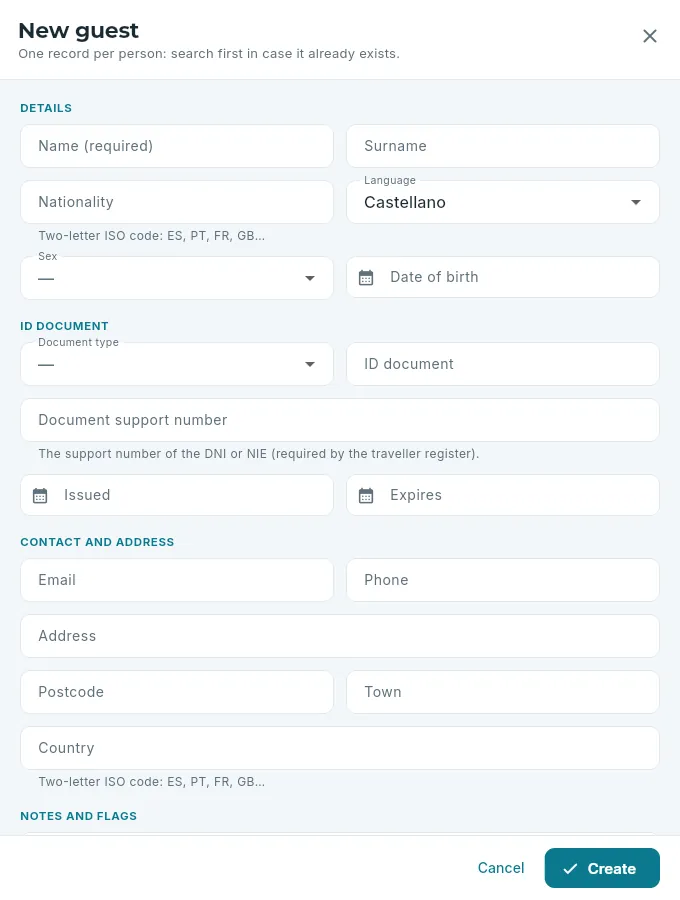 1234
1234
- 1The details: only the name is required; the nationality, with its two-letter code (ES, PT, FR…).
- 2The ID document: the type (deduced from a DNI or NIE), the number, the support number and the dates. If a record with that ID document already exists, it warns you and offers to open it.
- 3Contact details and address.
- 4Create.
- No duplicates. If the ID document is already in another record, the database will not save it and the screen offers Open their record.
- If two people change it at the same time, the database does not let one overwrite the other’s changes: you have to close the record, open it again and repeat the change.
- The change log keeps which fields were changed and by whom, but not their values: personal data is not copied into the history.
#Agencies and companies
The Agencies and companies tab brings together those who bring in bookings or pay for other people’s stays: the channels (Booking.com, Expedia, the hotel’s own website), travel agencies, companies with an agreement and tour operators. Each one with its commercial terms:
- Commission: the percentage it takes from each booking it brings in.
- On credit: whether its invoices are paid later, on their due date, instead of at check-out.
- Payment terms: how many days after the invoice it falls due.
- Credit limit: the most it may owe on credit. If a new invoice would take it over the limit, the database will not let it be issued on credit: it will have to be paid or the limit raised.
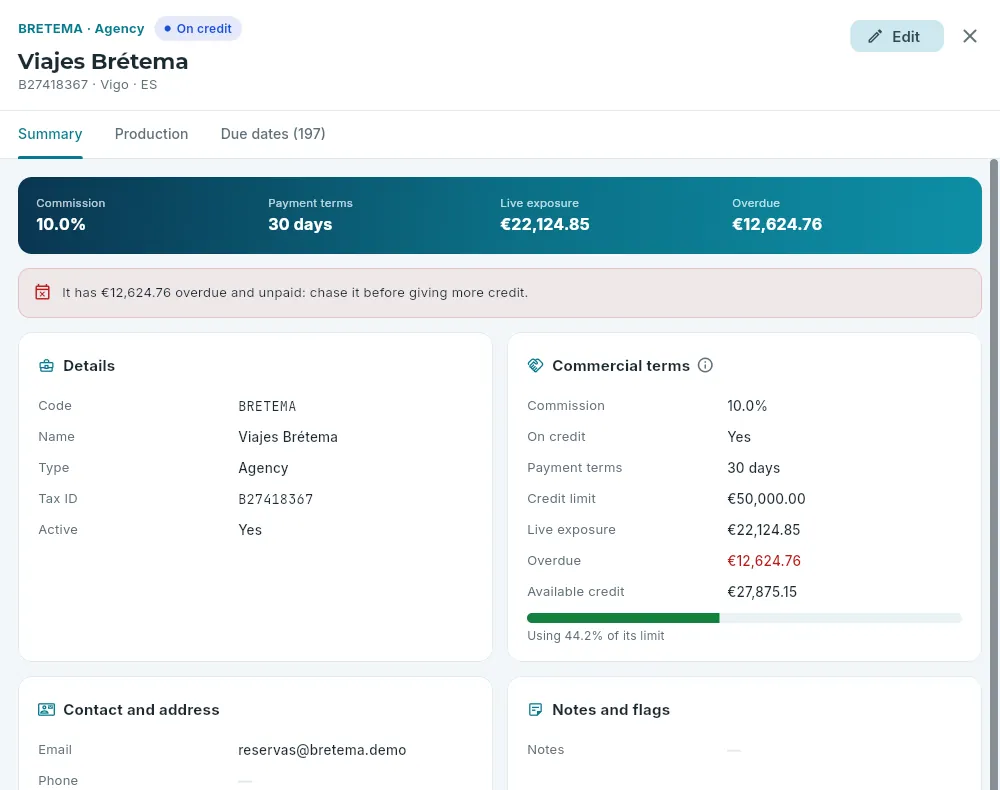 12345
12345
- 1Code, type and whether it works on credit; below, its tax ID.
- 2The tabs: Summary, Production and Due dates.
- 3Commission, payment terms, live exposure (what it owes now) and overdue.
- 4A warning if it has unpaid overdue amounts: chase them before giving it more credit.
- 5The terms: credit limit, live exposure, overdue and available credit, with the bar showing how much of its limit is used.
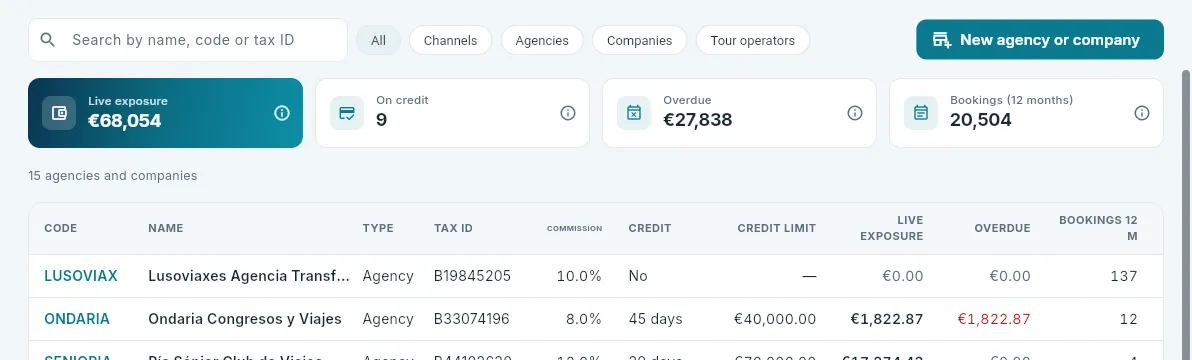 12
12
- 1Live exposure, how many work on credit, what is overdue and the bookings they have brought in over 12 months.
- 2Each one with its type, tax ID, commission, credit, limit, exposure and bookings.
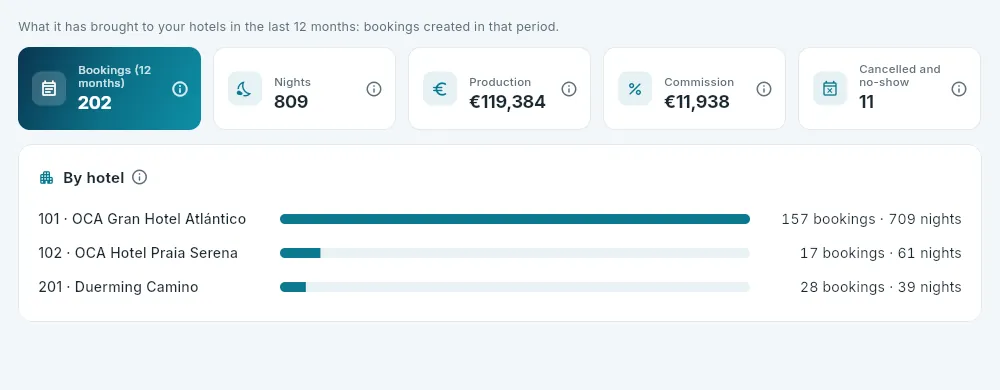 12
12
- 1Bookings, nights, production, commission and cancellations.
- 2Which hotels it works with most.
#The guest’s data protection
The GDPR tab on the record (with the Personal data permission) brings together what data protection requires you to know about each person: what they have consented to, what requires their data to be kept and who has seen it. Their rights of access and erasure are also handled from here. Everything for all guests at once is in Legal obligations.
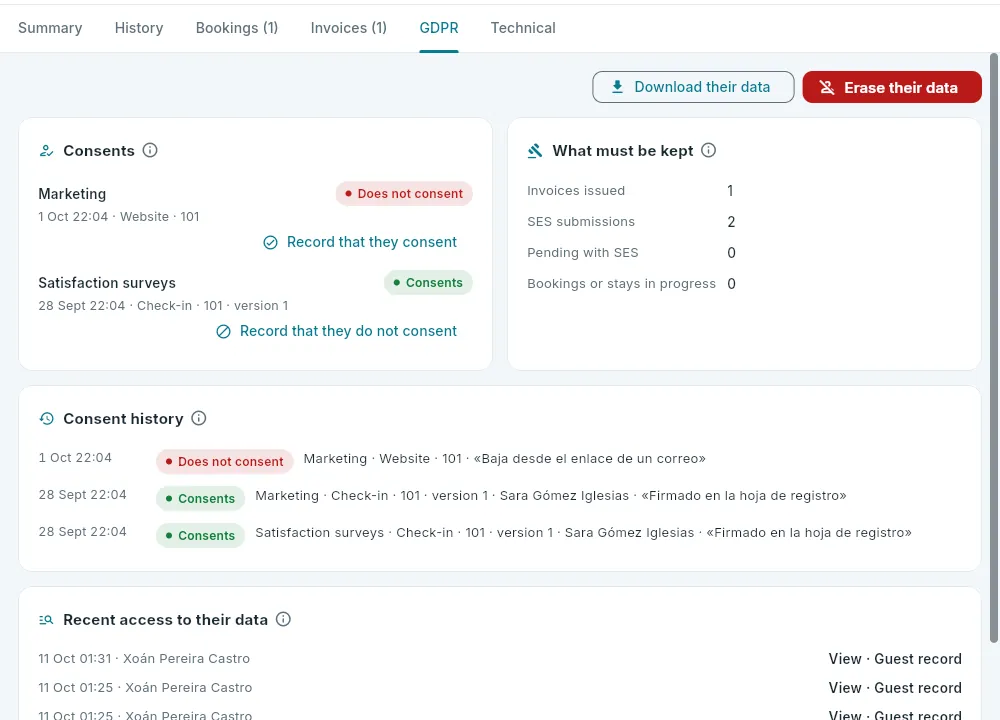 12345
12345
- 1Download their data (everything the hotel holds about them) and Erase their data.
- 2What they consent to today: marketing and surveys, when, from where and with which version of the text; and recording that they consent or do not.
- 3What requires their data to be kept: invoices issued, SES submissions, anything pending with SES and their bookings in progress.
- 4All their consents, which are never deleted: here, an unsubscribe from marketing via an email.
- 5Who has viewed or changed their data (the last 50 accesses; with the Manage GDPR permission).
- Recording a consent. If the guest says at the desk, by phone or by email that they want (or no longer want) marketing or surveys, Record that they consent or Record that they do not consent, with a note of how they said it. With nothing recorded, they receive no marketing but do receive the survey (on legitimate interest, until they object). The same is recorded at check-in (see Front desk).
- Right of access. Download their data gives them everything the hotel holds about them: record, stays, invoices, preferences, surveys, consents, SES submissions and accesses. The download is recorded in the access log.
- Right to rectification. Their record is corrected with Edit, as usual; if they have a guest register at SES, it is submitted again.
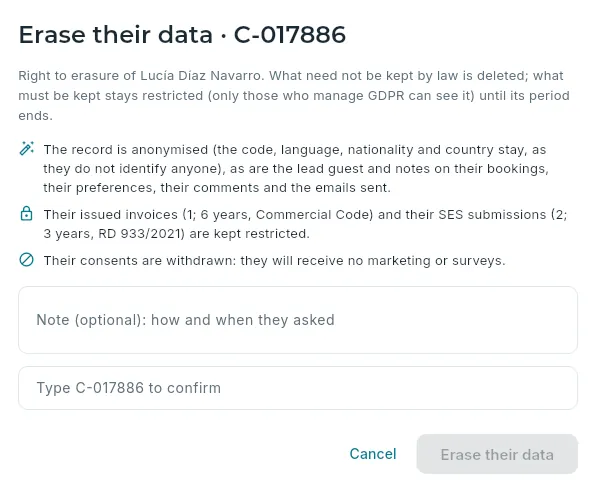 123
123
- 1What is anonymised: the record (the code, language, nationality and country stay, as they do not identify anyone), the lead guest and notes on their bookings, their preferences, their comments and their emails.
- 2What is kept restricted because the law requires it: their invoices (6 years) and their guest registers (3).
- 3To confirm, their guest code.
Open their record, GDPR tab. Check under What must be kept that they have no bookings in progress or anything pending with SES (if they do, you have to wait).
Click Erase their data and read what is deleted and what is kept.
Type, if you wish, how and when they asked, and their guest code to confirm.
Click Erase their data.
#What each role can do
Front desk and bookings
Invoices
The hotels’ invoices: series and numbering, full and simplified invoices, invoices on credit, credit notes, Verifactu and SII, the PDF and sending by email.
An invoice sets out what a guest is charged: the nights of their stay, the tourist tax, extras… It is issued from the booking’s folio (at check-out or when the guest asks for it) and, once issued, it never changes: if it has an error, it is corrected with another invoice, the credit note. The Invoices section brings together all the invoices at your hotels, with what has been paid and what is still outstanding on each one.
#Series and numbering
Each invoice has a number that gives its series, its year, its hotel and its sequence: A26-101-000123 is invoice 123 in
series A for 2026 at hotel 101.
| Series | Type | What for |
|---|---|---|
| A | Full invoice (F1) | With the recipient’s tax details: their name and their tax ID (NIF). The one a company asks for. |
| F | Simplified invoice (F2) | Without the recipient’s details, like a till receipt: the one for a private individual who does not ask for it in their name. |
| R | Credit note (R4, or R5 if it corrects a simplified invoice) | Cancels an earlier invoice in full. |
Numbering is sequential with no gaps per hotel, series and year: the database reserves the next number at the very instant it issues the invoice, so two people invoicing at the same time never get the same number and none is skipped. The number format is a chain rule, like the locator’s.
#The invoice list
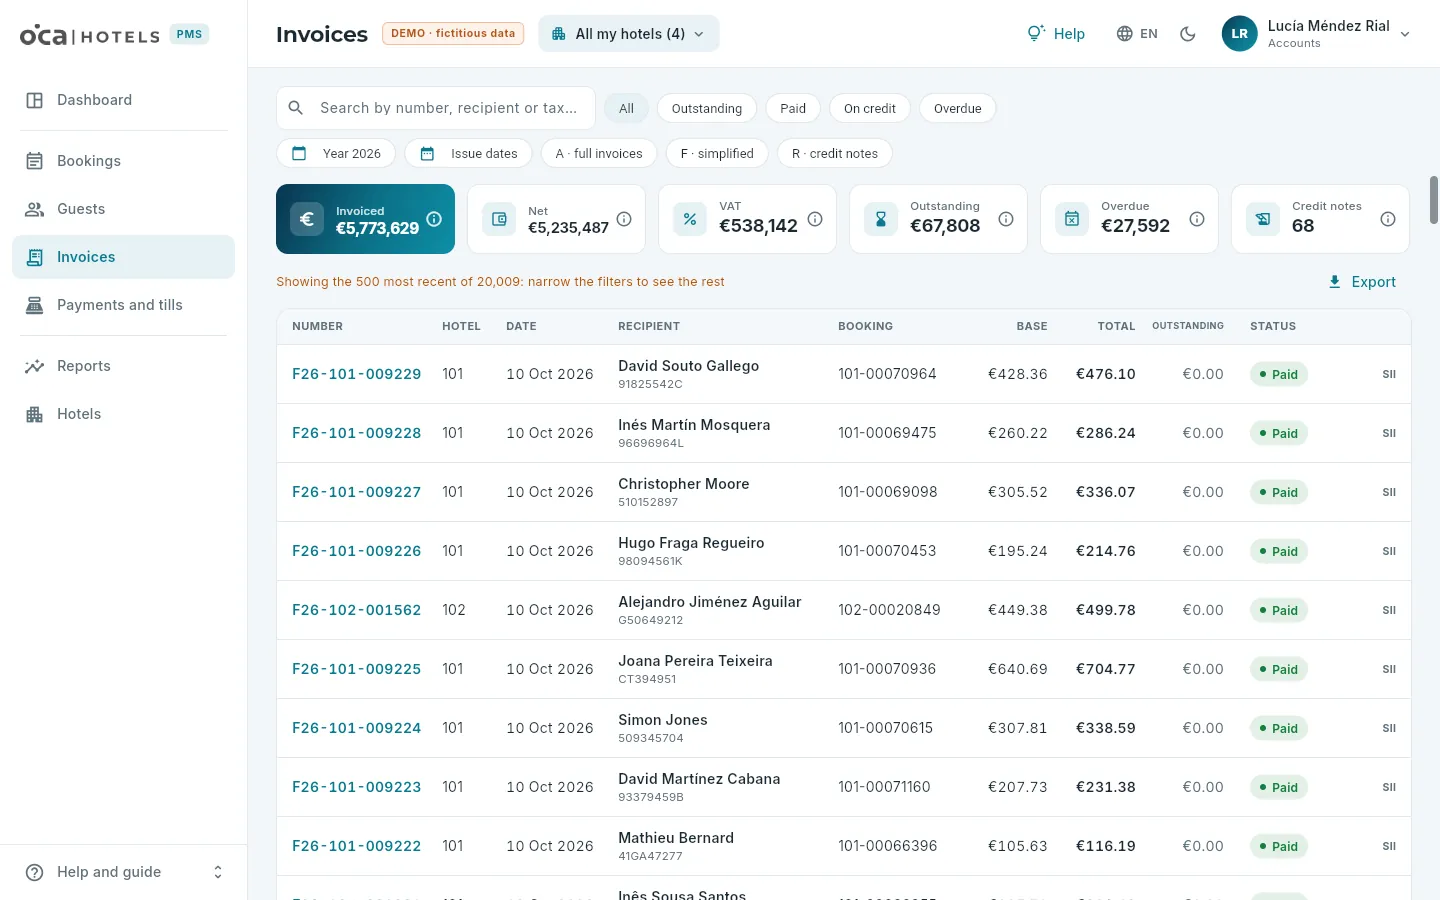 12345678
- 1Search by number, recipient or tax ID.
- 2The shortcuts: all, outstanding, paid, on credit and overdue.
- 3The year and a period of issue dates.
- 4The series: full invoices, simplified invoices and credit notes.
- 5The indicators for what is filtered, each with its ⓘ.
- 6Export the list (with the export permission).
- 7Each invoice: number, hotel, date, recipient with their tax ID, and booking. Click it to open its record.
- 8Its status (paid, outstanding, on credit, overdue, cancelled by credit note…) and whether it is reported through the SII or carries Verifactu (with its submission status).
#Issuing an invoice
Invoices are issued from the booking’s folio: in the booking record (Folio tab) or at check-out in Front desk. The Invoice button shows the outstanding amount; if you select some charges, it invoices only those.
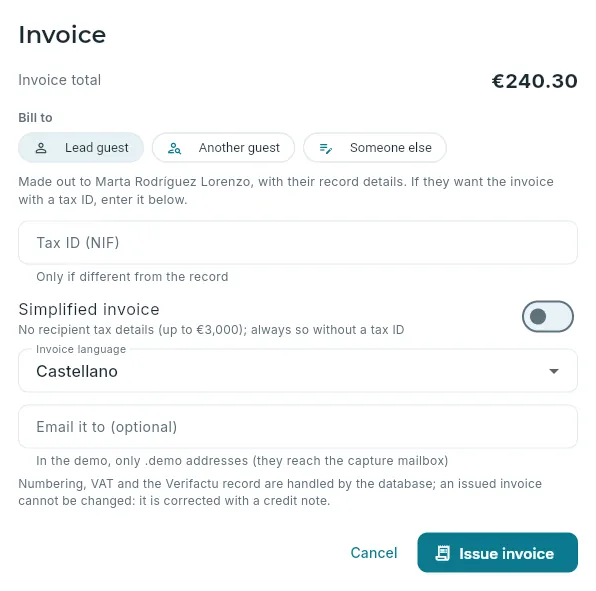 1234567
- 1The total: the outstanding charges (or the selected ones).
- 2Who is invoiced: the lead guest, another guest (from their record), the booking’s agency or company (if it has one) or another recipient typed in by hand.
- 3The tax ID, if they ask for it and it is not in their record.
- 4Simplified: no tax details, up to €3,000. Without a tax ID, it is always simplified.
- 5The language of the invoice: Spanish, Galician, English or Portuguese.
- 6Send it by email when it is issued (in the demo, only to
.demoaddresses). - 7Issue invoice.
Open the booking’s folio (Folio tab of its record, or check-out) and click Invoice with the amount. To invoice only some charges, select them first.
Choose the recipient: Lead guest, Another guest (search for them by ID document or name), Agency or company or Someone else (name, tax ID, address and country typed in by hand).
If the guest asks for it with their tax ID, type it in; if not, let it be a simplified invoice.
Choose the language and, if you want to send it, the email address.
Click Issue invoice.
- Deposits. What has been paid on account for the booking (a deposit, a down payment) is applied automatically to the invoice when it is issued, from the oldest to the most recent.
- On credit. If the invoice is made out to an agency or company with credit, it is left on credit: it is not paid at the desk but on its due date (the invoice date plus the agreed payment days) and it does not prevent the guest from checking out. The database checks the agency’s credit limit: if this invoice would take it over the limit, it cannot be issued on credit (see Agencies and companies).
- The tourist tax carries VAT. It is part of the taxable base of the accommodation and carries the same VAT (10%): one euro of tax per adult per night is invoiced as €1.10. That is the conclusion of the Spanish Directorate General for Taxation (DGT) in binding ruling V0507-26; in Verifactu it goes with the accommodation. Out of scope is kept for an item that really is not subject to VAT.
#The invoice record
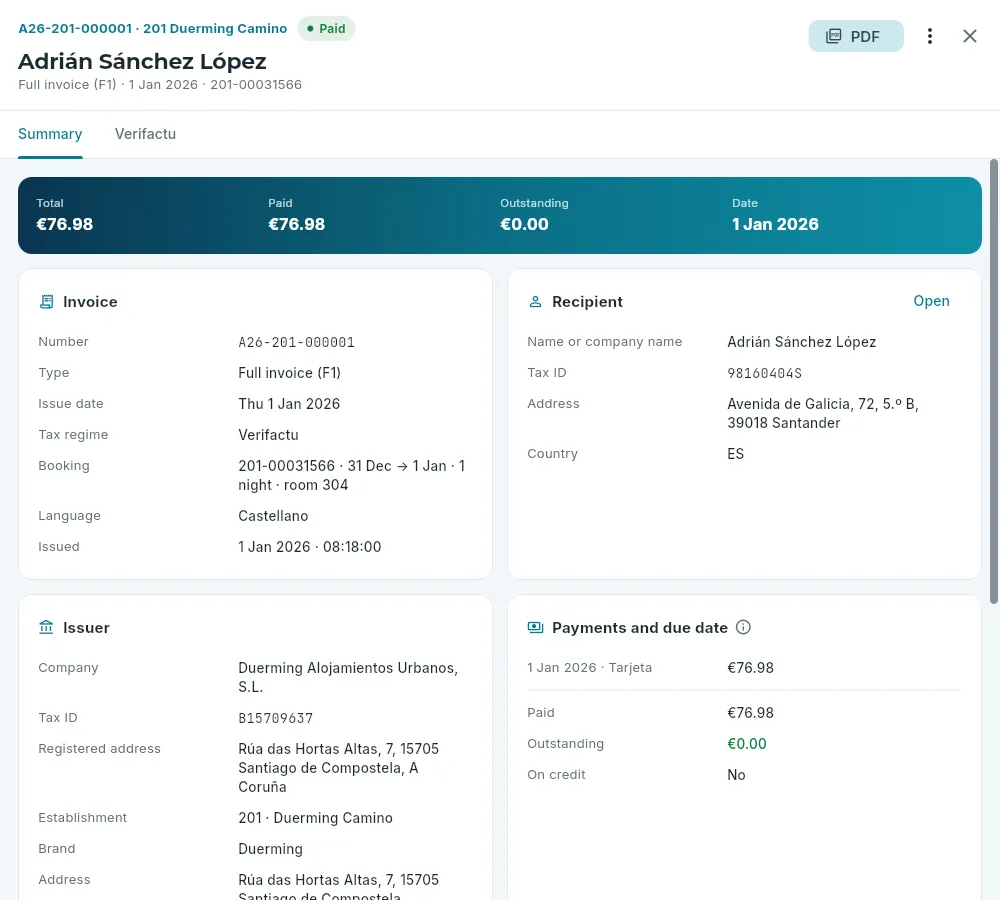 12345678
- 1The number, the hotel, the status and the recipient; below, the type, the date and the booking.
- 2The invoice’s PDF.
- 3More actions: send it by email, open the booking, the guest or the agency, and issue a credit note.
- 4The tabs: Summary and Verifactu (or SII, depending on the company); with the technical data permission, also history and technical.
- 5Total, paid, outstanding and the date (or the due date, if it is on credit).
- 6The invoice details: number, type, issue date and date of supply, tax regime, booking and language.
- 7The recipient, with Open to go to their record.
- 8Its payments, what is outstanding and, if it is on credit, its due date.
Further down, the issuer (the company, its tax ID and registered address, and the establishment) and the lines: each invoiced charge with its quantity, price, VAT, base and VAT amount; the VAT breakdown by rate, what is not subject to VAT and the totals. Taxable base + VAT amount + not subject to VAT = total, always: the database will not save an invoice that does not add up.
#Verifactu
Verifactu is the Spanish Tax Agency’s (AEAT) system to make sure invoices cannot be secretly altered. Here it is without the jargon:
- When each invoice is issued, the software generates an invoicing record with its main details: the issuer’s tax ID, the number, the date, the type, the VAT amount and the total.
- A hash is calculated for that record: a 64-character code that sums up all that data and the hash of the previous invoice of the same company. If a single figure on an invoice already issued were changed, its hash would no longer match, and nor would those of all the invoices after it: that is why it is called a chain.
- The invoice carries a printed QR code that the recipient can use to check it on the AEAT’s e-office, with the legend “VERI*FACTU”.
- The record is sent to the AEAT, which replies whether it is correct.
In OCA PMS the database does all this at the very instant the invoice is issued: nobody has to do anything else.
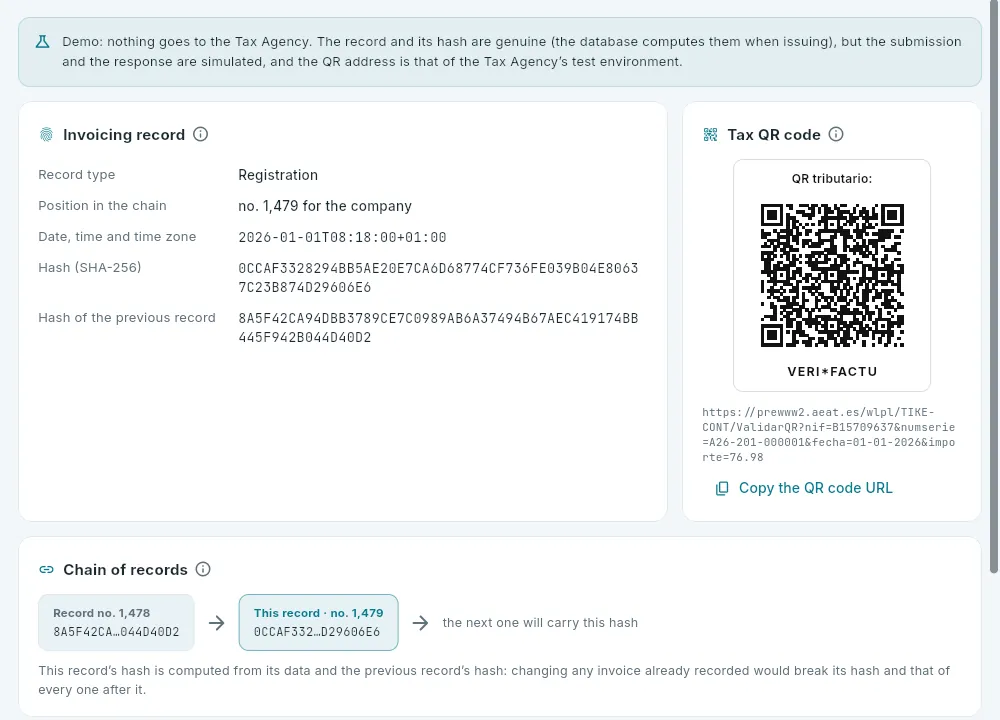 12345
12345
- 1In the demo, the record and its hash are real; the submission and the response are simulated.
- 2The record: its type (registration), its position in the company’s chain and the date and time it was generated.
- 3Its hash and that of the previous record, which goes into its calculation.
- 4The QR code printed on the invoice, with the AEAT verification address (in the demo, the test one) and the button to copy it.
- 5The chain: the previous record, this one and the next one, which will carry this hash.
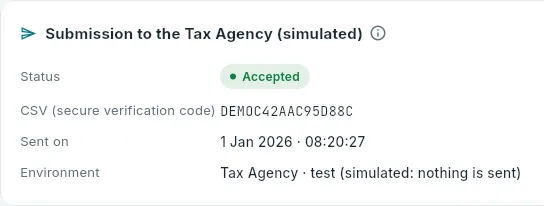 12
12
- 1The submission status: awaiting submission, accepted, accepted with errors or rejected.
- 2The response’s CSV (secure verification code), and when it was sent.
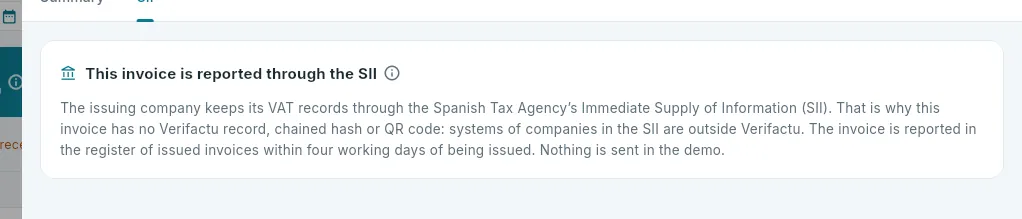 1
1
- 1Why it does not carry Verifactu.
#The PDF and sending by email
- The PDF. The record’s PDF button requests the document from the document service (simulated in the demo): in a few seconds The PDF is ready appears with the Open the PDF button. The PDF comes out in the invoice’s language, with the Verifactu QR code at the top right if it has one, and with the “DEMO · fictitious data” mark. The link is private and expires after five minutes.
- Sending it by email. More actions → Send by email sends it with its PDF attached to the email address you type.
In the demo only
.demoaddresses are accepted and the email lands in the capture mailbox: nothing goes out to the internet.
#Correcting an invoice
An issued invoice is never changed or deleted. If it has an error – a different recipient, a misspelt tax ID, a charge that did not belong on it – a credit note (series R) is issued that cancels it in full, by difference and as a negative amount, followed, if needed, by the correct invoice.
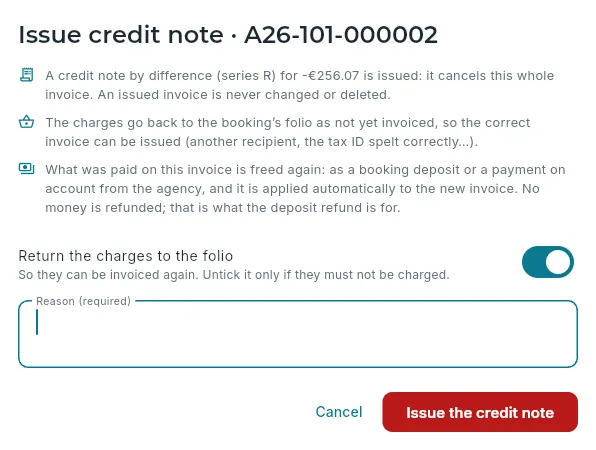 123456
- 1The credit note: for the same amount, as a negative, it cancels this whole invoice.
- 2The charges go back to the folio as not yet invoiced, so they can be invoiced correctly.
- 3What has been paid is freed up as a deposit (or as the agency’s payment on account) and is applied automatically to the new invoice.
- 4Untick it only if those charges must not be charged (a complimentary stay, a charge that did not belong).
- 5The reason, required.
- 6Issue the credit note.
Open the invoice and click More actions → Issue credit note.
Leave Return the charges to the folio ticked (the usual case) and type the reason: “Tax ID misspelt”, “to be invoiced to the company”…
Click Issue the credit note.
If it has to be invoiced again, go to the booking’s folio: the charges are outstanding again. Issue the correct invoice.
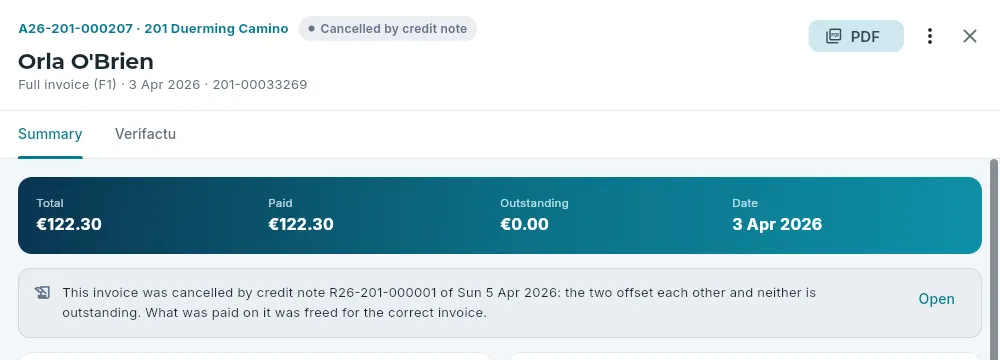 12
12
- 1Its status: Cancelled by credit note.
- 2Which invoice cancelled it and when, and that the two offset each other; Open takes you to the credit note.
What happens when you issue a credit note, in detail:
- The charges go back to the booking’s folio as not yet invoiced (unless you untick the box).
- What was paid on the original is not refunded: it is freed up as a deposit for the booking or as a payment on account for the agency, and is applied automatically to the next invoice.
- The due date, if the original was on credit, is cancelled.
- Verifactu: the credit note gets its own record, chained to the company’s latest one, and its own PDF.
#What each role can do
Front desk and bookings
Payments and tills
The money coming in: the front desk till for the day (opening it, taking payments, cash in and out, closing it with a count) and the due dates of invoices on credit to agencies and companies.
A payment is money coming in for an invoice or on account for a booking: in cash, by card, by bank transfer or with the virtual card sent by the channel. Cash and card payments go through the front desk till, which is opened at the start of the shift with a float and closed by counting what is in it. The Payments and tills section has two tabs: Today’s till and Due dates (what agencies and companies owe for their invoices on credit).
#Today’s till
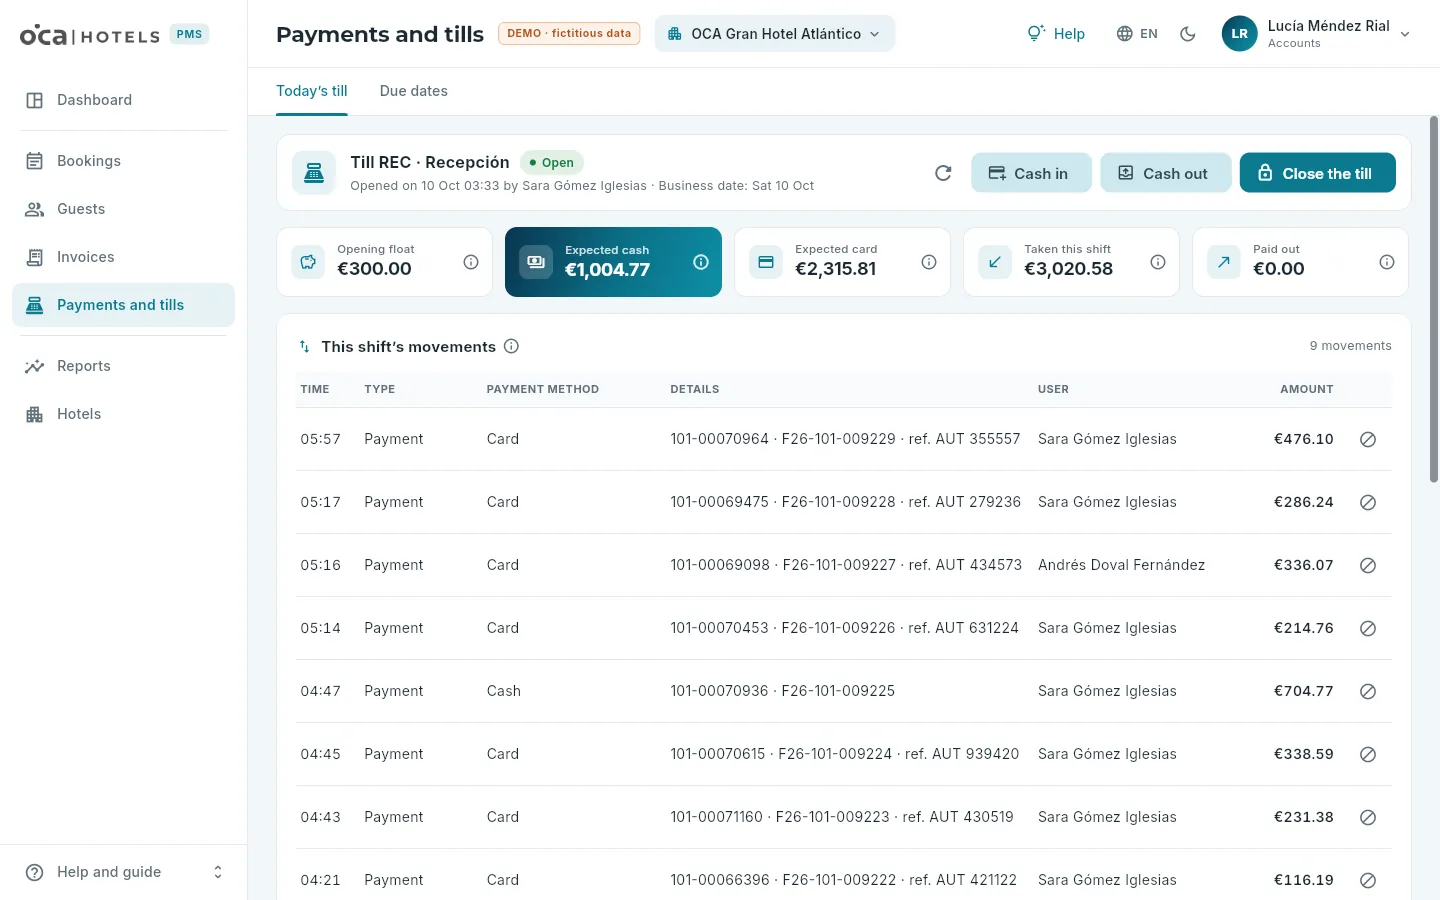 12345
12345
- 1The till, whether it is open or closed, and who opened it and when.
- 2Cash in and cash out that are not payments, and Close the till, with a count.
- 3The shift’s indicators: the float, the expected cash and card, what has been taken and what has gone out, each with its ⓘ.
- 4The shift’s movements: time, type, payment method, which booking and invoice (with the card terminal reference), who and how much.
- 5Void a movement, with a reason, while the till is still open.
- Opening the till. At the start of the shift, Open the till asks for the float you start with. While the till is closed, no cash or card payments can be taken (the payment dialog warns you and lets you open it from there).
- Cash in and out. Money coming in or going out that is not a payment: change brought from head office, cash taken to the bank… Always in cash and with a description.
- Voiding. Each movement’s icon voids it with a reason: it is not deleted, it stays in the log, and whatever a payment had paid off an invoice becomes outstanding again. Only while that shift’s till is open.
#Take payment
Payments are taken from the booking’s folio (Take payment at check-out or in the record’s Folio tab), from an invoice record (Take payment with the outstanding amount) or from the due dates. If there is no invoice yet, the payment stays on account for the booking: it is a deposit, which will be applied automatically to the invoice when it is issued.
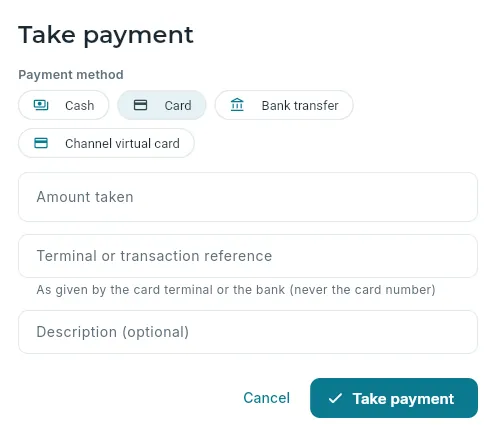 12345
12345
- 1The payment method: cash, card, bank transfer or the channel’s virtual card.
- 2The amount. With invoices, it is shared out among them; anything left over stays on account.
- 3The reference given by the card terminal or the bank. Never the card number.
- 4A description, if you like.
- 5Take payment.
On the booking’s folio, click Take with the outstanding amount (or, in the invoice record, Take payment).
Choose the payment method. For a card, type the reference given by the card terminal.
Check the amount: if you take more than is owed, the difference stays on account for the booking.
Click Take payment.
- Deposits. Money taken on account (a down payment, a prepayment) appears on the folio as a deposit and is applied automatically, from oldest to newest, to the booking’s next invoice. A payment from an agency that is not applied to any invoice stays as a payment on account for the agency.
- Refunds. What remains of a deposit (the guest leaves early, or too much was taken) is refunded from the folio with the Refund button on that payment: it goes out by the same payment method it came in by and, if it is cash or card, through the hotel’s open till. The refund stays on the folio and in the till with its sign.
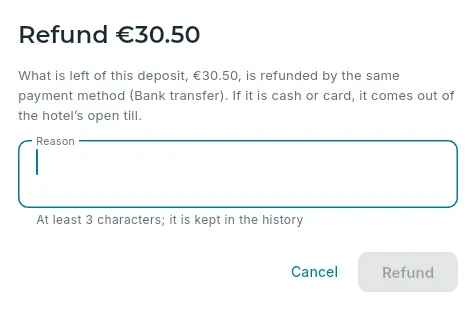 123
123
- 1How much is refunded, by which payment method and whether it goes through the till.
- 2The reason, which is kept in the log.
- 3Refund.
#Closing the till
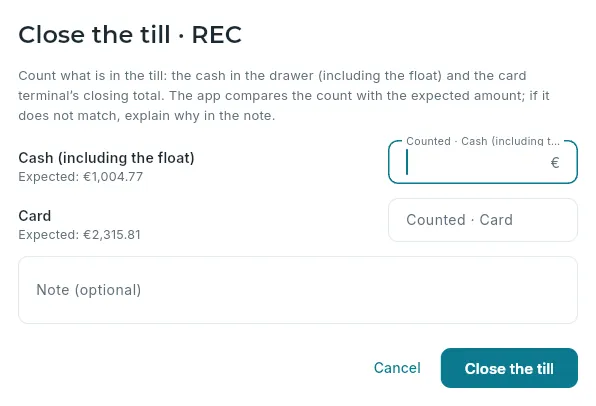 12345
12345
- 1What needs counting.
- 2The cash in the drawer, including the float; on the left, the expected amount.
- 3The total from the card terminal’s end-of-day report.
- 4A note, required if anything does not balance.
- 5Close the till.
Count the cash in the drawer (including the float) and print the card terminal’s end-of-day report.
In Today’s till, click Close the till.
Enter the amounts counted in cash and by card. The screen tells you straight away whether they match what is expected.
If they do not match, explain the discrepancy in the note (“€5 short in change”, “card payment recorded as cash”…).
Click Close the till.
- Discrepancies. The cash difference is the amount counted minus the amount expected; the card difference, the card terminal total minus what was recorded. Any difference requires a note; the closing keeps it and it shows in red in Recent closings.
- Reopening. If, after closing, a forgotten payment or a counting error turns up, the last closing can be reopened with a reason (Reopen the till permission): the till is open again with the same shift and will have to be counted again.
- Closing the till is not the night audit. The night audit does not need the tills to be closed: it only warns about those still open.
#Due dates
Each invoice on credit to an agency or company has a due date: the date by which it must be paid, which is the invoice date plus the payment terms (in days) agreed with the agency. The Due dates tab shows what they owe, and payments are taken from it.
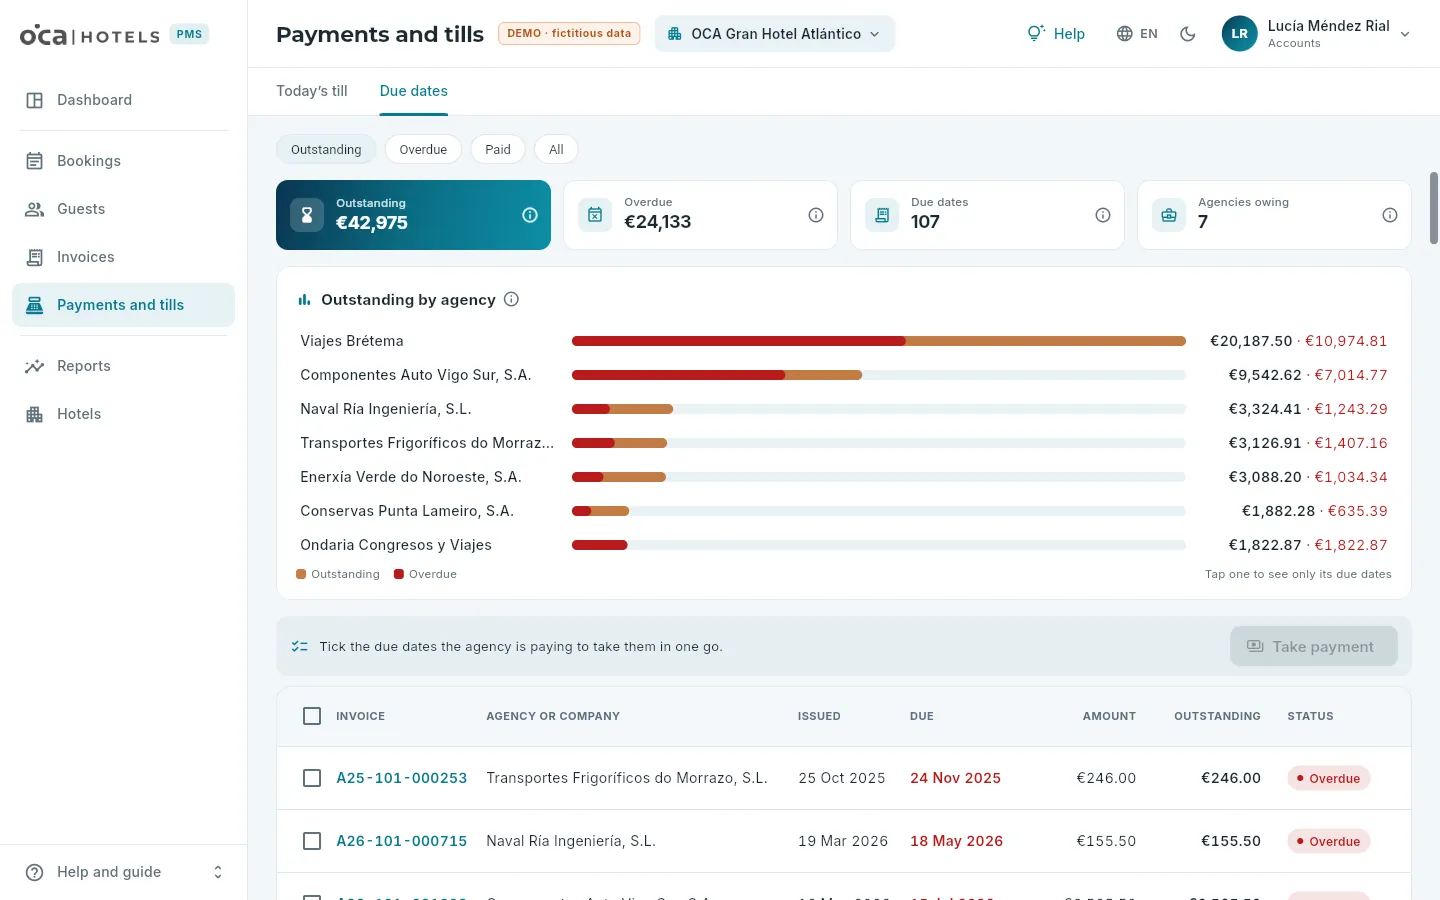 12345
12345
- 1Filters: outstanding, overdue, paid or all.
- 2What is outstanding, what is already overdue, how many due dates there are and how many agencies owe money, with their ⓘ.
- 3Outstanding by agency: outstanding amounts in orange and overdue ones in red. Click one to see only its due dates.
- 4Tick the due dates an agency is paying and take them in one go with Take payment.
- 5Each due date: invoice, agency, issue date, due date (in red if it has passed), amount, outstanding and status.
In Due dates, click the agency in Outstanding by agency to see only its own.
Tick the due dates it is paying (they must all be from the same agency and the same hotel).
Click Take payment, choose the payment method (usually bank transfer) and the bank reference, and take the payment.
#What each role can do
Front desk and bookings
Accounting
The accounting entries the PMS generates by itself from what it invoices, collects and purchases, by company: what is still to be exported and what needs reviewing, each entry with its source, the chart of accounts with the ledger and the trial balance, the account mappings that decide each account, and the export to a3innuva.
The hotels’ accounts are kept by the accountants in their accounting software, a3innuva. OCA PMS does not replace that software: it saves them keying in by hand what is already in the PMS. Every invoice issued, every payment, the summary of the tickets of each POS terminal, every till that closes with a difference and every supplier invoice and payment automatically become an accounting entry, which is exported to a3innuva by closed periods.
An entry is the accounting record of an event; its lines say which account moves and by how much, on the debit or the credit side; in every entry the debit adds up to the same as the credit (the entry balances). The accounts follow the Spanish chart of accounts (PGC): 430 customers, 438 customer advances, 400 suppliers, 477 and 472 output and input VAT, 570 cash, 572 bank, 6 purchases and expenses, 7 sales and income. The sub-accounts (4300000123) are those of each customer, agency or supplier.
Accounting belongs to the company, not the hotel: the entries of hotels 101 and 102 belong to Hoteles Atlánticos (HAN) and those of 201 and 202 to Duerming (DAU). The hotel goes in the cost centres (the cost centre of each purchase and sales line). The section has five tabs: Summary, Entries, Export, Chart of accounts and Settings.
- 1Invoicing, payments and purchasesAt the front desk, in the POS, in payments and in purchasing, as usual.
- 2Night auditEach hotel’s night audit generates the entries for its day.
- 3ReviewWhat is pending by type, each entry with its source and what needs reviewing.
- 4ExportBy closed periods: a file for a3innuva (simulated), which checks it and imports it.
#The overview
Summary shows how the company’s accounting is going: what is still to be exported, what needs reviewing and the last export.
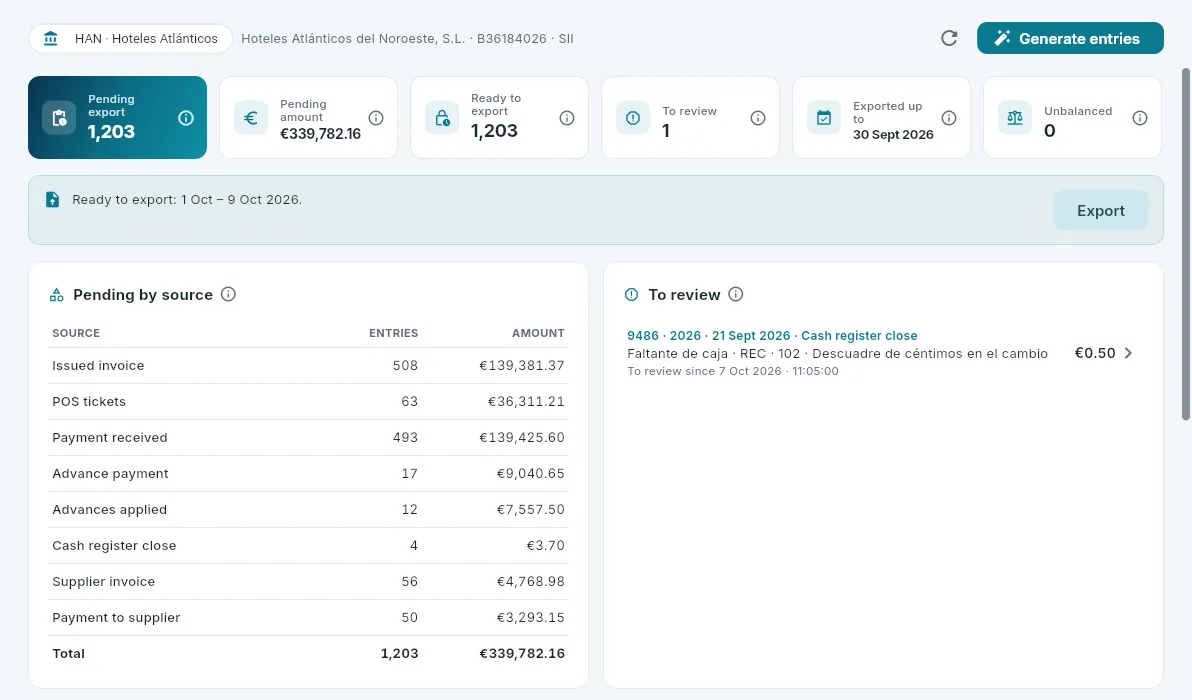 123456
- 1The company: the first control on every tab, with its registered name, its tax ID and its scheme (SII or Verifactu). If you choose a hotel at the top, its company applies (shown with a padlock).
- 2Generate entries for a period on demand (see Generating the entries).
- 3What is pending export and its amount, what can already be exported, what is to review, the day exports go up to and the unbalanced entries, always 0. Each with its ⓘ.
- 4The closed period that is ready to export; Export takes you to that tab with it already chosen.
- 5What is pending by source. Each row opens its entries.
- 6Exported entries to review: each one opens its record.
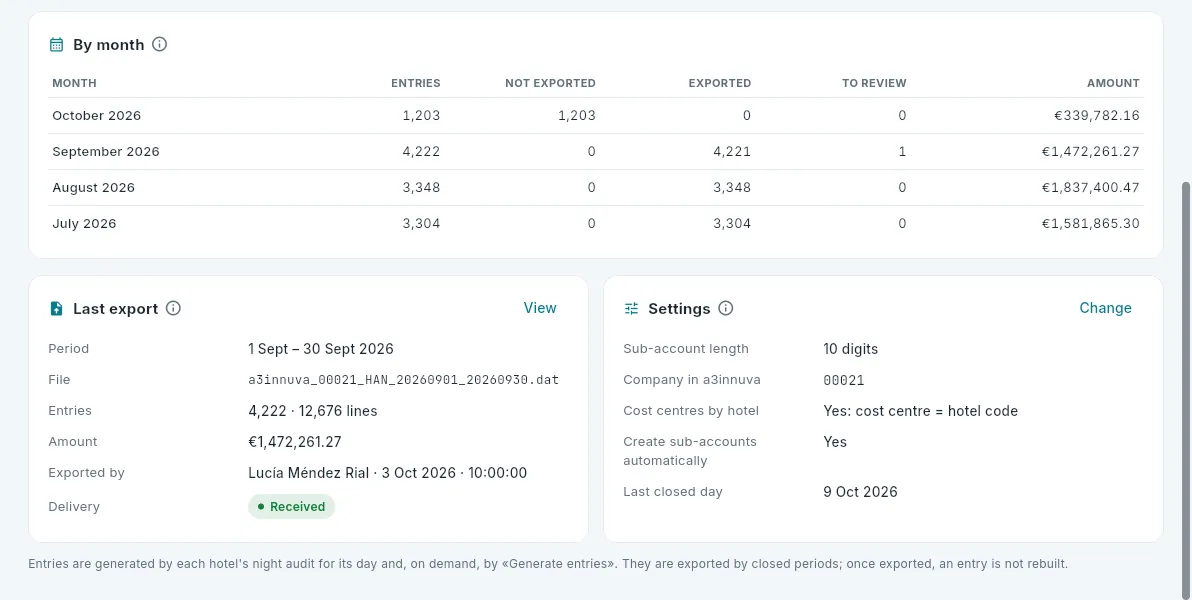 123
123
- 1By month: each month’s entries, not exported, exported and to review. A closed month should have everything exported.
- 2The last export: its period, its file, how many entries and lines it had, who did it and its delivery to a3innuva. View opens its record.
- 3How the company keeps its accounts and the last closed day, the last one that can be exported. Change takes you to Settings.
#Generating the entries
Normally there is nothing to do: each hotel’s night audit generates the entries for its day when it closes it (see Front desk). Generate entries is for rebuilding a period on demand; for example, after changing a mapping.
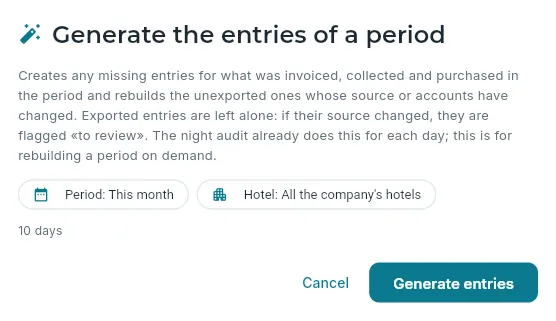 123
123
- 1The period: this month, last month, the quarter, the financial year or other dates (up to today).
- 2All the company’s hotels or just one.
- 3Generate entries: when it finishes, it tells you what it has done.
The generation compares, source by source, what should exist with what does:
- Whatever is missing is created, numbered per company and financial year in date order.
- Anything not exported whose source or accounts have changed is rebuilt with the same number; anything that no longer makes an entry (a cancelled payment, a reopened till that now balances) is deleted. That is why there may be a gap in the numbering: the final number is given by a3innuva on import.
- Anything exported is never touched. If its source changed, it is flagged to review.
- The sub-accounts of customers with a tax ID, agencies and suppliers are created automatically the first time they are needed.
Generating the same thing twice duplicates nothing: each source has a single entry. When it finishes, the dialog tells you how many entries are new, how many were rebuilt, deleted or left unchanged, how many exported ones are now to review and which sub-accounts were created.
#The entries
Entries lists the company’s entries for the chosen period, most recent first.
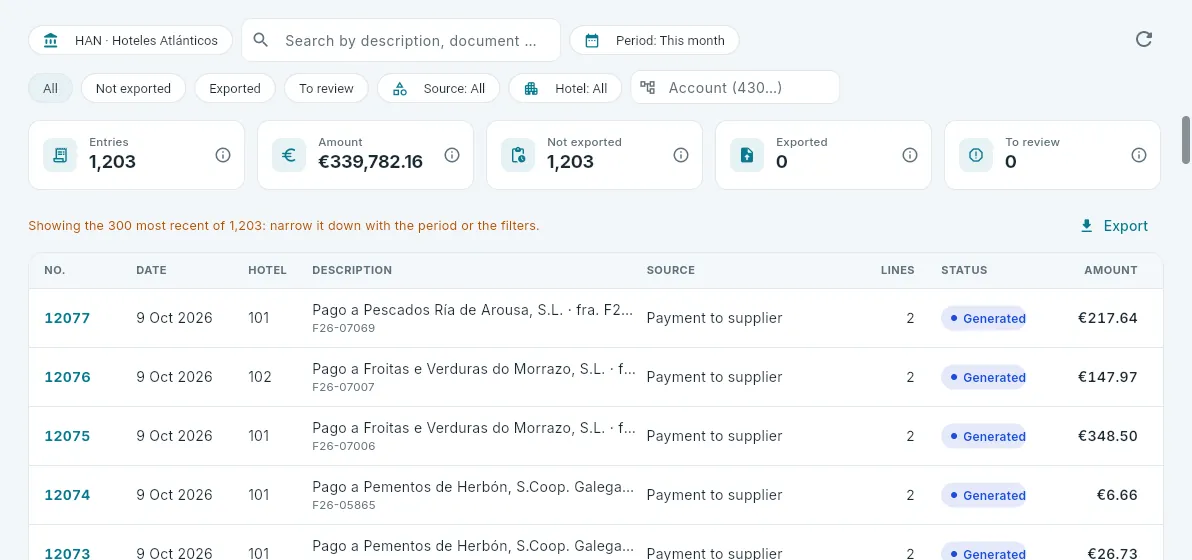 12345
12345
- 1Search by description, document or number (an invoice number brings up its entry, its payments and its advances).
- 2The period.
- 3The filters: status (not exported, exported, to review), source, hotel and account (“430” brings up all those that move a customer account).
- 4How many entries match the filters, for how much and in what status.
- 5The list in CSV.
Each row is an entry: number and financial year, date, hotel, description and document, source, how many lines it has, its status (generated, exported or to review) and its amount. Click it to open its record.
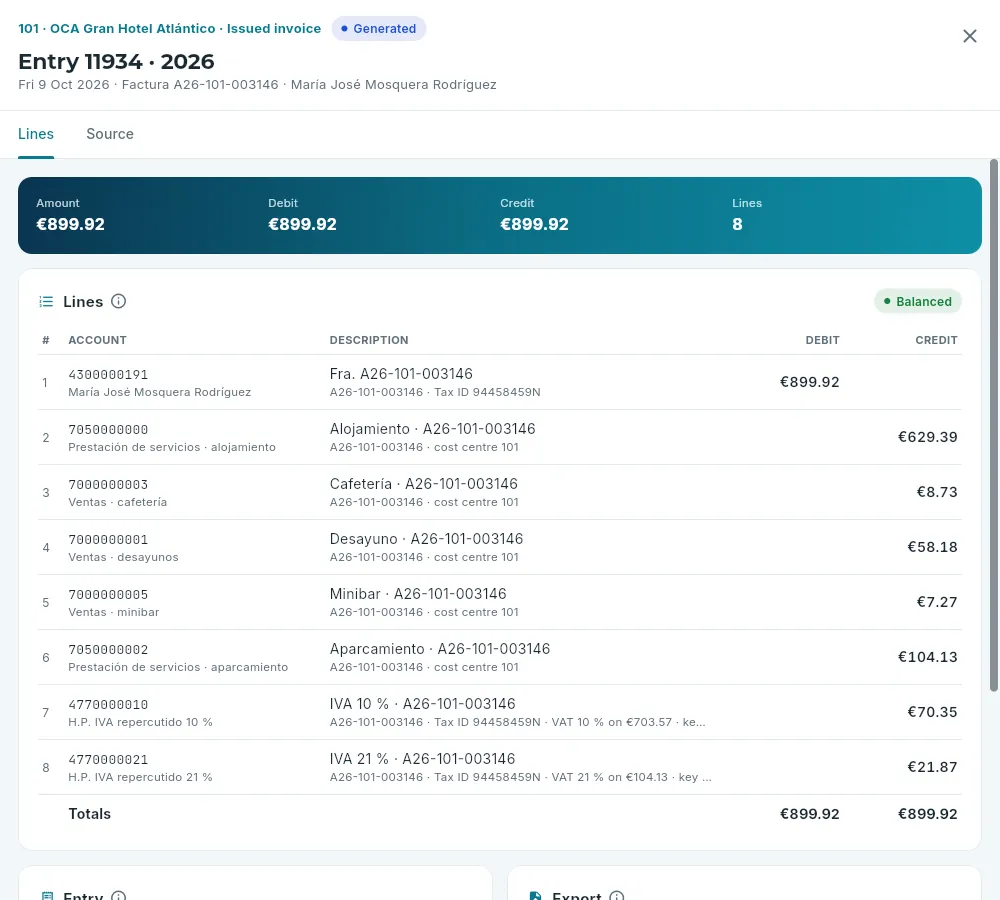 1234
1234
- 1The hotel, the source and the entry’s status.
- 2Its tabs: Lines and Source.
- 3Its lines: the customer (their 430 sub-account, by tax ID) debited with the total; the sales of each charge item and the VAT of each rate (with its taxable base and its SII key) credited.
- 4Balanced: the debit adds up to the same as the credit.
Below the lines, the entry’s details (date, hotel, document, when it was generated and whether it was rebuilt) and its export: until it is exported, it is rebuilt automatically if its source changes; once exported, it no longer is.
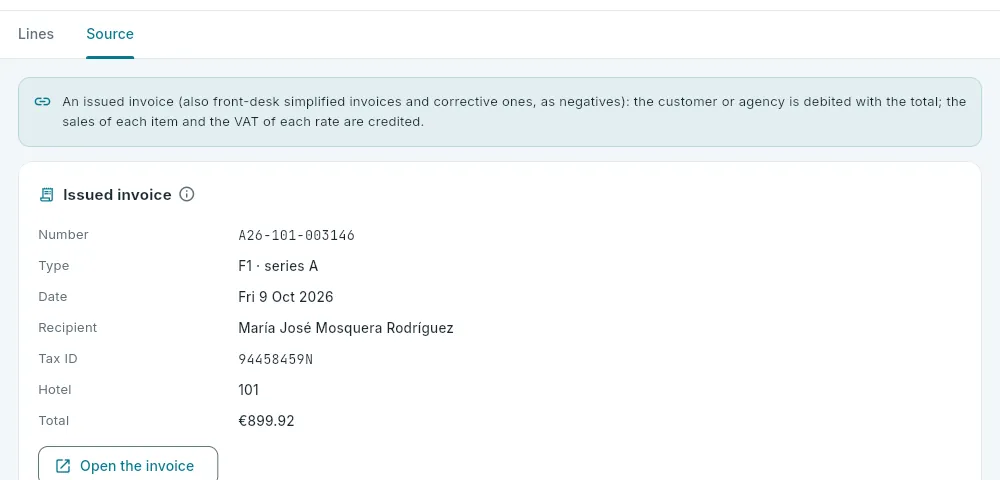 123
123
- 1What entry this type of source produces.
- 2The invoice as it was issued: number, type and series, recipient, tax ID, hotel and total.
- 3Open the invoice, with its lines, its payments and its SII or Verifactu record.
This is how each thing that happens at the hotel is recorded (in brackets, the PGC account):
| What happens | Debit | Credit |
|---|---|---|
| An invoice is issued (also front-desk simplified invoices; corrective ones, as negatives) | the customer or agency (430) for the total | the sales of each charge item (70…) and the output VAT of each rate (477) |
| A POS terminal’s tickets for a day are closed | the cash or bank account of each payment method (57…) | sales (70…) and VAT (477) |
| An invoice is paid | the cash or bank account of its payment method (57…) | the customer or agency (430) |
| A payment is taken with no invoice yet (an advance on a booking or a payment on account) | cash or bank (57…) | customer advances (438) |
| The invoice for what was paid in advance is issued (advances applied) | customer advances (438) | the customer (430) |
| A payment is refunded | customer advances (438) | cash or bank (57…) |
| Cash is paid into or taken out of the till | cash (570) or bank (572) | the other one |
| A till closes with a difference (only the cash difference) | a shortfall, to losses (659) | a surplus, to income (759) |
| A supplier invoice arrives | the purchases of each family (60… or 62…) and input VAT (472) | the supplier (400 or 410) |
| A supplier is paid | the supplier (400 or 410) | bank or cash (57…) |
#An entry to review
An exported entry is already in a3innuva, and the PMS does not rebuild it. If its source changes afterwards – a till is reopened and counted again, a payment is cancelled – the generation flags it to review: what was exported no longer matches what its source says today.
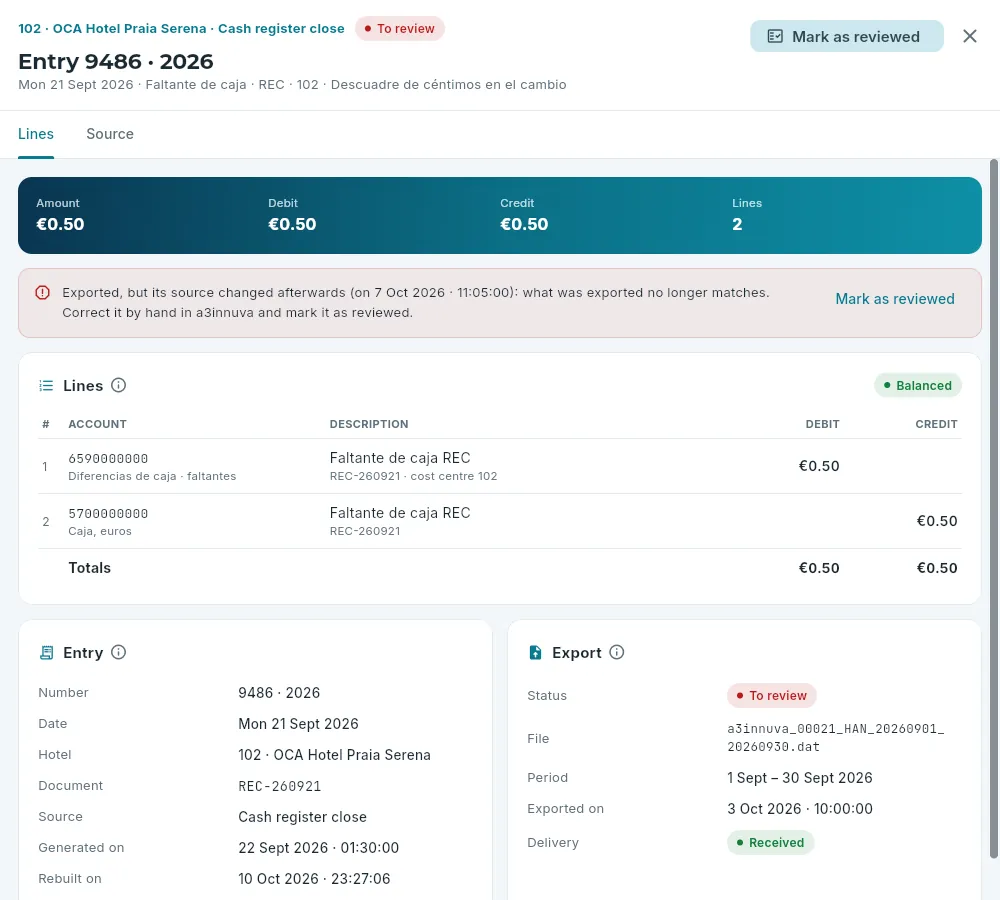 1234
1234
- 1The status: to review.
- 2Since when, and what to do.
- 3Mark as reviewed, once it has been corrected in a3innuva.
- 4Which export it went in, and its delivery.
In the Summary, click the entry under To review (or, in Entries, filter by To review).
On its Source tab, see what has changed: here, the till shift was recounted and no longer has a difference.
Correct the entry by hand in a3innuva (in this case, by cancelling it).
Go back to the record, click Mark as reviewed, type what was corrected and confirm.
#Exporting to a3innuva
Export prepares the file the accountants import into a3innuva. Only closed days are exported: anything from a day that is still open can change.
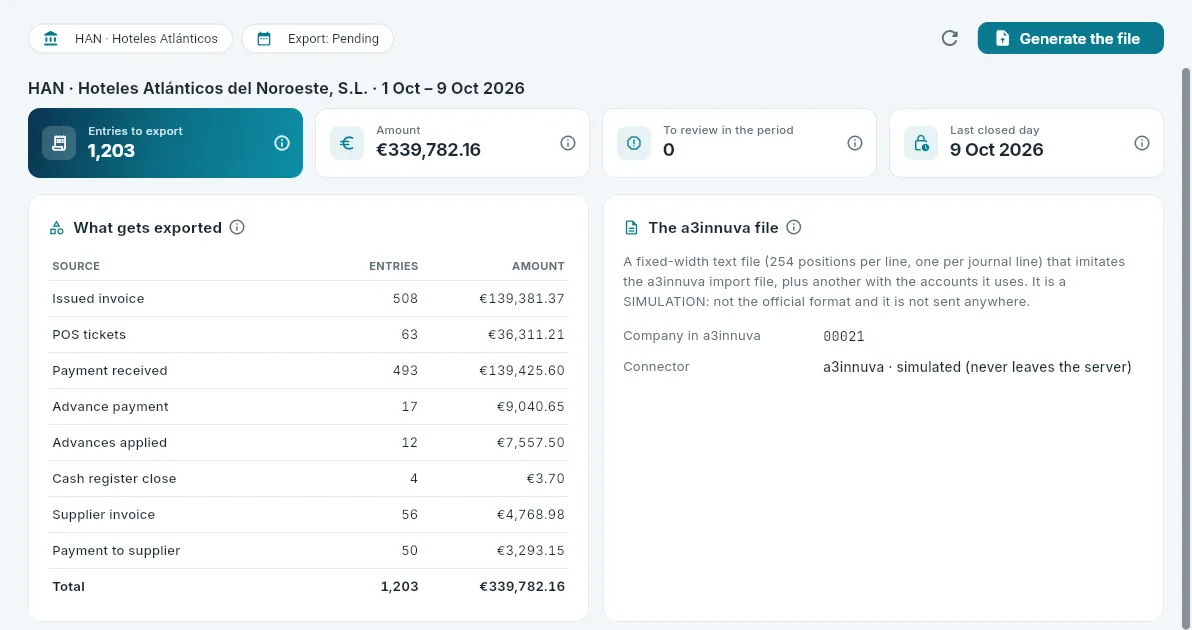 12345
12345
- 1The period: Pending (all the closed days not yet exported), last month, this month up to the last closed day or other dates.
- 2Generate the file.
- 3How many entries will go in and for how much, those in the period that are to review (they do not go in: they are already in a3innuva) and the last closed day.
- 4What gets exported, by source; each row opens its entries.
- 5What the file is like, the company in a3innuva and the connector (simulated).
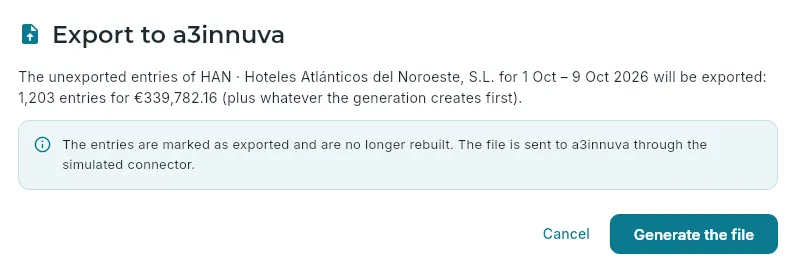 12
12
- 1On export, the entries become exported and are no longer rebuilt.
- 2Confirm with Generate the file.
In Export, choose the company (or one of its hotels at the top) and the period; Pending is the usual choice.
Check under What gets exported what is going in the file: each source opens its entries.
Click Generate the file and confirm.
Download both files (the entries file and the accounts file) with Download.
Before exporting, any missing entries for the period are generated, so there may be a few more than you saw. Below, in Exports, each export with its period, its file, how many entries and lines it had, for how much, who did it and its delivery; the icon on the right downloads it again. Click one to open its record.
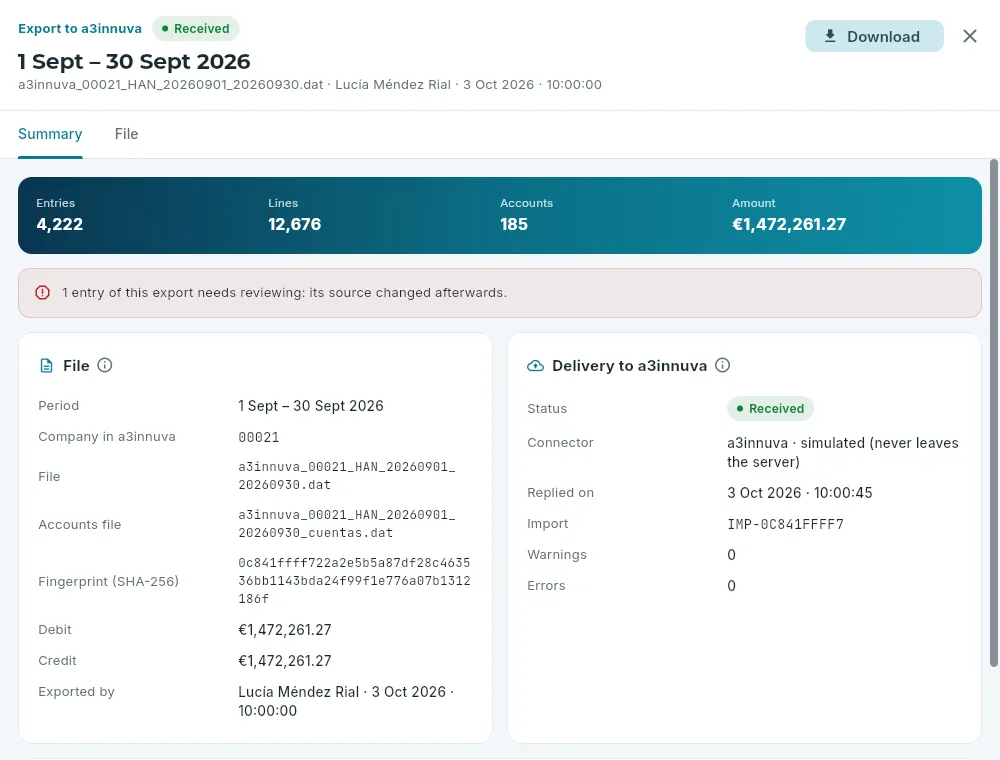 1234
1234
- 1Download both files again.
- 2If any of its entries is to review, it says so.
- 3The file: period, company, file names, its fingerprint (SHA-256, which identifies its contents) and the debit and credit, which are equal.
- 4The delivery: “Received”, with its import number and any warnings, or “Rejected”, with the errors.
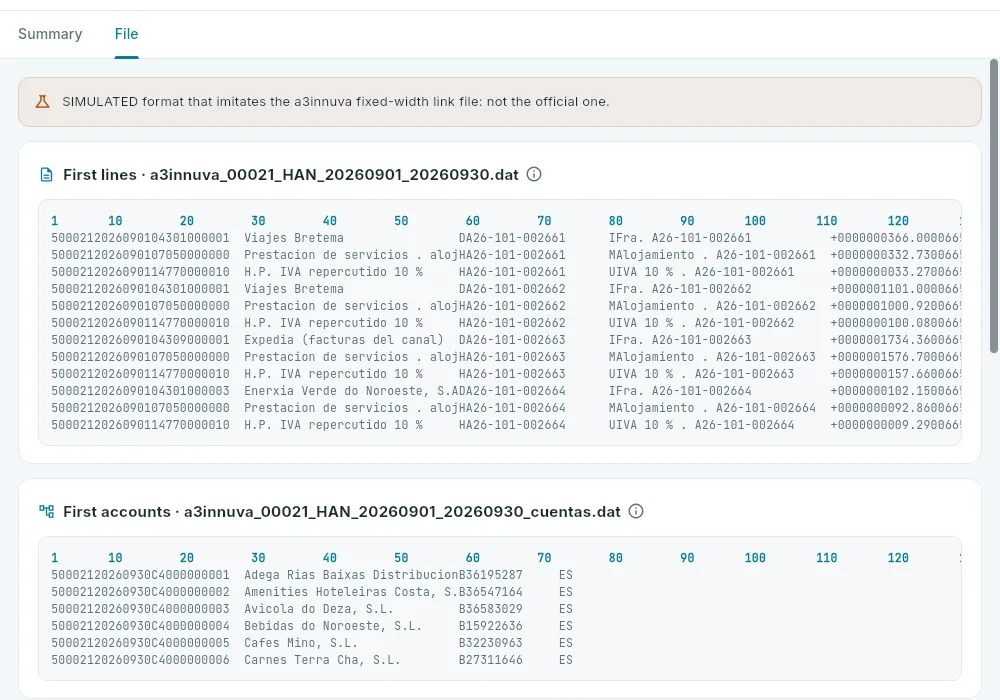 123
123
- 1A simulated format: it imitates the a3innuva link file, but it is not the official one.
- 2The first lines of the entries file, with the position ruler above: one 254-position line per journal line.
- 3The accounts file: the accounts the entries use, with their name and tax ID, so that a3innuva can add any it does not have.
#The chart of accounts, the ledger and the trial balance
Chart of accounts has two views: the company’s chart of accounts with what each account has moved in the period, and the trial balance.
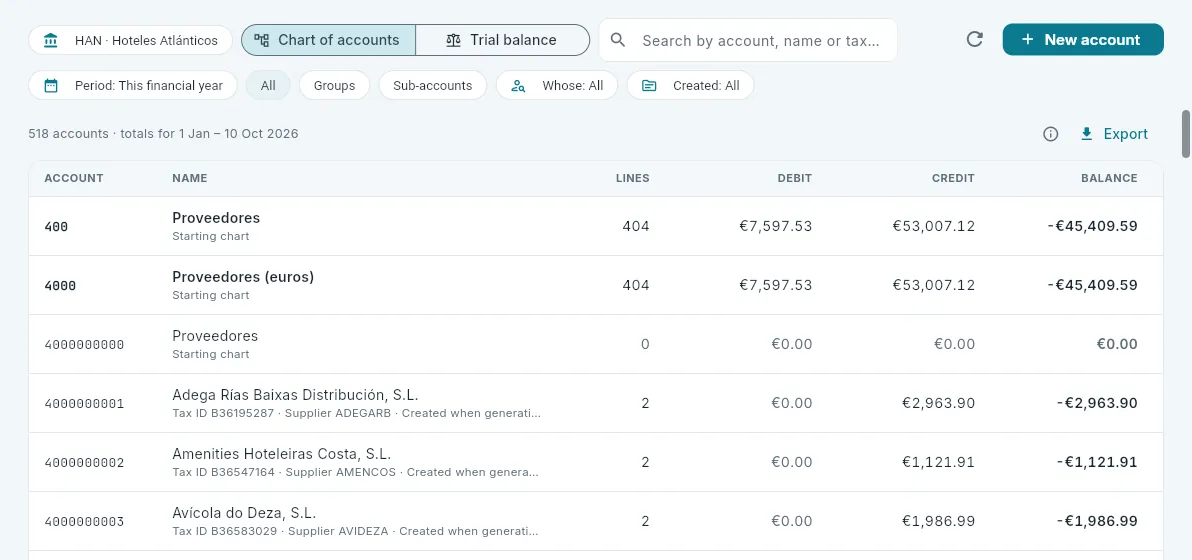 12345
12345
- 1The two views.
- 2Search by account, name or tax ID.
- 3New account, with the Configure accounting permission.
- 4The period for the totals, and the filters: groups or sub-accounts, whose sub-account it is (customer, agency, supplier) and how it was created.
- 5A supplier sub-account, with its tax ID, created automatically when generating: its lines, its debit, its credit and its balance. Click it to see its ledger.
The totals of a group (400) are those of all the accounts that start with it. Clicking an account opens its ledger: all its movements in the period, one per line, with the running balance.
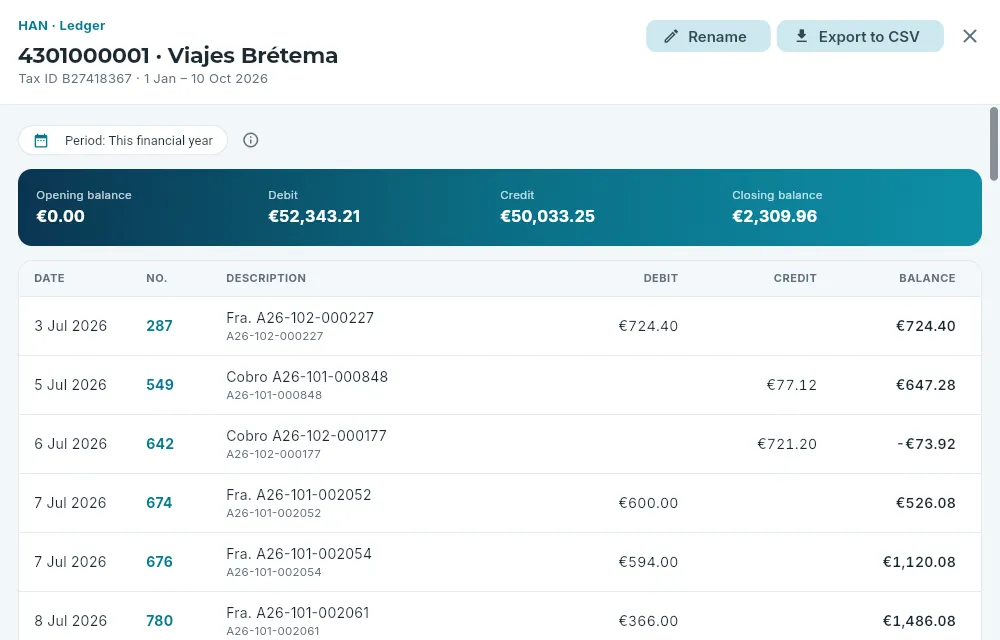 1234
1234
- 1Rename the account, and the ledger in CSV.
- 2The ledger’s period.
- 3The opening balance (the financial year’s balance up to the day before the period), the debit, the credit and the closing balance.
- 4Each movement: date, entry number, description, debit or credit and the balance. Click one to open its entry.
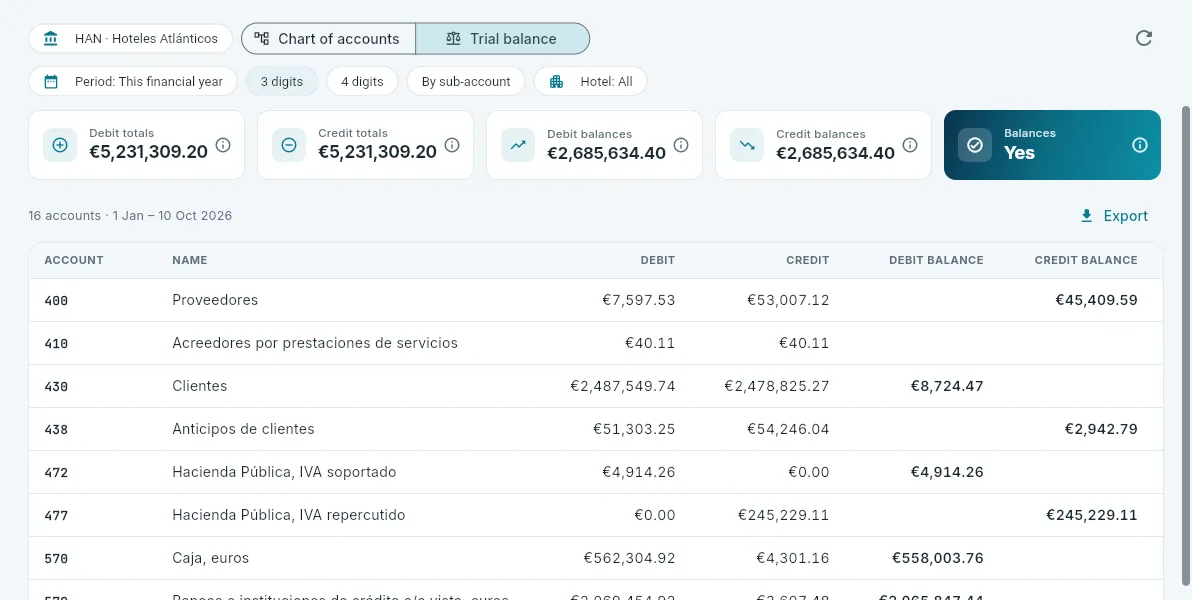 1234
1234
- 1The level: 3 or 4 digits or by sub-account.
- 2The whole company or one hotel (its lines).
- 3The debit and credit totals and the debit and credit balances.
- 4Balances: always “Yes”.
#Account mappings and settings
Settings (with the Configure accounting permission) decides which account each thing goes to. The account mappings assign an account to a payment method, a guest folio charge item, an item family, a purchase family or expense type, a store item, an agency, a supplier or a VAT rate. When an item has no mapping of its own, the next rule applies.
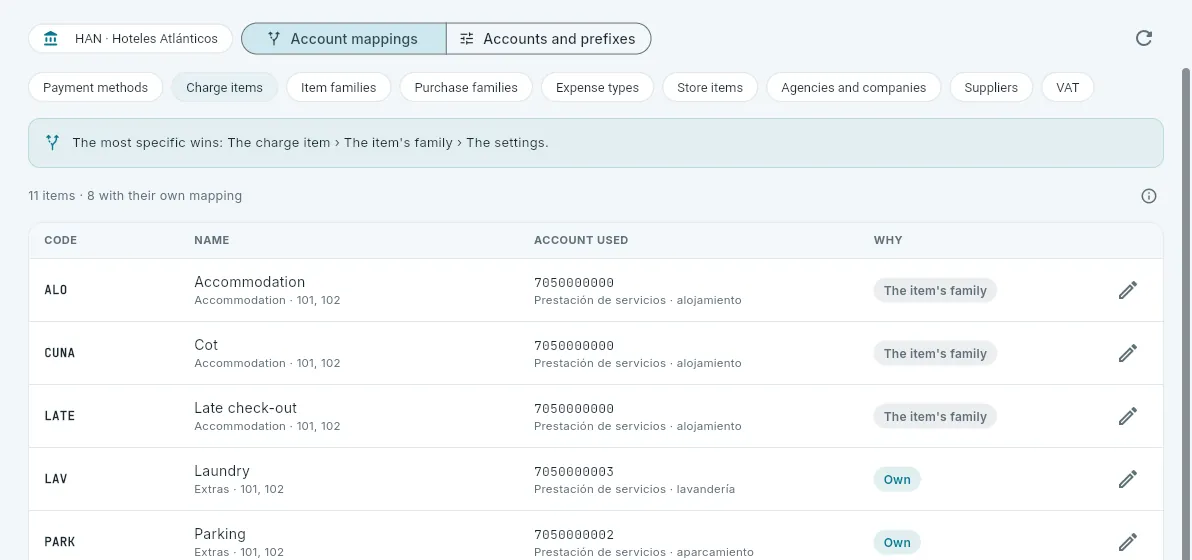 12345
12345
- 1The two views: account mappings and accounts and prefixes.
- 2What to look at: payment methods, charge items, families, purchases, store items, agencies, suppliers or VAT.
- 3The order of the rules: the most specific wins.
- 4Each item, the account the entry generation would use today and why: “Own” if it has its own mapping, or the rule that applies (here, its family’s).
- 5The pencil changes its account.
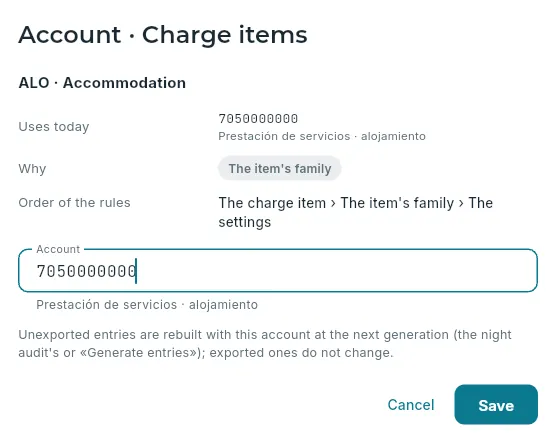 123
123
- 1The account it uses today, why, and the order of the rules.
- 2The new sub-account, with all its digits; if it is not in the chart, you give it a name and it is added.
- 3Save.
The order in which each account is decided:
| For | Wins, in this order |
|---|---|
| Sales | the charge item · the item’s family (accommodation, food and drink, extras, taxes, other) · default sales |
| Purchases | the store item · its family · the parent family · the expense type · default purchases |
| Payments | the payment method · cash (cash payments) or bank (the rest) |
| Agencies | its mapping · its sub-account · the generic agencies one |
| Suppliers | its mapping · the account on its purchasing record · its sub-account · the generic one |
| VAT | the rate’s mapping · the prefix plus the rate (4770000010, output VAT at 10 %) |
When a mapping changes, unexported entries are rebuilt with the new account at the next generation (the night audit’s or Generate entries); exported ones do not change and are not flagged to review.
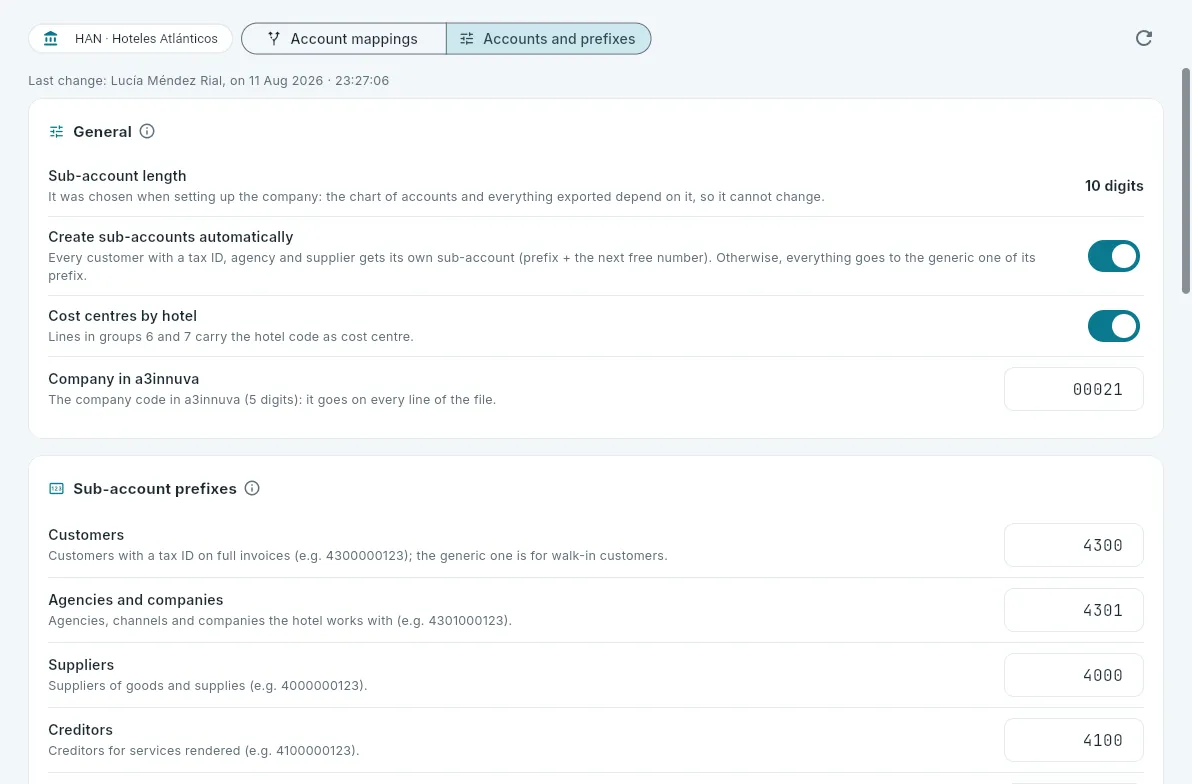 12345
12345
- 1The sub-account length (8 or 10 digits): it is chosen when setting up the company and cannot change afterwards. In the demo, Hoteles Atlánticos uses 10 and Duerming 8.
- 2Whether each customer with a tax ID, agency and supplier has its own sub-account or everything goes to the generic one.
- 3The cost centres: the hotel code as cost centre on the lines in groups 6 and 7.
- 4The company code in a3innuva, which goes on every line of the file.
- 5The sub-account prefixes; further down, the fixed accounts (advances, cash, bank, default sales and purchases, cash shortfalls and surpluses).
#What each role sees
#Frequently asked questions
Do I have to generate the entries every day? No: each hotel’s night audit generates them. Generate entries is for rebuilding a period on demand, for example after changing a mapping.
I corrected an invoice after exporting it. What happens to its entry? An issued invoice is not changed: it is corrected with a credit note. The credit note is another invoice, with its own negative entry, which will go in the next export. The exported entry is not touched.
Why is there a gap in the entry numbering? Because an unexported entry whose source no longer makes an entry (a cancelled payment, for example) is deleted. The final number is the one a3innuva gives on import.
Why can I not export yesterday? Because one of the company’s hotels has not closed that day yet: only closed days are exported. The Last closed day indicator tells you.
Why do POS tickets not have one entry each? Because there would be hundreds a day. They are summarised by terminal and day, as the SII allows for simplified invoices; from the entry you can open the first and the last ticket.
Does the PMS file the SII? No: for SII companies, the accountants file it from a3innuva with what has been exported. Verifactu, on the other hand, is sent by the PMS when each invoice is issued (see Legal obligations).
Why does the balance not match the accountants’ one? Because here the financial year starts at zero and only what goes through the PMS is there: payroll, taxes and depreciation are recorded in a3innuva.
Departments
Housekeeping
The cleaning status of each room, sharing out the work among the room attendants, the day’s work report, faults, lost property, the amenities to prepare (cots, extra beds…) and each hotel’s housekeeping rules.
Housekeeping is the section for the housekeeping department (the one that cleans and prepares the rooms): it shows the state of each room – dirty, being cleaned, to inspect or clean – and organises the day’s work: what needs doing in each room, who does it, how long it took and what was restocked. It also handles maintenance faults and lost property.
It is the housekeeper’s screen (the head of housekeeping) on the computer. Room attendants work with the housekeeping app on their mobile or on a shared tablet, and everything they do shows up here instantly (see Room attendant and Executive housekeeper). Housekeeping works with one hotel at a time: if the selector in the top bar shows all your hotels, the screen asks you to choose one.
- 1The guest checks outWith the check-out, the room becomes dirty and its task becomes a departure clean.
- 2Being cleanedThe room attendant starts the task in the housekeeping app.
- 3To inspectWhen it is finished, if the hotel inspects rooms, the housekeeper checks the room.
- 4CleanReady to give out: the front desk can now check guests into it.
#The room board
The first tab, Board, is the housekeeper’s board: all the hotel’s rooms by floor, each one with its cleaning status, whether it is vacant or occupied, who is leaving or arriving today, the guest, the amenities to prepare, the day’s task and who has it.
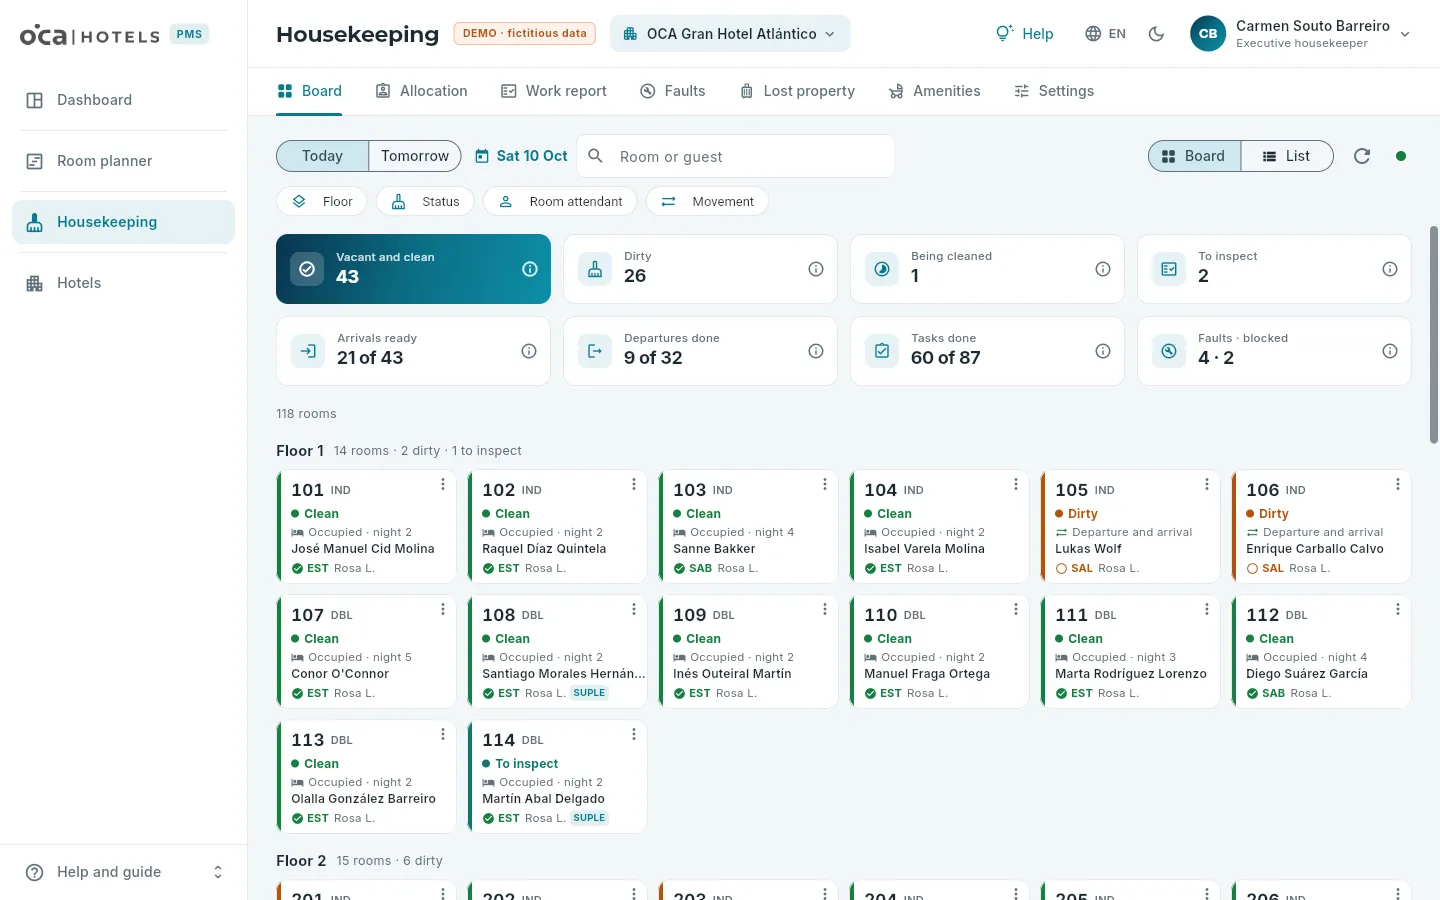 1234567
- 1The Housekeeping tabs: board, allocation, work report, faults, lost property, amenities and settings.
- 2Today or tomorrow (expected arrivals and departures) and search by room or guest.
- 3The filters: by floor, by cleaning status, by room attendant and by movement (departure, arrival, stayover, vacant).
- 4As a board or a list (the list can be exported), refresh and the green live dot.
- 5The day’s indicators, each with its ⓘ.
- 6A room: number and type, cleaning status, occupancy and movement, guest, task with who has it, and amenities. Click it to open its record.
- 7Its actions, depending on its status and your role.
- The colour of each room is that of its cleaning status: orange dirty, blue being cleaned, teal to inspect and green clean; in red, blocked (off sale because of a fault or building work). The colour never appears on its own: it always comes with its label.
- Occupancy and movement: vacant or occupied, and whether someone is leaving today, someone is arriving, there is a departure and arrival (changeover day, the most urgent) or the guest is staying on, with which night they are on.
- The day’s task: the code of its type of cleaning (SAL, departure; EST, stayover; SAB, linen change; REP, touch-up…), its status and the initial of whoever has it. With amenities to prepare (cot, extra bed, high chair…), a label.
- Today or tomorrow. Tomorrow shows the expected arrivals and departures with the current cleaning status: it helps you plan the work ahead.
#The room record
Clicking a room opens its record on the right: everything you need to know about it today and, in History, every change of its cleaning status with the real time, who made it and where it came from (the room attendant’s task, the inspection, the guest’s check-out, the night audit…), its tasks over the last 30 days, its faults and the items found in it.
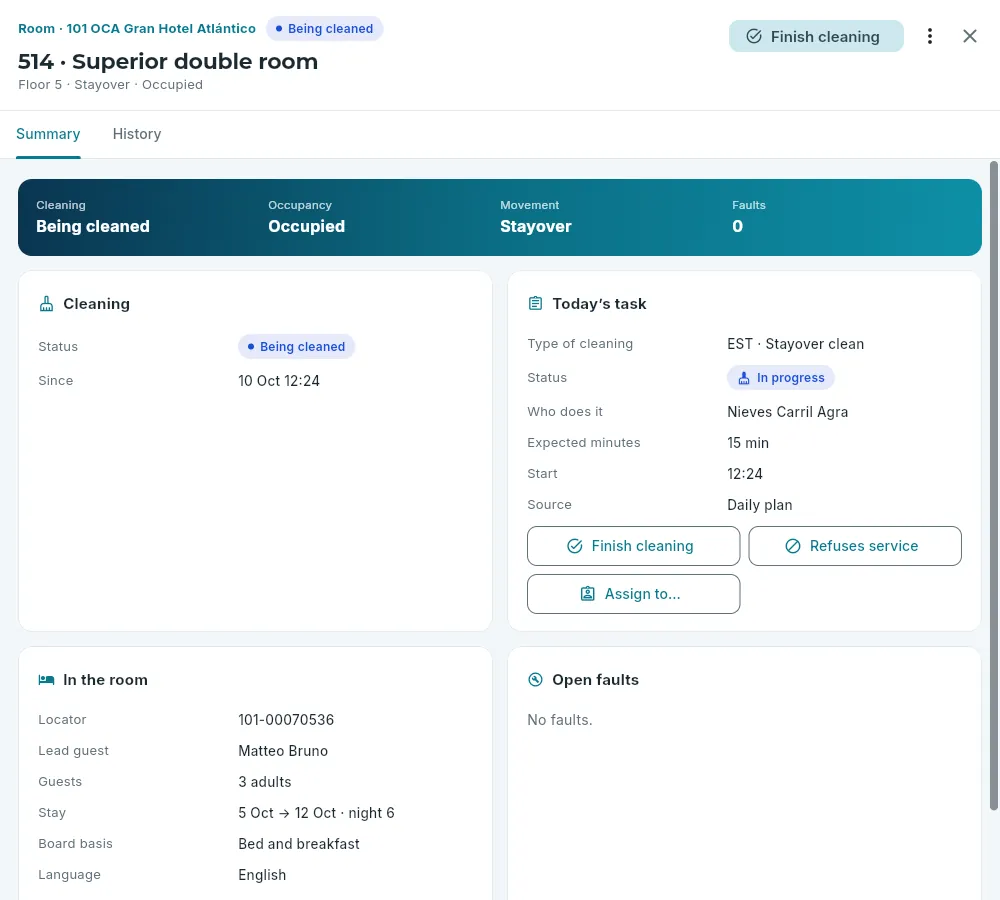 1234567
- 1The room, its type and floor, and its cleaning status.
- 2The action that is due now and More actions.
- 3Summary and History.
- 4The cleaning: the status and since when.
- 5Who is staying, leaving or arriving: booking, guests, stay, board, language and amenities to prepare.
- 6The day’s task: the type of cleaning, its status, who is doing it, the expected minutes and the start time, with its actions.
- 7Its open faults.
From each room’s menu (the three dots on its card) or from its record you can do everything that applies to it, depending on its status and your role:
| Action | What for |
|---|---|
| Inspect | Pass a room the room attendant has finished or send it back with a touch-up (see below). |
| Change the cleaning status | Set the status by hand: for example, clean if it has been prepared without a task. Marking it clean closes its open tasks. |
| New task | A task that was not in the plan: a deep clean, a touch-up, an arrival set-up… |
| Assign to… | Pass the task to someone else, or leave it unassigned. |
| Start cleaning, Finish cleaning, Do not disturb, Refuses service | The same as the room attendant does in the housekeeping app, in case the housekeeper records it. |
| Amenities… | The cots, extra beds… for whoever is arriving (see Amenities to prepare). |
| Report a fault, Record lost property | They open the report for that room (see below). |
| Record and history, Open the booking | The room’s record and the booking record of whoever is in it. |
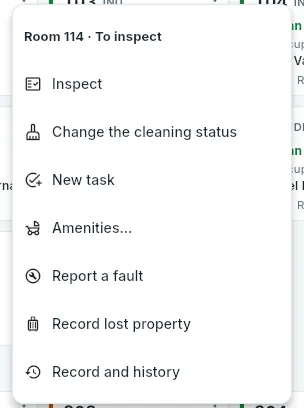 123
123
- 1Inspect: the main action for a finished room.
- 2Change the cleaning status, create a task and the amenities.
- 3Report a fault or lost property.
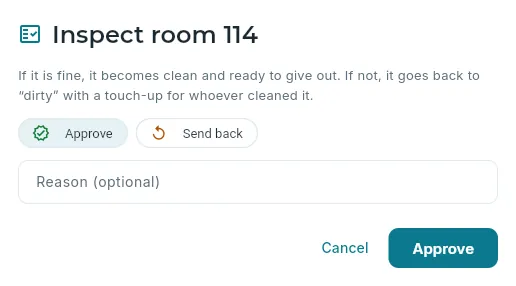 12
12
- 1Pass it or send it back.
- 2When sending it back, what needs a touch-up: the room attendant will see it.
On the Board, filter by Status → To inspect or look at the To inspect indicator. Inspect those with an arrival first.
Open the room’s menu (the three dots) and click Inspect.
If it is fine, click Approve. If not, choose Send back, type what needs a touch-up and click Send back.
#Allocating the work
Allocation has a column for each room attendant with their tasks for the day in the order they will do them, and another for Unassigned with what nobody has. In each person’s header, their tasks done, their workload (the expected minutes against their shift) and, if they are cleaning, which room they are in.
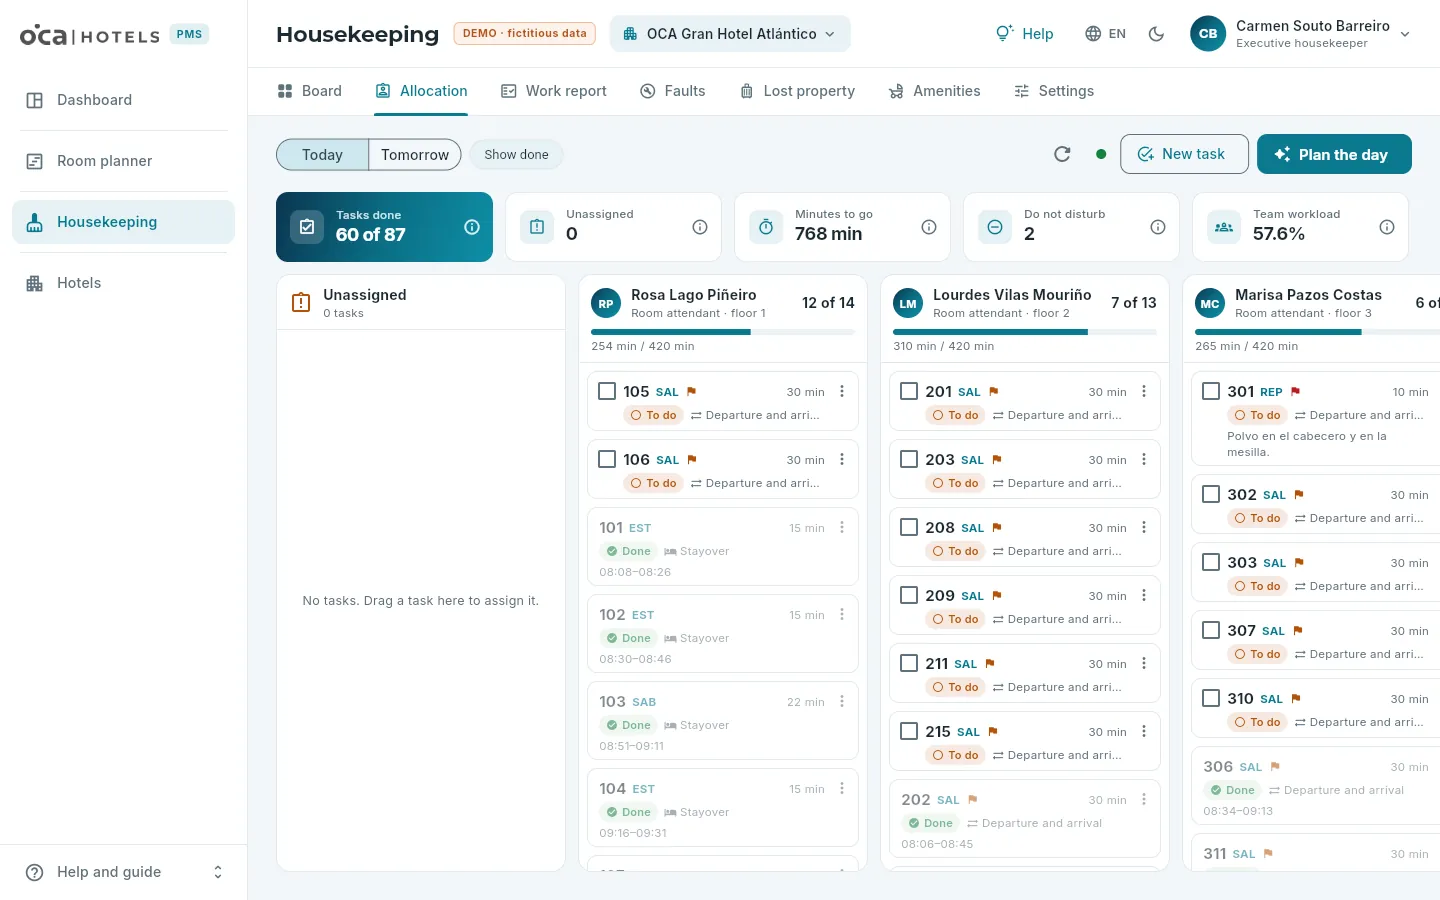 123456
- 1Plan the day and New task.
- 2Also show tasks already done.
- 3Tasks done, unassigned, minutes to go, “do not disturb” and the team workload, each with its ⓘ.
- 4Unassigned: what nobody has. Drag a task to a person’s column to give it to them.
- 5Each room attendant: their floor, how many tasks they have done and their workload against their shift; the blue icon, the room they are cleaning.
- 6Each task: room, type of cleaning, minutes, status and movement; the flag, high priority. The checkbox selects it so that several can be assigned at once.
- Assigning a task means dragging its card to someone else’s column (or to Unassigned). Without dragging – with the keyboard, a screen reader or on a mobile –, tick the tasks’ checkboxes and click Assign to…, or use the card’s menu.
- The order of each column is the working order: priority tasks first (departures with an arrival the same day), then by floor.
- New task creates a task by hand: the room, the type of cleaning, who does it, the priority and some notes.
- A task that is not needed is cancelled from its menu, with a reason: it no longer counts in the allocation or the work report.
- Tomorrow shows the allocation already made for tomorrow: the night audit leaves it ready if the hotel has the automatic plan.
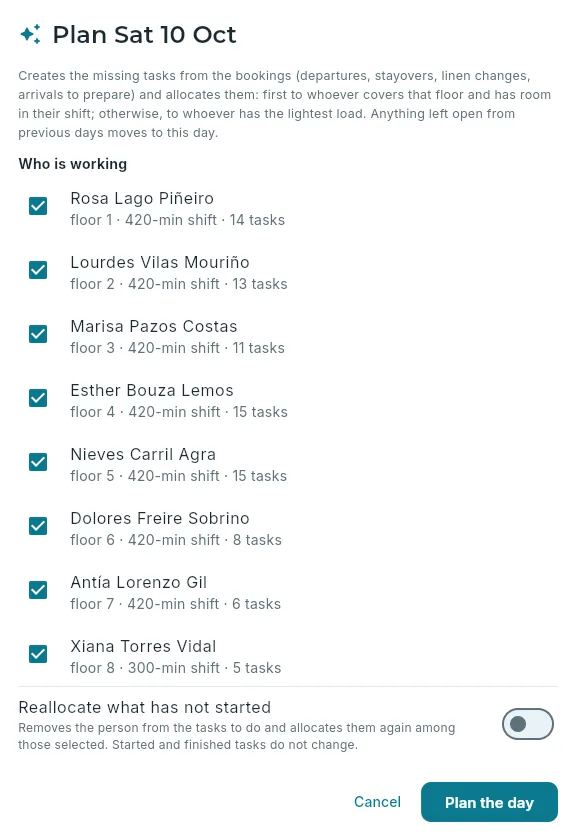 123
123
- 1What it does: creates any missing tasks from the bookings and allocates them.
- 2Who is working today: the active room attendants, with their floor, their shift and their tasks. Untick anyone who has the day off.
- 3Reallocate what nobody has started (for example, if someone leaves mid-morning).
In Allocation, click Plan the day.
Untick the people who are not working today.
If you want to reallocate everything (that has not been started), switch on Reallocate what has not started.
Click Plan the day.
#The work report
Work report is what was done on a day, person by person: each task with its start and end time, the expected and actual minutes, the items restocked, removed or consumed, the “do not disturb” attempts and the room attendant’s notes. Today’s report updates itself; those for previous days stay as they were at the night audit.
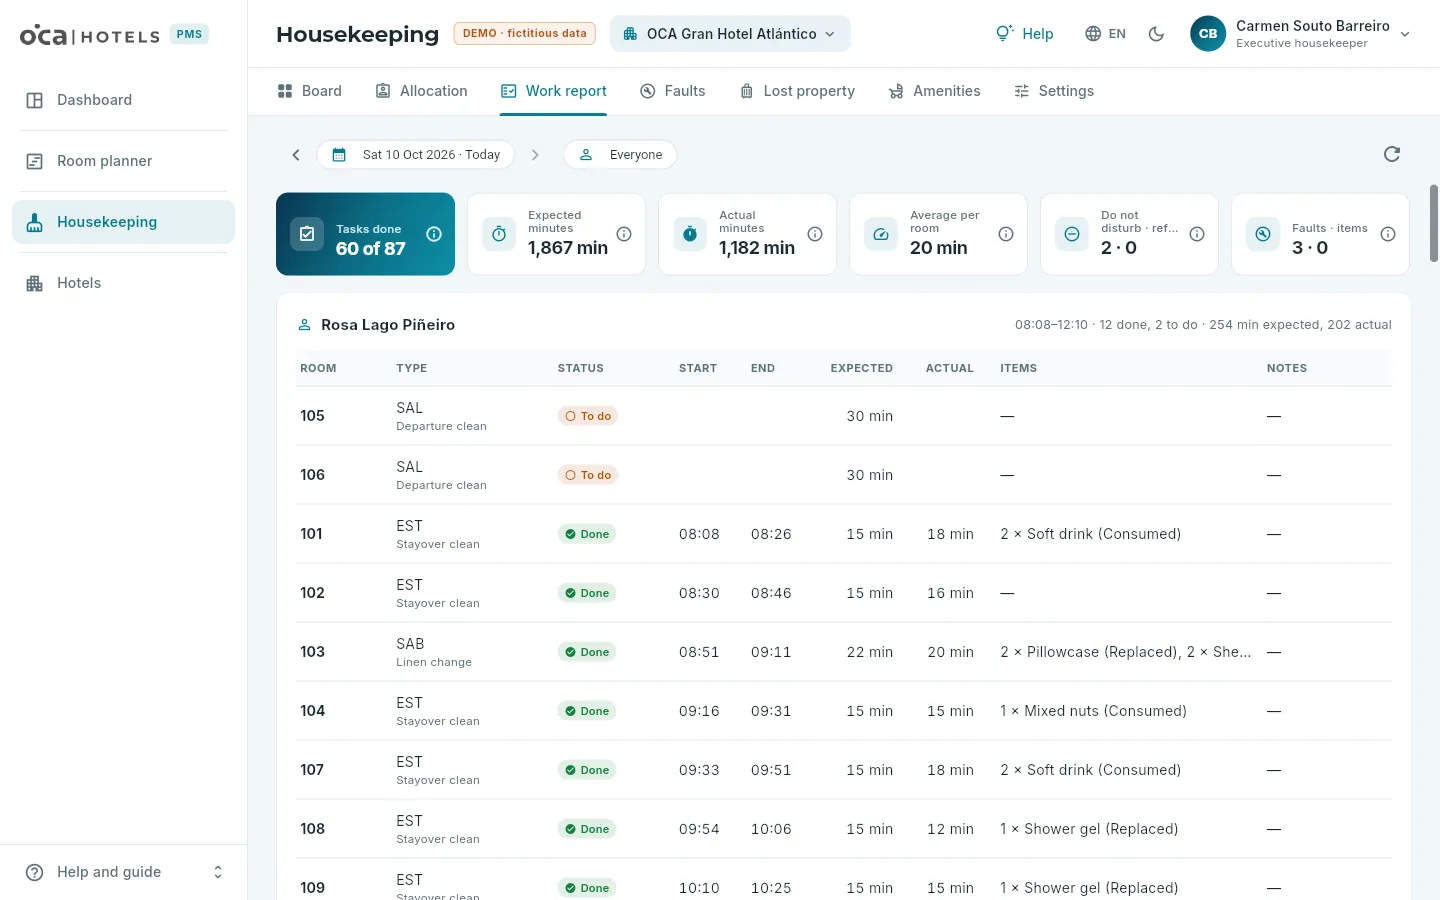 12345
12345
- 1The report’s day (any past day or today).
- 2Everyone or one person.
- 3The day’s summary: tasks done, expected and actual minutes, average per room, “do not disturb” and refused, faults and items.
- 4The report for each person, with their hours and their summary.
- 5Each task: type, status, start and end, expected and actual minutes, items and notes.
At the end of the report, Items of the day adds up what was restocked, what was removed and what was taken from the minibar (with the charges posted to each guest’s folio): it is what needs to be ordered from the linen room and the stores. The actual minutes run from the start time to the end time of each task, the real time on the room attendant’s mobile even if it was sent later without a connection. The export button at the bottom downloads the report as CSV.
#Faults
Faults is the list of what needs fixing: in a room or in a public area (a corridor, the lift, the café…), with its category (plumbing, electrical, heating and air conditioning…), its priority and its status: open, in progress (someone is fixing it), fixed or cancelled. A fault can take the room off sale (block it) until it is fixed.
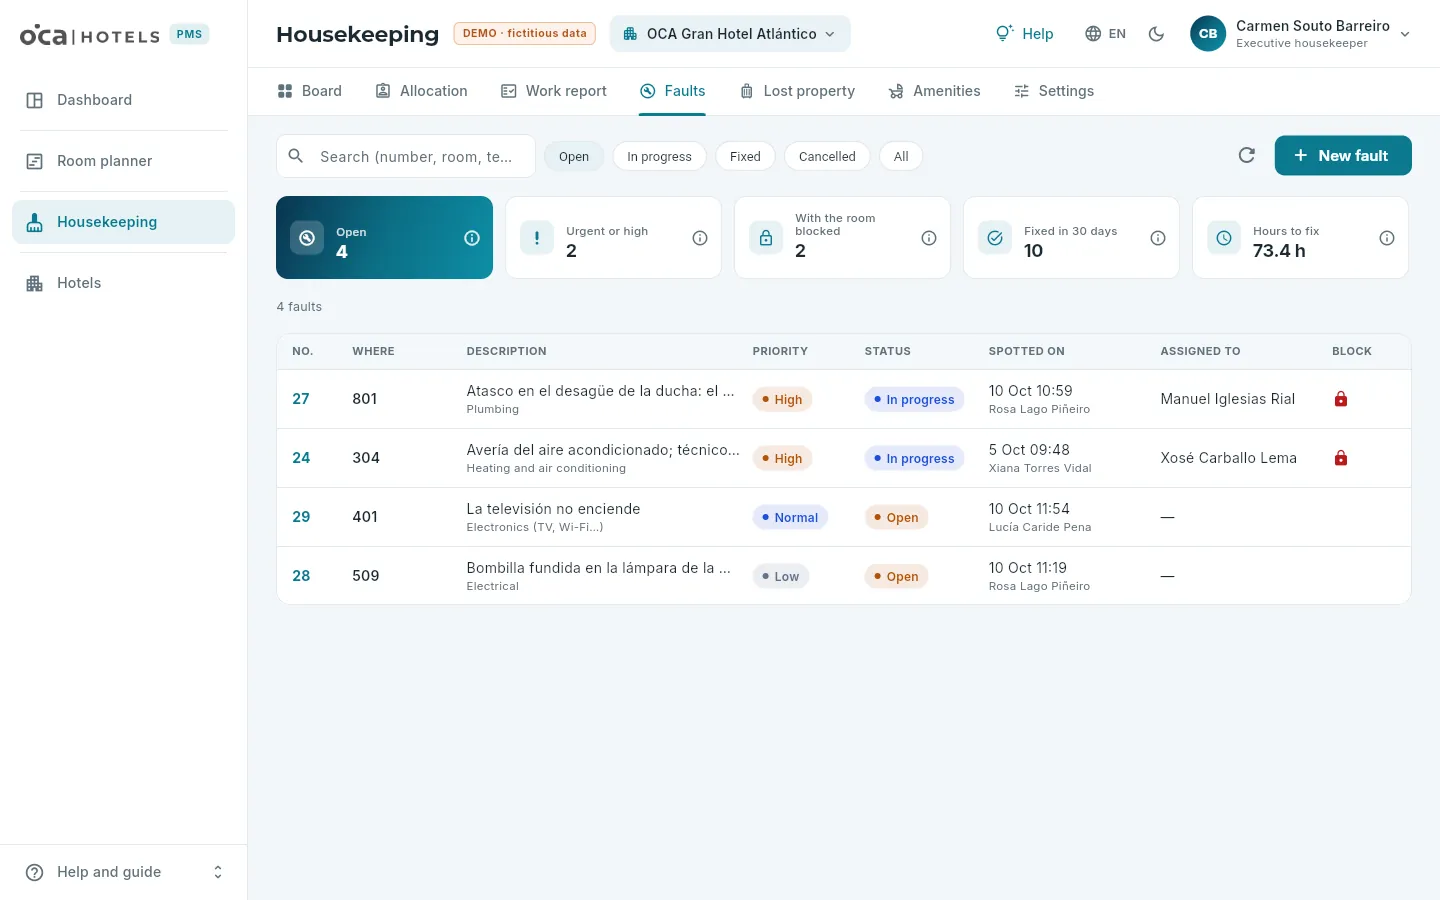 12345
12345
- 1Search by number, room or text.
- 2The open ones (open and in progress), in progress, fixed, cancelled or all.
- 3New fault.
- 4Open, urgent or high, with the room blocked, fixed in 30 days and the average time to fix them.
- 5Each fault: number, where, what is wrong, priority, status, when and who spotted it, who it is assigned to and the padlock if it blocks the room. Click it to open it.
 123
123
- 1Fix it, change its priority and who it is assigned to, and more actions: start the repair, a note, block or unblock the room, cancel it.
- 2What is wrong, where, when and who spotted it, and who is fixing it.
- 3The block: from when until when the room is off sale.
 123
123
- 1In a room or in a public area.
- 2The category and the priority: urgent faults email maintenance.
- 3Take the room off sale: it blocks it for those nights.
In Faults, open the fault.
When the repair starts, More actions → Start the repair (it moves to “in progress”). The technician’s notes are added with Add a note.
When it is finished, click Fix, type what was done and, if the room was blocked, leave Put the room back on sale ticked.
Click Fix.
Faults are also reported from the housekeeping app, with a photo (the room attendant takes it with their mobile on the spot); from the computer they are added without a photo. An urgent fault emails the hotel’s maintenance team (in the demo, the capture mailbox).
#Lost property
Lost property keeps what is found in the hotel: what it is, where and when it was found, who found it and whose it may be. If it is found in a room, OCA PMS suggests the last stay in it as the owner (today’s or the one that has just checked out). Each item is kept until a date (the hotel sets the number of days) and ends up handed over, sent, donated or disposed of. Valuable items (jewellery, money, documents, electronics…) go to the reception safe.
 1234
1234
- 1Stored (and claimed), handed over, sent, donated, disposed of or all.
- 2Record an item.
- 3Stored, claimed, valuable, those expiring in 7 days and those returned in 30.
- 4Each item: what it is, where and when it was found, its status, the booking and how long it is kept; the diamond, valuable.
 123
123
- 1Hand over, it has been claimed and, in More actions, notify the guest, send, a note, donate or dispose of.
- 2What it is, where and when it was found and by whom.
- 3Whose it may be: the booking and its lead guest, and whether they have already been notified.
In Lost property, open the item.
If the guest does not know yet, More actions → Notify the guest: they receive an email with the “lost property” template, in their language.
When they ask for it, click It has been claimed: it is set aside.
When you hand it over in person, click Hand over and type who to (the name and, if you like, the ID document); if it is sent, More actions → Send, with the recipient and the address.
#Amenities to prepare
Some guests need something in the room: a cot, an extra bed, a high chair, a pillow menu… These are the hotel’s amenities; some have limited units (the hotel has six cots) and others do not. The cot for infants and the extra bed for anyone beyond the room’s standard occupancy are prepared even if nobody asks for them.
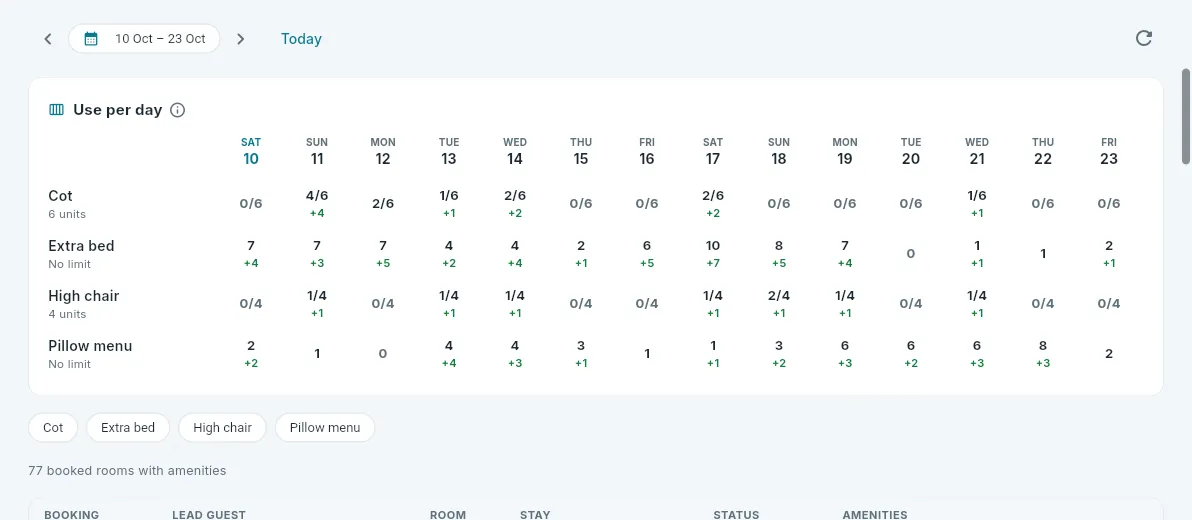 123
123
- 1The dates: two weeks, back or forward.
- 2Use per day: how many units of each amenity are needed each night against how many the hotel has; “+n”, those arriving that day. In red, the days with none left.
- 3Filter by amenity; below, the booked rooms with amenities and the pencil to change them.
A booked room’s amenities are changed from here (the pencil), from the room’s menu on the board, from Front desk or from the Rooms tab of the booking. Before saving you can see how many are left on the tightest night; if a limited amenity is all taken on any night of the stay, the database will not let you add it and says which day is short.
#Housekeeping settings
Each hotel works its own way, and in OCA PMS those are options, not different software. In Settings (only for whoever runs housekeeping: the housekeeper and management) you will find the hotel’s housekeeping rules, the staff and the catalogues.
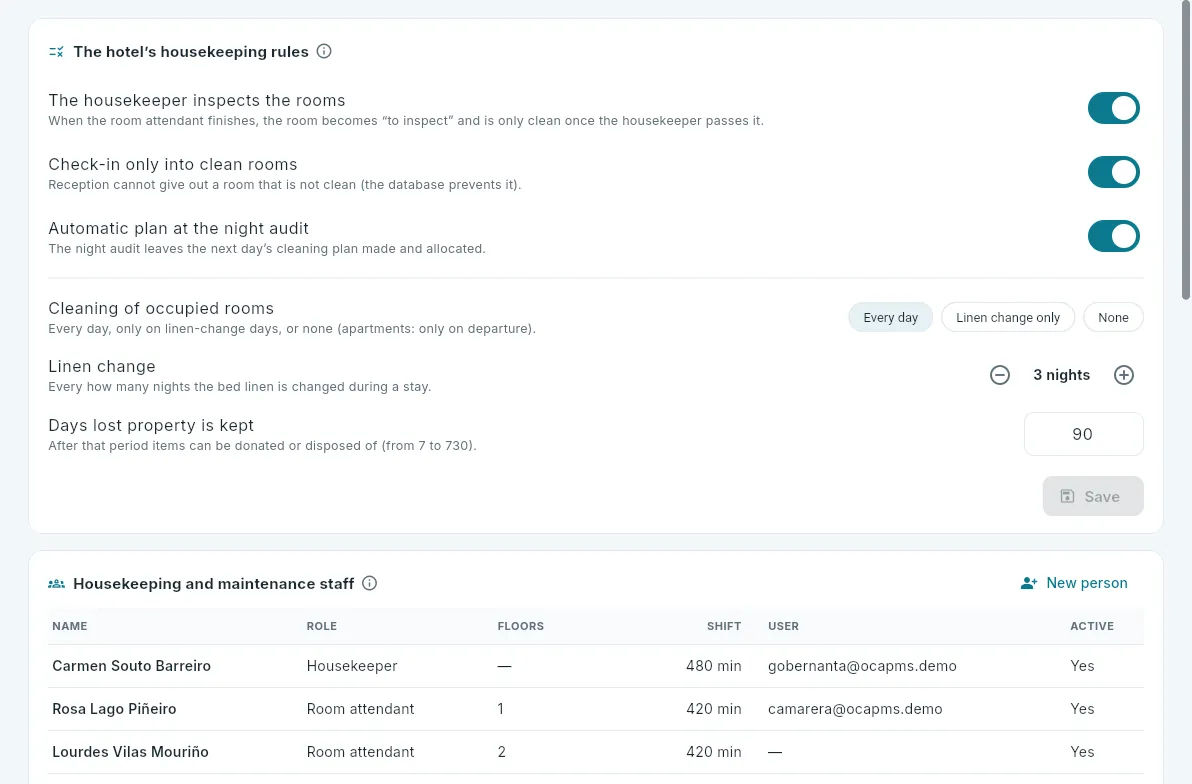 123456
- 1Housekeeper’s inspection: a finished room stays “to inspect” until it is passed.
- 2Check-in only into clean rooms: the front desk cannot give out a room that has not been cleaned (the database prevents it).
- 3Automatic plan: the night audit leaves tomorrow’s plan made and allocated.
- 4Cleaning of occupied rooms (every day, linen change only or none) and every how many nights the bed linen is changed.
- 5The days lost property is kept.
- 6The staff: role, floors usually covered, shift, whether they have a user and whether they are active.
- The staff: each housekeeping and maintenance person, with their role, the floors they usually cover (the allocation gives them those first), their shift in minutes (the workload is measured against it) and, if they have one, their user, so that they can see their list in the housekeeping app. Inactive staff are left out of the allocation, but their history is kept.
- The catalogues, further down: the types of cleaning (what each one is used for and its minutes; the plan picks the active type for each use), the items (linen, toiletries and minibar, which is charged with its folio charge code) and the amenities (with the units the hotel has or with no limit).
Each change is recorded in the event log (which options changed, not their values). This is how the demo hotels are set up:
| Hotel | Inspection | Occupied rooms | Check-in only into clean rooms | Lost property |
|---|---|---|---|---|
| 101 | yes | every day; linen every 3 nights | yes | 90 days |
| 102 | no | every day; linen every 4 nights | no | 120 days |
| 201 | no | linen change only | no | 30 days |
| 202 | no | none (only on departure) | yes | 60 days |
Housekeeping items and stock. Each amenity and each minibar item is linked to its stock item (in Purchasing and stock): when a room is finished, what the room attendant records as restocked leaves the hotel’s housekeeping storeroom and what was taken from the minibar, the minibar one (or the housekeeping one). That way the dry store knows how many gels or bottles are left and the order proposal restocks them without counting by hand. Linen is not linked: it goes to the laundry and comes back (anything ruined is written off as waste).
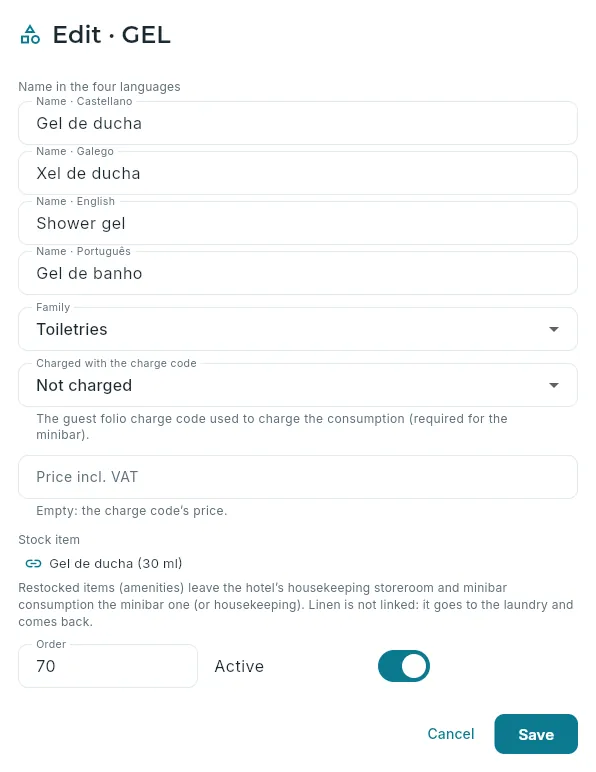 12
12
- 1The family and, if it is charged (the minibar), its charge code and price.
- 2The stock item that restocked or consumed items come from.
#What each role can do
Housekeeping is live: what a room attendant does on their mobile (start, finish, “do not disturb”), what the housekeeper inspects and what the front desk does (a check-out) shows up instantly on everyone’s board, allocation and work report. The green dot shows this. Each room’s cleaning status can also be seen in the Room planner and in Front desk.
Departments
POS
The restaurant, café and bar point of sale seen from the back office: tables live, sales, receipts with their Verifactu record, the terminals’ Z reports, the menu with its allergens and recipe costings, the floor plan, and the outlets, terminals and waiters.
Waiters sell with the POS app, on a tablet or a touch terminal at each outlet: they open tables, take orders, send order tickets to the kitchen and the bar, take payment and charge to rooms, also offline (see Waiter). The POS section of the back-office app is for the office: what is happening right now in the dining rooms, what has been sold, receipts and till closings, and how each hotel’s POS is set up (the menu, the floor plan, the terminals and the waiters).
It has seven tabs: Live, Sales, Receipts, Z reports, Menu, Floor plan and Outlets. Anything covering a period (sales, receipts and Z reports) follows the hotel selector in the top bar: with All my hotels, all of them together. Anything for one hotel (live, menu, floor plan and outlets) needs a single hotel: if all of them are selected at the top, the tab asks for the hotel as its first control.
- 1The table is openedThe waiter opens it on the POS; in the back office it shows up at once in Live.
- 2Order ticketsWhat is ordered goes to the kitchen and the bar by course: mains wait until they are “fired”.
- 3PaymentWith a receipt (the terminal’s simplified invoice) or by charging it to the room.
- 4Z reportAt the end of the shift, each terminal counts its till and runs its Z report.
#The POS live
Live is the hotel’s business day at its outlets, as it happens: what has been sold so far, the occupied tables and what each one has. It updates by itself whenever the waiters work on the POS (the green dot, live).
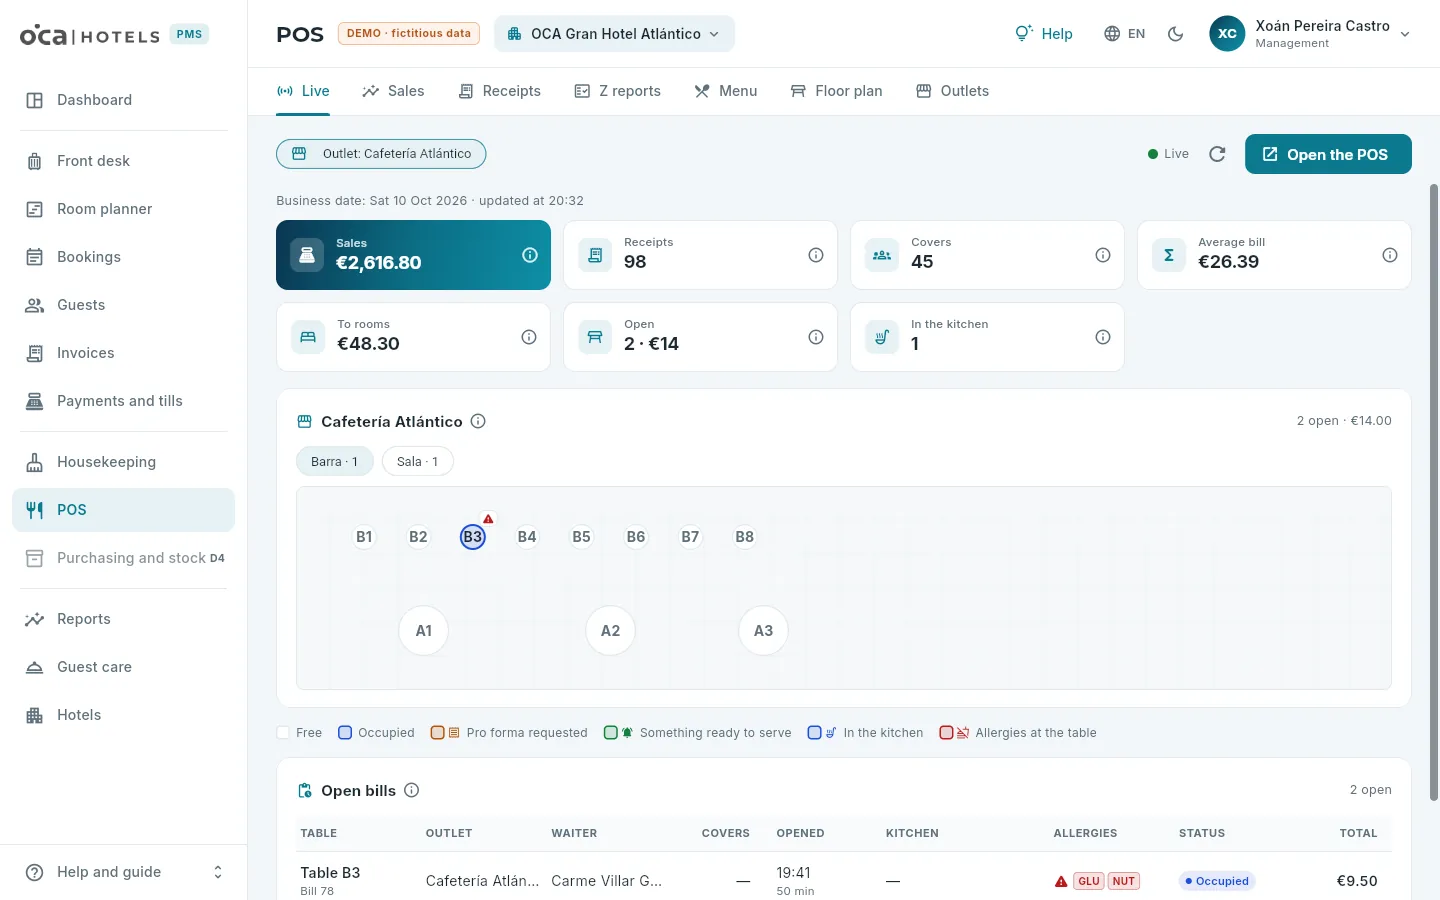 1234567
- 1The POS tabs.
- 2View one outlet or all of them (one below the other).
- 3Real time, refresh and Open the POS (the waiters’ app, in another tab; only if your role sells).
- 4The day’s indicators, each with its ⓘ.
- 5The outlet’s areas, with how many tables are open in each.
- 6An occupied table (this one, in red: someone at the table has an allergy): how long it has been open and, on the large ones, the total. Click it to see its bill.
- 7The colour key.
| Table | What it means |
|---|---|
| Free | No colour: it has no open bill. Inside, its name. |
| Occupied | Blue: it has an open bill. Inside, how long it has been open and, if it fits, the total. |
| Pro forma requested | Amber: the table has asked for the bill (the waiter printed the pro forma, the provisional bill before payment). |
| Something ready to serve | Green: the kitchen or the bar has something ready that the waiter has not served yet. |
| In the kitchen | The pot icon: there are dishes in the kitchen or at the bar, being prepared or waiting to be fired (see below). |
| Allergies at the table | Red: someone at the table has an allergy. An in-house guest’s come from their preferences by themselves (see Guests); the waiter marks the rest. |
Below the floor plan, what is open without a table: bar tabs and parked notes (a named bill that is waiting, such as someone coming back later). And at the end, the table of all open bills, the oldest at the top: the table, the outlet, who is serving it, the covers, when it was opened, what is in the kitchen, its allergies, its status and the total.
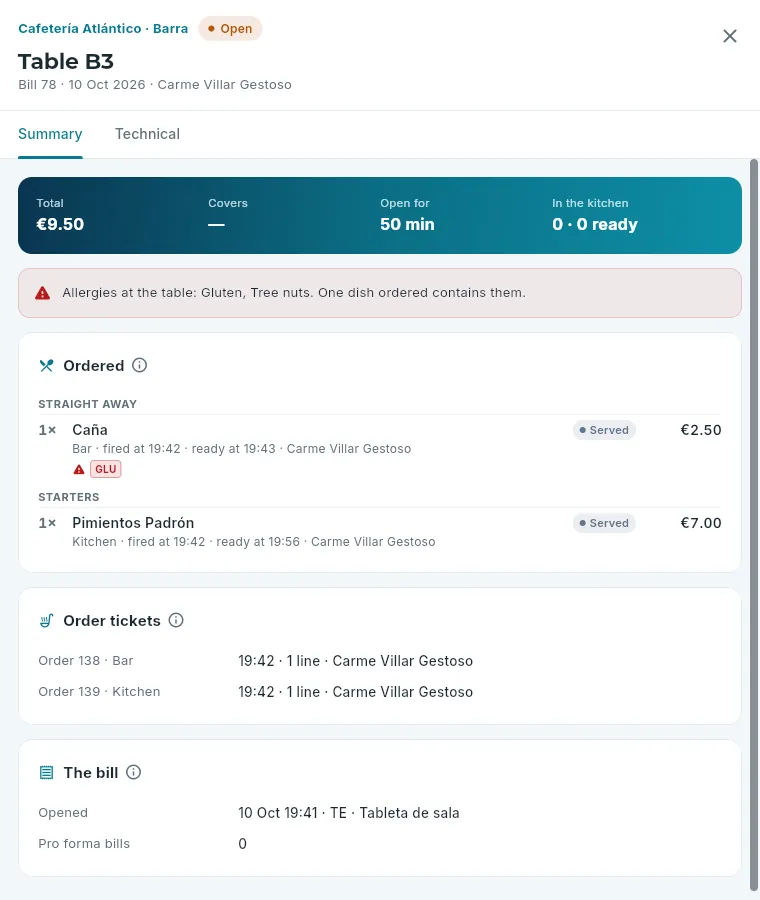 123456
- 1The outlet and area, the table, the bill number, the date and who is serving it; on the right, whether it is open or how it was closed.
- 2The total, covers, how long it has been open and what is in the kitchen.
- 3The table’s allergies and how many of the dishes ordered contain them.
- 4What has been ordered, by course, with the status of each line; a dish that contains one of the table’s allergens is flagged.
- 5The order tickets: each one sent to the kitchen or the bar.
- 6When and on which terminal it was opened and closed, the pro formas and, once it is closed, its receipt.
Courses. What is ordered is grouped into straight away (drinks and anything served as soon as it is ordered), starters, mains and desserts. When the order ticket is sent, the lowest course still missing goes out at once; the rest wait in the kitchen until the waiter fires them (gives the order to prepare them, as the table is finishing the previous course). Each line goes through Not sent → On hold → Fired → Ready to serve → Served; anything cancelled is struck through with its reason. In a café, everything goes out straight away.
A bill’s record is read-only: the waiter handles the bill on the POS. For a closed bill, View the receipt opens its invoice and, if it was charged to a room, Open the booking opens the guest’s booking.
#Sales
Sales summarises what was sold over a period: today, yesterday, the last 7 or 30 days, this month, last month or other dates (up to 400 days). Each bill counts on the business date it was opened (a dinner paid after midnight belongs to the day of the dinner).
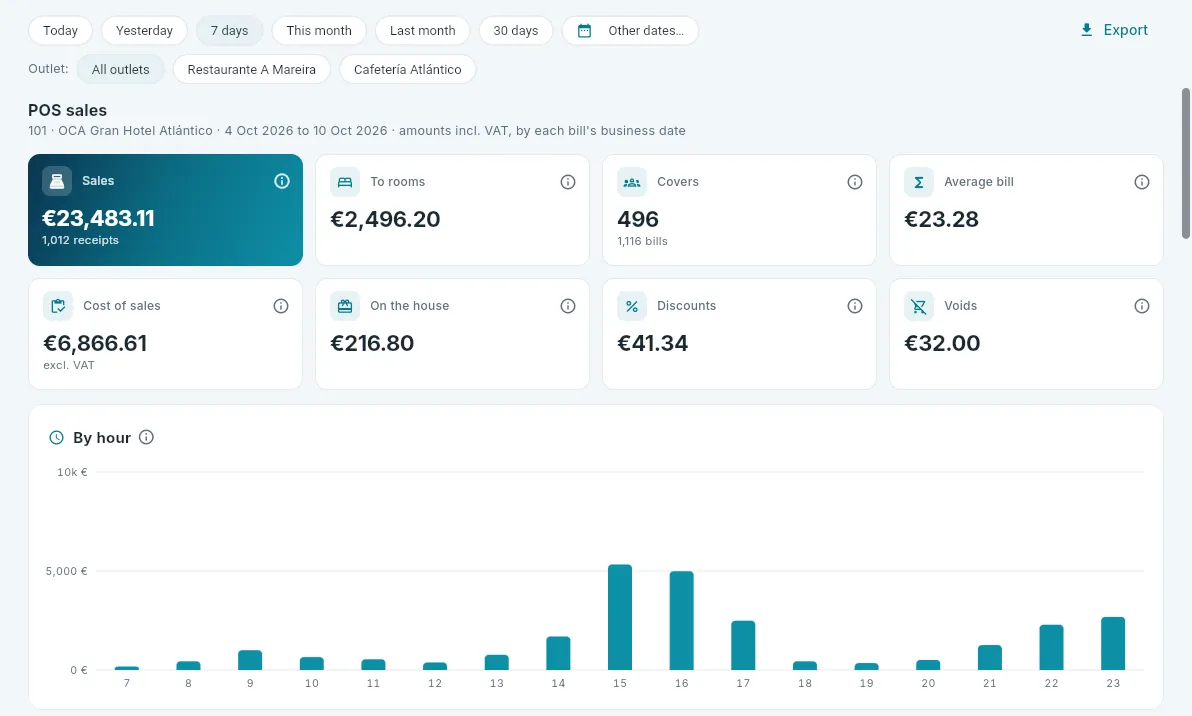 12345
12345
- 1The period.
- 2All of the hotel’s outlets or one.
- 3Export everything to CSV.
- 4Sales, charges to rooms, covers, average bill, the cost of sales, what was on the house, what was discounted and what was cancelled after being sent to the kitchen.
- 5Sales by hour of closing: breakfasts, lunches and dinners.
Further down, sales by menu category, the best sellers (the fifteen items with most units sold), by waiter, by outlet and by payment method, with charges to rooms shown separately. All including VAT, as the POS charges it.
#Receipts
Receipts lists the closed bills for a period: those paid with a receipt, those charged to the room and those
on the house (given away in full). The receipt is a simplified invoice from the terminal that took the payment, with its own
series: TA, TB… (TA26-201-000123).
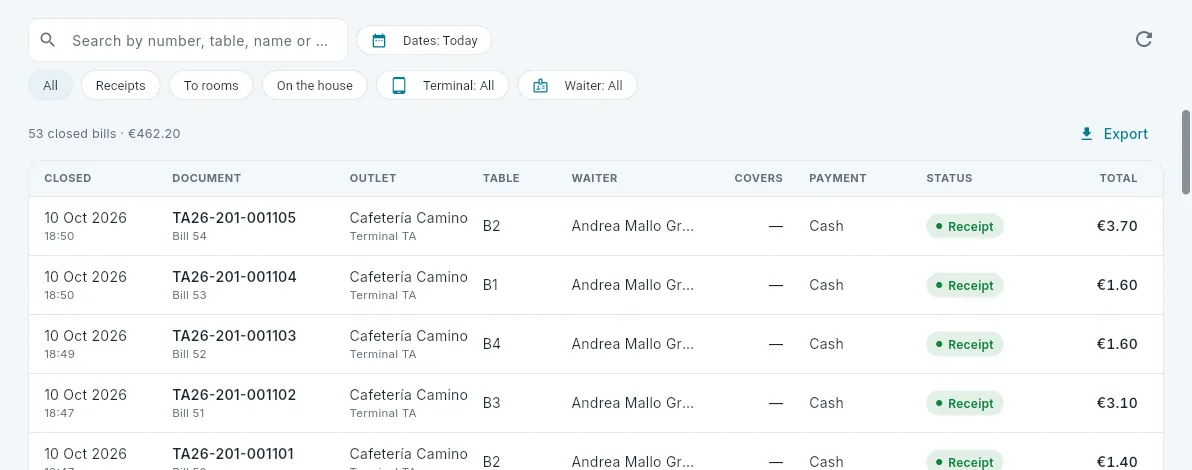 1234
1234
- 1Search by receipt number, table, name or bill number, and the dates.
- 2How it was closed (receipt, to the room, on the house), the terminal and the waiter.
- 3How many and for how much; Export.
- 4Each bill: the time, the receipt (or the booking it was charged to), the outlet and terminal, the table, the waiter, covers, how it was paid, its status and the total. Click it to open it.
A receipt opens in the invoice record, the same one as in Invoices: the total, what has been paid, the company issuing it, the terminal and its lines with VAT. A charge to a room or a bill on the house opens the bill’s record instead.
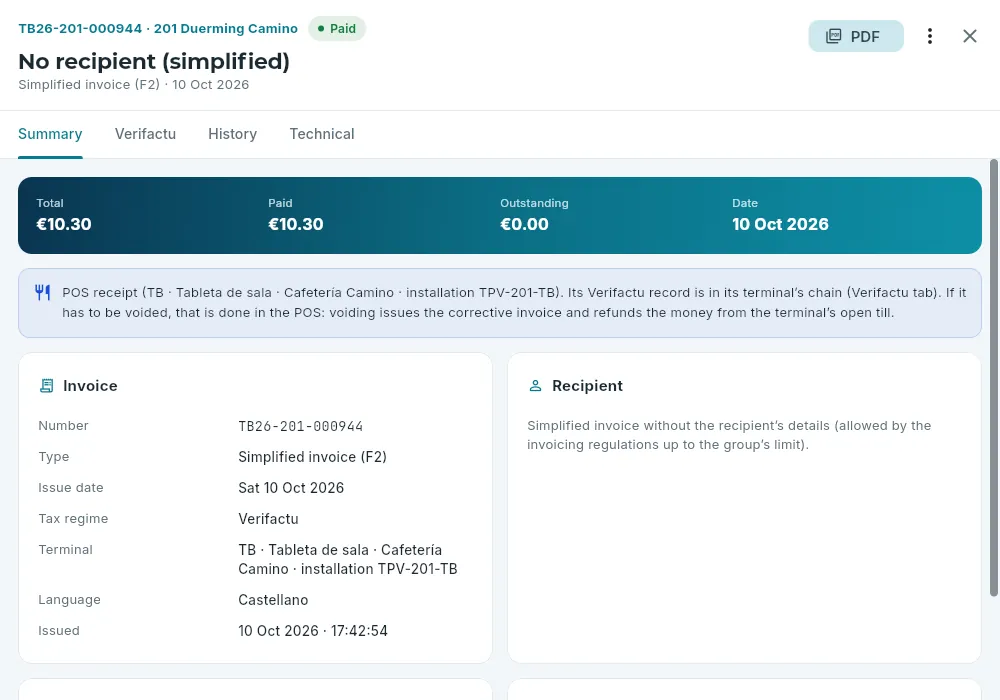 1234
1234
- 1The number, in the terminal’s series: a simplified invoice (F2).
- 2Send it by email… but not Issue credit note: a receipt is voided on the POS.
- 3Which terminal and outlet it comes from, and where its record goes.
- 4The terminal and its invoicing system installation.
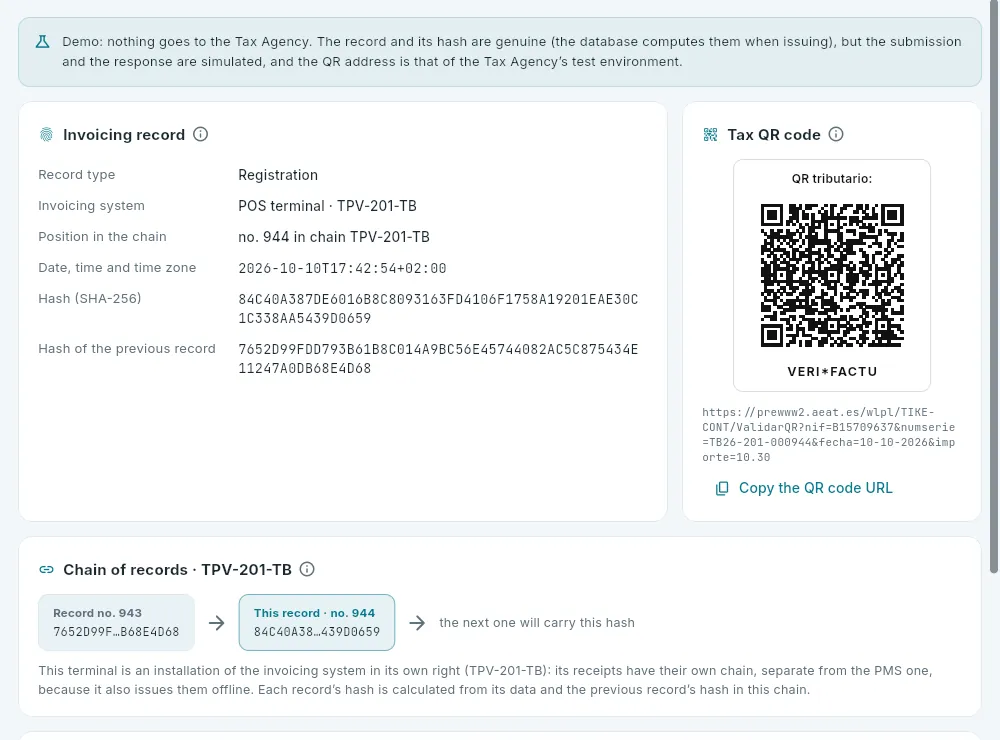 123
123
- 1The invoicing system is the terminal, and the position is in its own chain.
- 2The QR code printed on the receipt.
- 3The terminal’s chain: each record carries the hash of the previous one from the same terminal.
#Z reports
Each terminal has its own till, with its shift: it is opened at the start with a float (the change you start with) and closed at the end with the Z report, which counts what is there, compares it with what is expected and saves the breakdown of everything sold during the shift. A Z report never changes. Z reports brings them all together, by terminal and day.
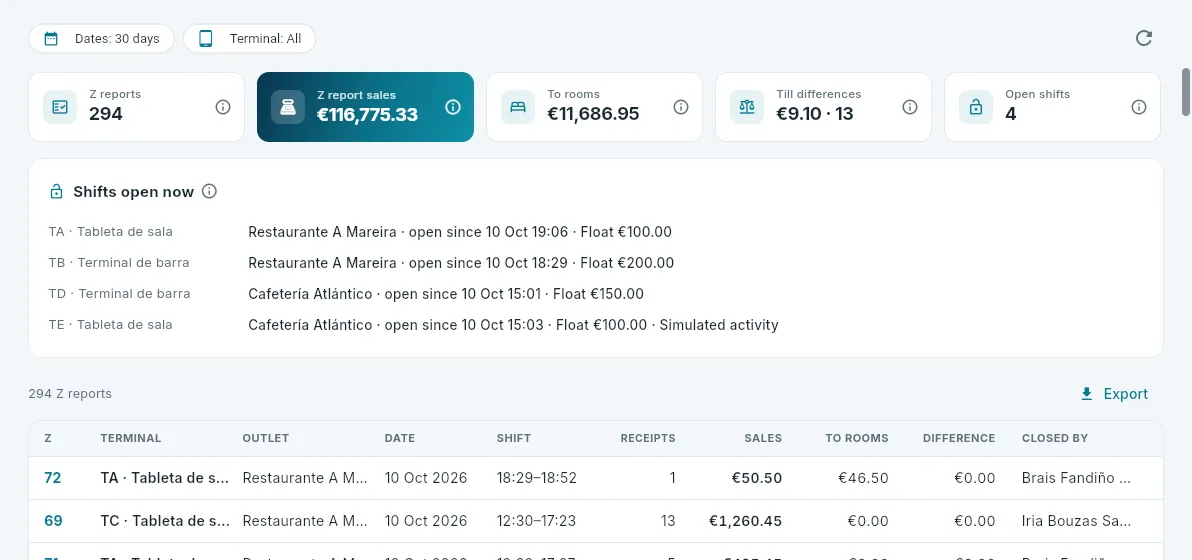 1234
1234
- 1The dates and the terminal.
- 2How many reports, the sales in them, charges to rooms, till differences and the open shifts.
- 3The shifts open now: since when and with what float.
- 4Each Z report: terminal, date and shift times, receipts, sales, charges to rooms, the difference and who closed it. Click it to open it.
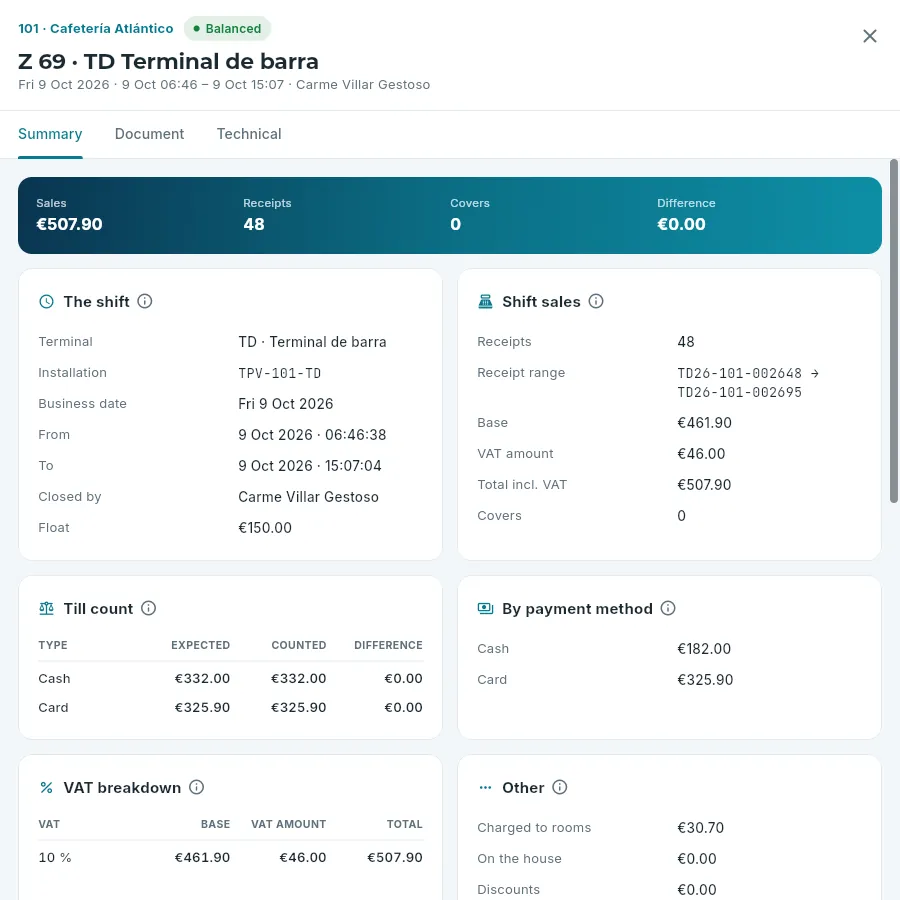 12345
12345
- 1The Z report and its terminal; whether it balanced or its difference.
- 2The shift: the installation, the times, who closed it and the float.
- 3The receipts, from first to last (no number may be missing), and their tax base, VAT and total.
- 4The till count: expected and counted, in cash and by card.
- 5Anything that is not a receipt: charges to rooms, items on the house, discounts and cancellations.
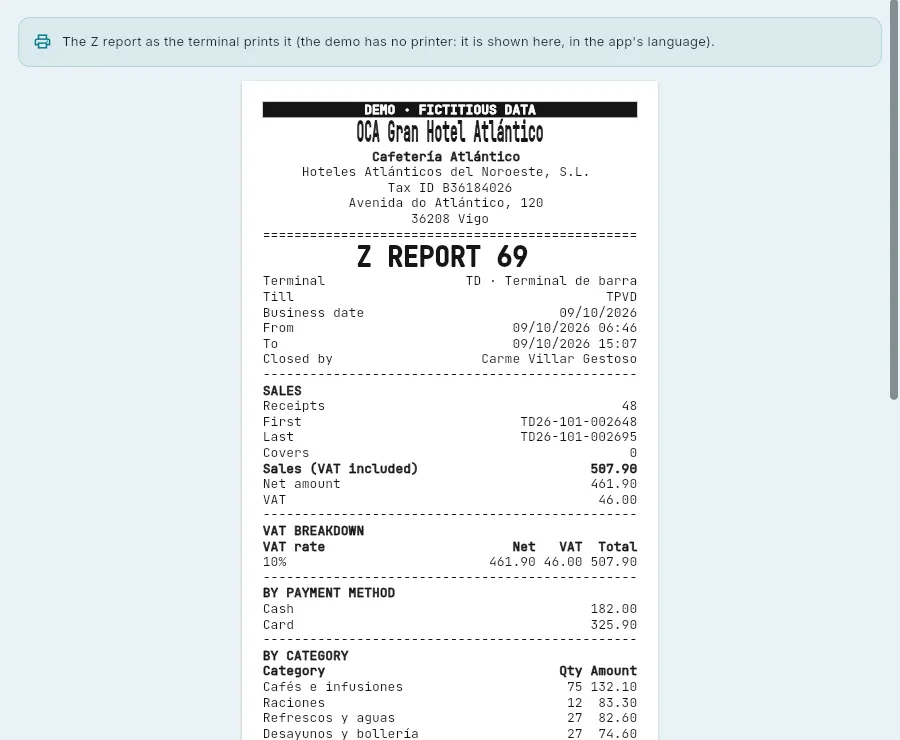 1
1
- 1The Z report document, on thermal paper (the demo has no printer: it is shown here, in the app’s language).
- The till count: in cash, the expected amount is the float plus cash taken minus refunds; by card, what was taken by card. The difference is the amount counted minus the amount expected: negative, money is missing; positive, there is extra. A Z report with a difference carries a note from whoever closed it.
- A shift open since another day is a forgotten Z report: it has to be run on the POS, with the Close the shift permission.
- Further down the record, sales by category, by waiter and by hour. The document can also be printed from the POS.
- Each terminal’s till is separate from the front desk’s: Today’s till in Payments and tills is the front desk’s only.
#The menu and allergens
Menu is the hotel’s menu, the same at all its outlets (each item says where it is sold): the items, their categories (starters, meat, wines, coffees…: the colour of their buttons on the POS, where their order tickets go and which course they come out with), the set menus and the quick notes. The names belong to the hotel: they are written in its language and appear that way on the POS and the receipt. Whoever configures the POS (management) changes it; everyone else can view it.
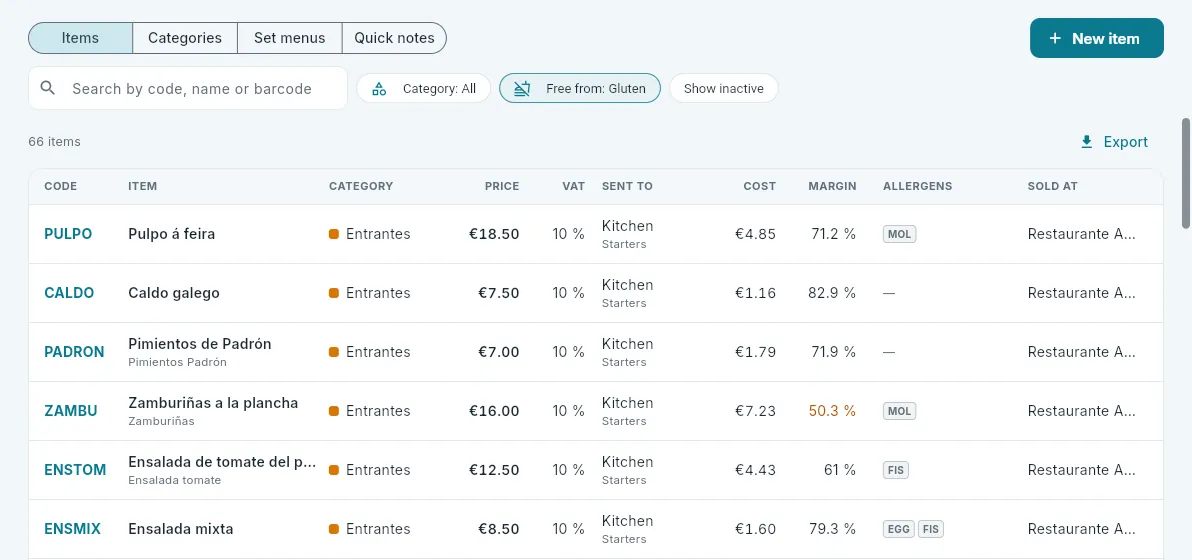 12345
12345
- 1Items, categories, set menus and quick notes.
- 2New item.
- 3Search by code, name or barcode, and the category.
- 4The allergen filter: here, those free from gluten.
- 5Each item: code, name, category, price including VAT, the VAT rate, where it goes and which course, the cost, the margin, its allergens and where it is sold. Click it to open its record.
The allergens are the 14 that must be declared under Regulation (EU) No 1169/2011. In the list they are abbreviated (hover over them for their name):
| GLU · gluten | CRU · crustaceans | HUE · eggs | PES · fish | CAC · peanuts | SOJ · soya | LEC · milk |
| FCA · nuts | API · celery | MOS · mustard | SES · sesame | SUL · sulphites | ALT · lupin | MOL · molluscs |
The Allergens filter quickly answers “which dishes are gluten-free?” (those free from all of the chosen ones) or “what contains milk?” (those containing any).
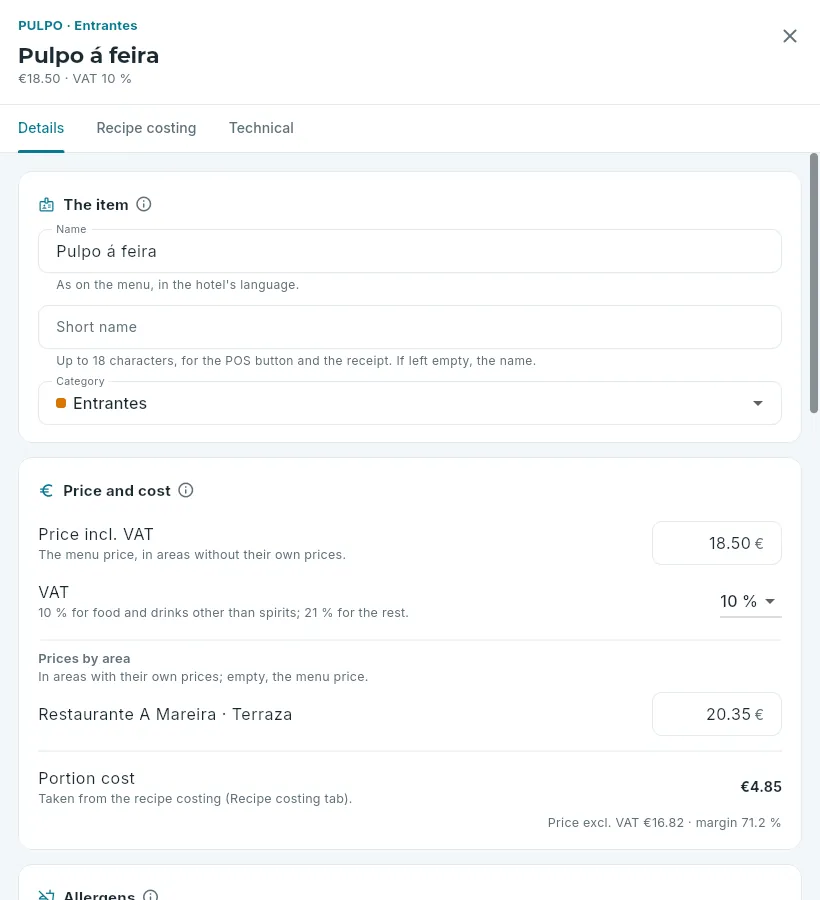 123
123
- 1The code (PLU, it never changes) and the category, the name, the price and the VAT rate.
- 2The name (the short one, for the POS button and the receipt) and the category.
- 3The price including VAT and the VAT rate, the prices by area (in areas with their own prices, such as the terrace) and the portion cost, which comes from the recipe costing, with the margin on the price excluding VAT.
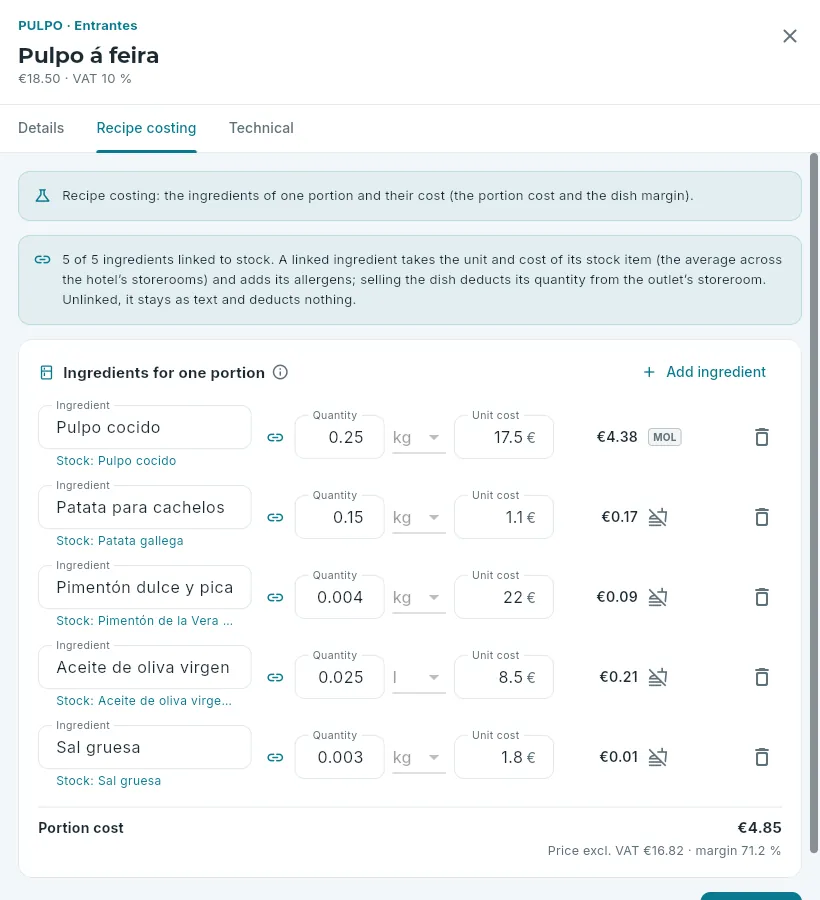 123
123
- 1The recipe costing; below, how many ingredients are linked to stock (see Recipe costings and stock).
- 2Each ingredient with its quantity, its unit, its cost per unit and its allergens.
- 3The sum: the portion cost and the margin.
- The recipe costing is the recipe with its costs: the quantity of each ingredient in one portion times its cost per unit. They add up to the portion cost, which is passed to the item on saving; without a recipe costing, the cost is entered by hand in the details. Each ingredient is linked to its stock item, and then sales deduct stock (below).
- The dish’s allergens: they are ticked in its details or come from its recipe costing: on saving, the dish adds its ingredients’ allergens and never drops any (removing one is done by hand on the item, deliberately), so that none slips through.
- On the POS: if a table has an allergy and the waiter orders a dish containing it, the POS warns (it does not stop it: the guest decides) and the printed order ticket highlights it in the kitchen: the table’s allergies at the top and “contains…” on each dish with them.
- A price change applies at once; anything ordered offline before the change is charged at the old price.
- Deactivating an item removes it from the POS without touching what has already been sold (Show inactive shows them).
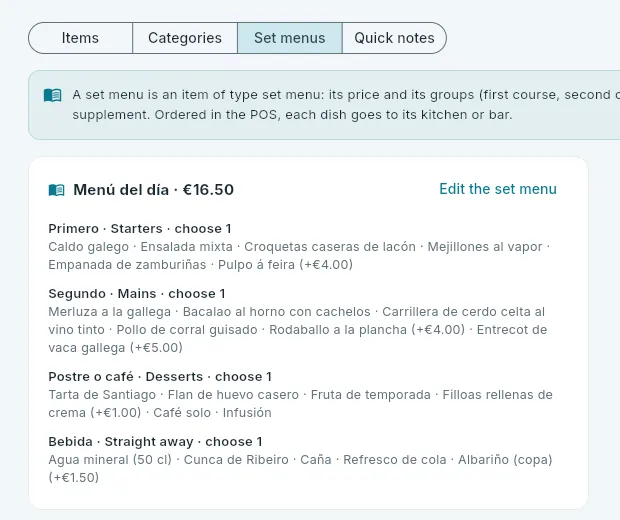 123
123
- 1The set menu and its price.
- 2Edit the set menu: its groups and options.
- 3Each group: its course, how many dishes are chosen and the options, with their supplement.
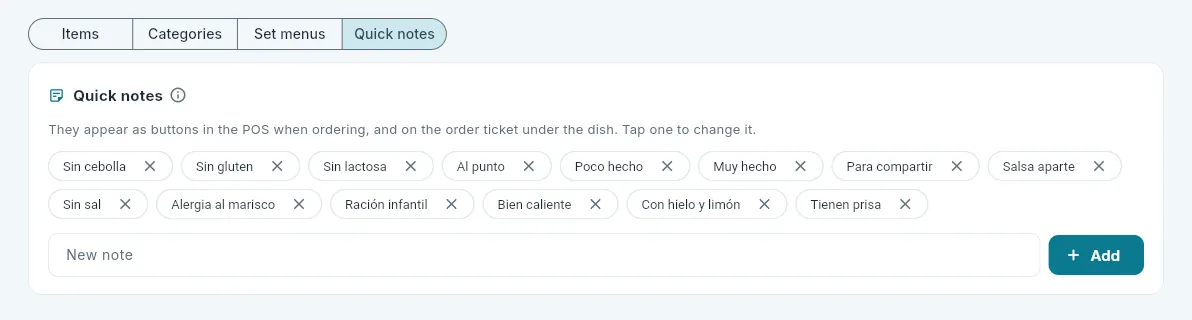 12
12
- 1Quick notes: one tap from the waiter adds them to a dish and they appear on the order ticket, under it.
- 2Type a new note and Add; the cross on each note removes it.
The set menu is a menu-type item, with its price and its groups in the order they are served (first course, main, dessert or coffee, drink): how many dishes are chosen from each (the minimum and the maximum) and from which options, each with its supplement. On the POS, the waiter chooses the dishes from each group and each one goes to its kitchen or bar like any other. A group that has already been sold is not deleted: it is withdrawn from the menu.
#Recipe costings and stock
The POS and Purchasing and stock are connected: each ingredient in the recipe costing is linked to its stock item (the cooked octopus, the potatoes, the oil…) and, when a bill is closed, what was sold deducts stock from its outlet’s storeroom. That way the storeroom knows what has been used without anyone writing it down, and the portion cost is that of what is actually bought.
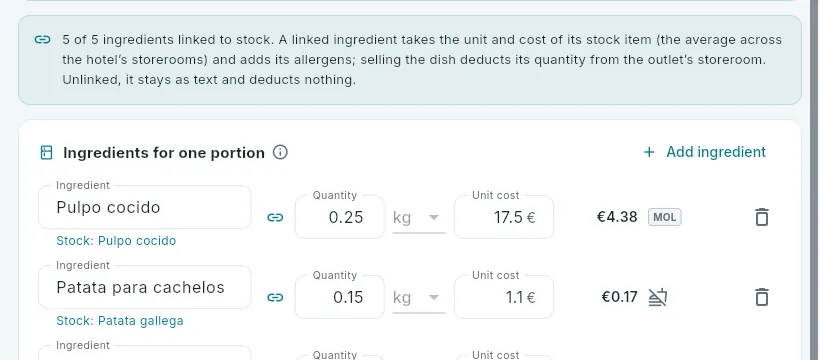 123
123
- 1How many ingredients are linked.
- 2Which stock item each ingredient comes from.
- 3The link: choose another or remove it.
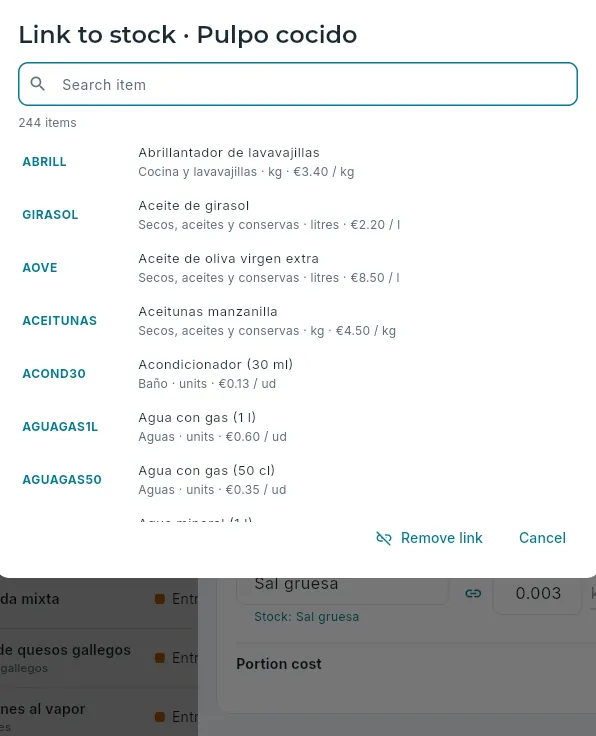 123
123
- 1Search by name or code.
- 2Each item with its family, unit and average cost.
- 3Remove link.
- A linked ingredient takes the unit of its stock item (which can then no longer be changed), its cost (the average cost across the hotel’s storerooms) and its allergens, which are added to the dish’s. If the stock item gains an allergen (a new supplier, another recipe), the dishes that use it gain it too; none is ever removed by itself.
- Unlinked, the ingredient is just text: it counts towards the portion cost but deducts nothing.
- Links are saved with the recipe costing (Save).
- Anything sold as is (a bottle of wine, a water, a soft drink) needs no recipe costing: in its details, Sold as is says which stock item it comes from, one unit per unit sold (and it takes precedence over its recipe costing, if it has one).
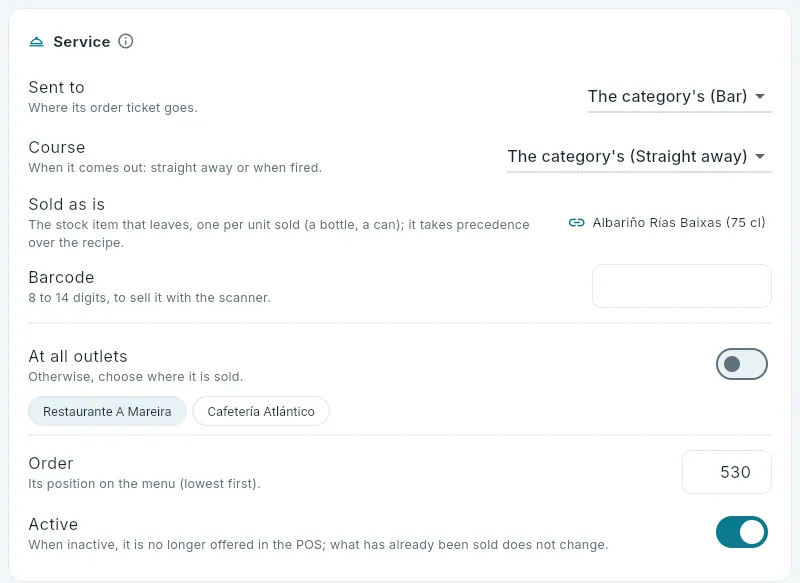 1
1
- 1Sold as is: the stock item that goes out, one per unit sold.
Which storeroom does it come from? The one each outlet says (in Outlets, its storeroom: in the demo, the restaurant uses the kitchen and the café, the bar). When a bill is closed (with a receipt, charged to the room or on the house), each dish deducts the quantity of its linked ingredients times the portions sold, and anything sold as is, its units. A receipt cancelled later gives nothing back to the storeroom: the food has already gone out. What leaves each batch, its cost and each outlet’s actual margin are in Purchasing and stock.
#The floor plan
Floor plan is the editor for each area’s plan (the dining room, the terrace, the bar…): a grid of squares in which each table has its place, size, shape, rotation and seats. It is the plan the waiters see on the POS and the one in Live.
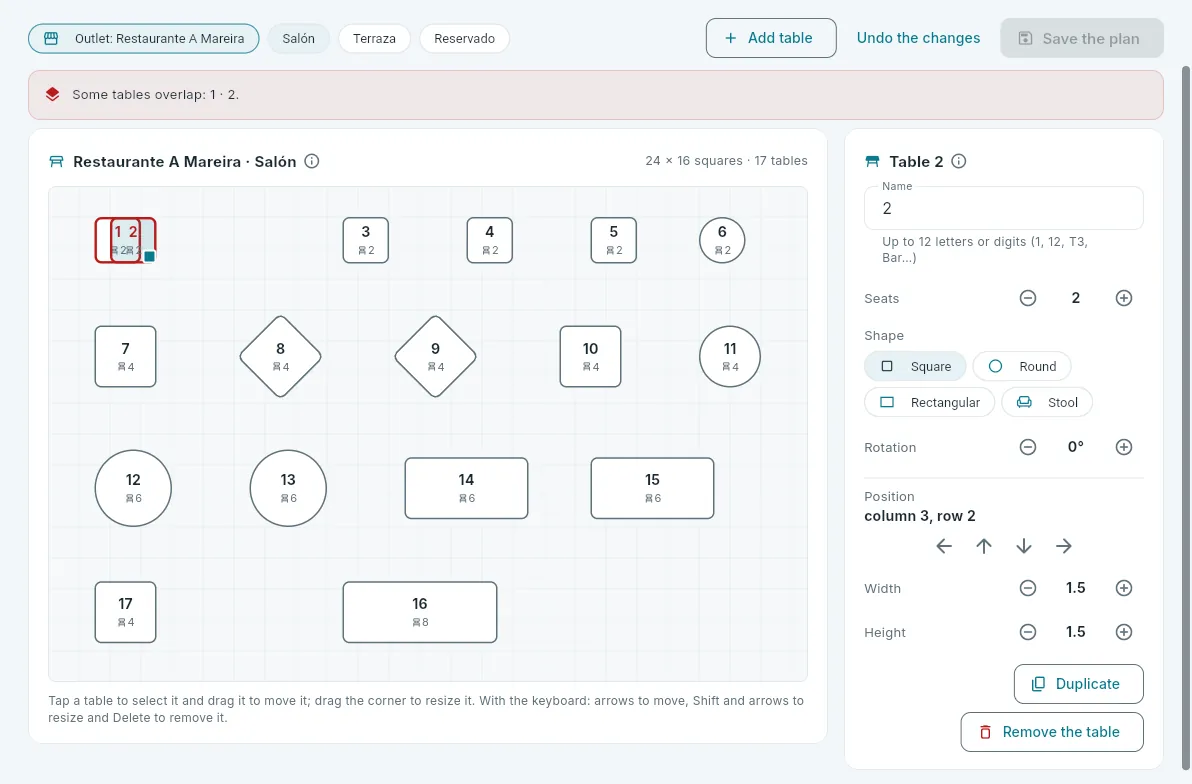 12345
12345
- 1The outlet and the area.
- 2Add table, Undo the changes and Save the plan.
- 3A warning: two tables overlap. It cannot be saved until it is fixed.
- 4The selected table (in red, because it overlaps the one next to it). Drag it to move it; its corner changes its size.
- 5Its details: name, seats, shape, rotation, position and size, with buttons to change them without dragging.
In Floor plan, choose the outlet and the area.
Click a table to select it and drag it into place (or use the arrows in its details, or the keyboard’s). To change its size, drag its corner (or Shift and the arrows).
Change its name (up to 12 letters or digits: 1, 12, T3, Bar…), its seats, its shape and its rotation.
For a new table, Add table puts it in the first free space; Duplicate makes another one like the selected table; Remove the table removes it.
If a warning appears (a table goes off the plan, overlaps another or repeats a name), fix it.
Click Save the plan.
#Outlets, terminals and waiters
Outlets is how the hotel’s POS is set up, in three views: the outlets and their areas, the terminals and the waiters.
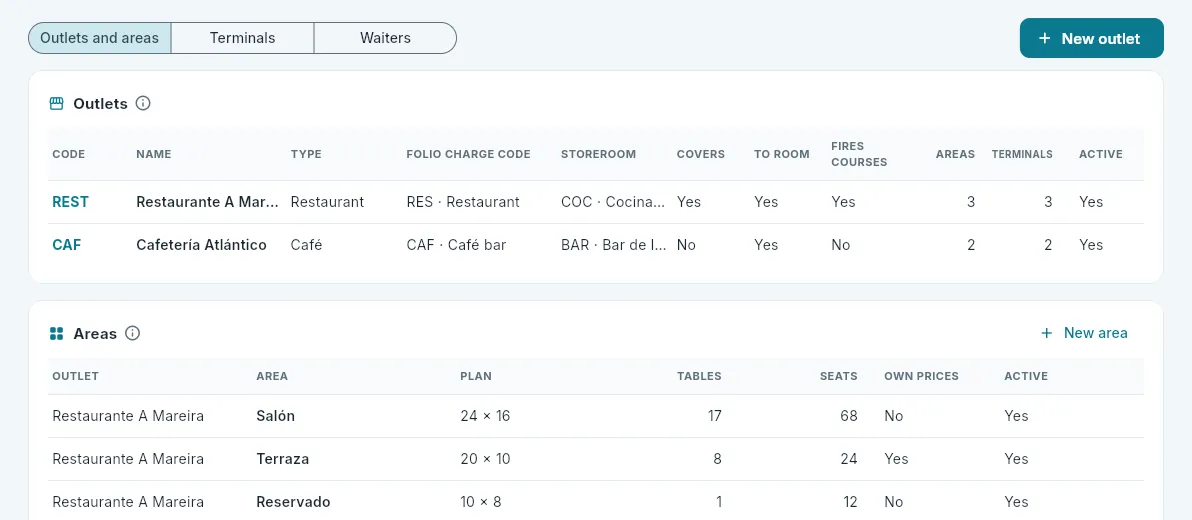 1234
1234
- 1The three views.
- 2New outlet.
- 3Each outlet: its type, the folio charge code its bills are charged to rooms with, the storeroom it uses, whether it asks for covers, whether it allows charging to the room and whether it fires courses.
- 4Its areas: the plan size, the tables and seats and whether they have their own prices.
- Folio charge code: the F&B charge code on the guest’s folio with which that outlet’s bills are charged to their room (the guest’s invoice shows “Restaurant”, “Café”…).
- Storeroom: the one its sales deduct from (through the recipe costing or what is sold as is). “None”: its sales do not touch stock.
- Fires courses: in a restaurant, mains and desserts wait in the kitchen until the waiter fires them; in a café, everything goes out straight away.
- Own prices: the area charges the menu’s prices by area (a terrace, room service).
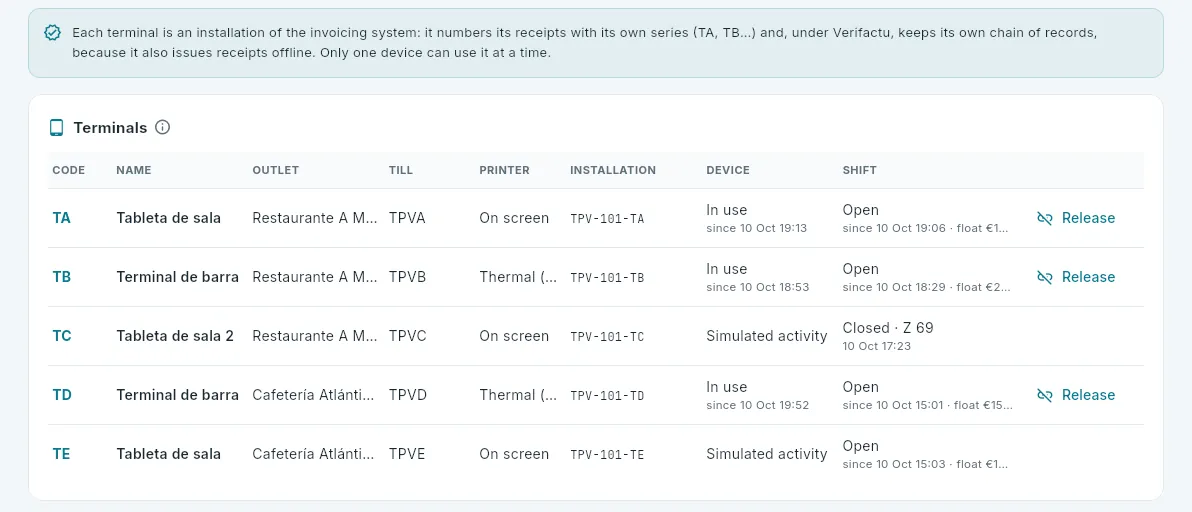 12
12
- 1Each terminal is an invoicing system installation, with its own series and chain.
- 2Each terminal: its outlet, its till, its printer, its installation, the device using it (free, in use since…, or simulated activity) and its shift (open with its float, or its latest Z report).
- One device per terminal. The tablet claims the terminal when it is chosen on the POS. If the tablet is replaced or lost, Release (on terminals in use) frees it for another: the old one can no longer issue receipts in that chain. It asks for confirmation.
- The printer: on screen or a thermal printer (ESC/POS). The demo has no printer: the document is shown on the POS screen and the thermal printer is simulated.
- A terminal with an open shift cannot be deactivated until its Z report.
- Simulated activity terminals are the ones the demo uses to “sell” by itself throughout the day; they are not offered on the POS.
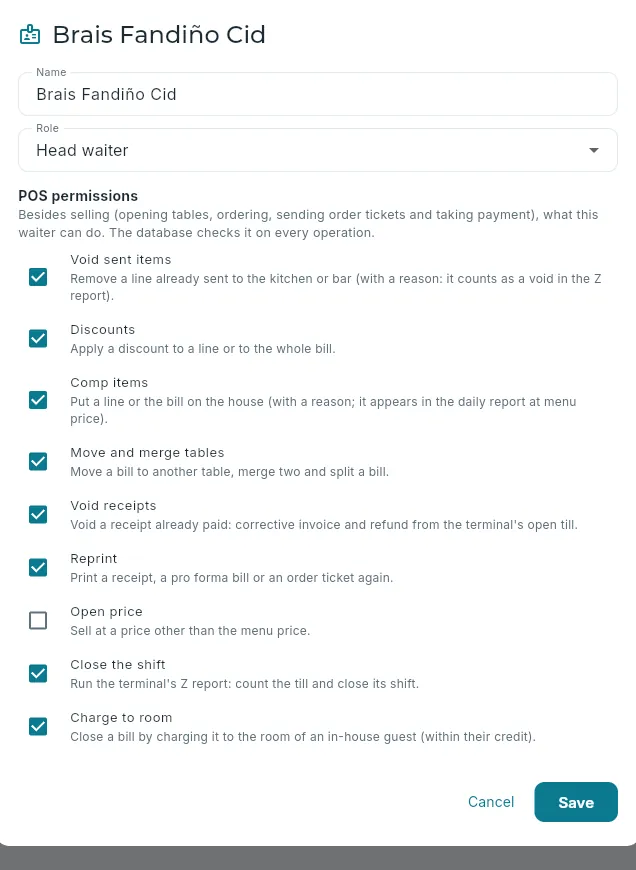 123
123
- 1The role: waiter, head waiter, cashier, kitchen or manager (who has every permission).
- 2Their POS permissions, on top of selling, each with what it allows.
- 3Further down, where they work and a new PIN; Save.
Waiters do not need a user account: on each outlet’s shared tablet, each one taps their name and signs in with their PIN (4 to 6 digits; only its hash is stored, nobody can read it afterwards). Whatever they do is recorded under their name. On top of selling (opening tables, taking orders, sending order tickets and taking payment), each one has the permissions they are given:
| Permission | What it allows |
|---|---|
| Void sent items | Removing a line that has already gone to the kitchen or the bar, with its reason (it counts in the Z report’s cancellations). |
| Discounts | A discount on a line or the whole bill. |
| Comp items | Giving a line or the bill on the house, with its reason (it appears in the daily report at menu price). |
| Move and merge tables | Moving a bill to another table, merging two and splitting one. |
| Void receipts | Voiding a receipt already paid: the credit note and the refund in the terminal’s till. |
| Reprint | Printing a receipt, a pro forma or an order ticket again. |
| Open price | Selling at a price other than the menu price. |
| Close the shift | Running the terminal’s Z report. |
| Charge to room | Closing a bill by charging it to the room of an in-house guest, within their credit. |
The database checks the waiter’s permissions on every operation: the tablet’s user account is not enough.
#What each role sees
#Frequently asked questions
Why do the figures in Sales not match the Z reports? Because they count differently: Sales puts each bill on the business date it was opened, and the Z report, everything taken in the terminal’s till during its shift. A shift that runs from one day into the next separates them.
A guest complains about a receipt charged in error. How is it voided? On the POS, with Void receipts, on the terminal that took the payment and with its till open: it issues the credit note and refunds the money in the same step. A receipt is not credited from the office.
Why does a table show allergies when the waiter has not marked any? Because the bill belongs to an in-house guest with an allergy recorded in their preferences: it is copied over by itself when the bill is opened or linked to their booking (see Guests).
What happens if the POS loses its connection? It keeps selling: it numbers the receipts and calculates their Verifactu record on the tablet, and sends them when the connection is back. They do not appear in Live until then. The Waiter chapter explains it.
Why can I not remove a table from the floor plan? Because it has an open bill: it can be moved, but not removed until the bill is closed.
Where is what was charged to a room? On the booking’s folio, as a charge with the outlet’s folio charge code (see Bookings); it is collected on the guest’s invoice at check-out. In Receipts, the To rooms filter.
What is simulated activity? In the demo, the kitchen, the bar and some of the sales are run by the demo itself: some terminals “sell” by themselves throughout the day (the café and the bar from 7:30 to 23:30; the restaurant at lunchtime and in the evening) and run their Z report. See Getting started.
Departments
Purchasing and stock
What is bought and what is in each hotel’s storerooms: the order proposal left by the night audit, orders to suppliers, receiving with batch and use-by date, invoices and their payments, stock with its batches, expiry dates, stock counts and statistics on purchases, consumption and margin.
Each hotel has its storerooms: the kitchen, the bar, the dry store (the general storeroom, which supplies the others) and the housekeeping one (linen and amenities). Purchasing and stock tracks what goes into them —what is ordered from suppliers and arrives with its delivery note, the paperwork the driver brings— and what goes out: what is sold on the POS, what is used in housekeeping, what is used in-house, what is lost and what is moved from one storeroom to another. That way it always knows what is in each storeroom and what it is worth.
What saves the most work is the automatic proposal: every night, the night audit works out what needs ordering from each supplier to last until their next delivery, based on what there is, what is already on order and what will be used given the occupancy over those days. In the morning, whoever handles purchasing reviews it, changes it if needed and sends it.
- 1ProposalThe night audit proposes what to order from each supplier.
- 2OrderIt is reviewed and approved: the email goes to the supplier.
- 3Delivery noteThe goods arrive: they are received with their batch and use-by date and go into stock.
- 4InvoiceThe supplier’s invoice groups their delivery notes; accounting posts its entry.
- 5PaymentBy bank transfer, direct debit (paid by the night audit) or cash.
It has nine tabs: Overview, Orders, Receiving, Supplier invoices, Stock, Expiry dates, Stock counts, Statistics and Settings. Everything is for the hotel chosen in the top bar or, with All my hotels, for all of them together (where a storeroom is needed, it is chosen with its hotel in front). Purchasing amounts exclude VAT, except the invoice totals.
#The overview
Overview is the first thing to look at in the morning: how stock stands and what needs doing today, each with its button.
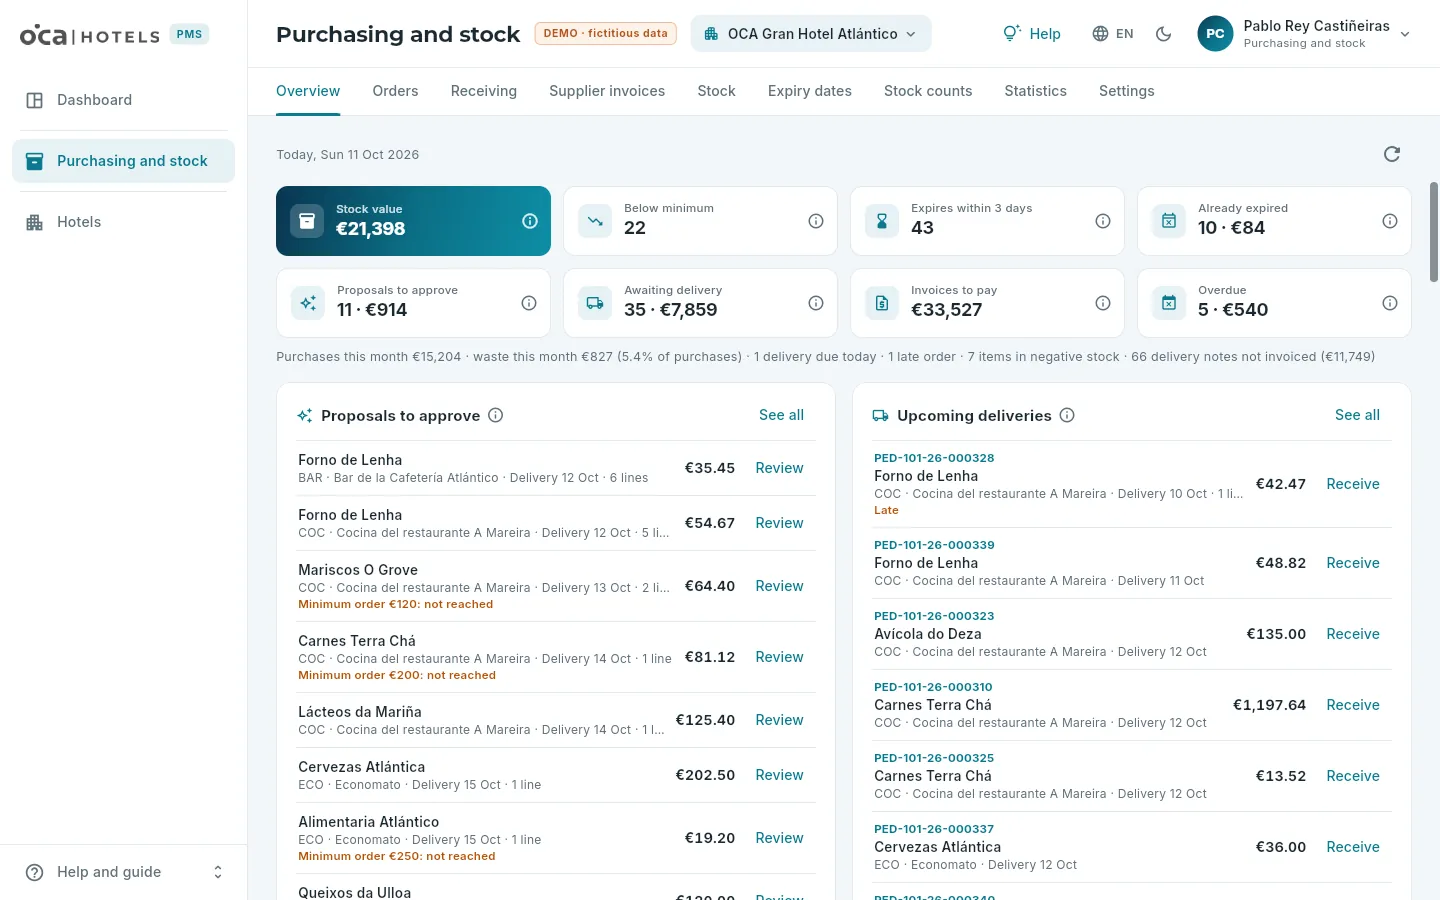 1234567
- 1The section’s nine tabs.
- 2The eight indicators, each with its ⓘ (below, how they are calculated).
- 3The month’s purchases and waste, late orders and uninvoiced delivery notes.
- 4Last night’s proposals, one per supplier and storeroom; in orange, those below the minimum order.
- 5Review opens the proposal.
- 6What is due over the next few days (in orange, anything late).
- 7Receive opens receiving for the order.
Further down, four more lists:
- Expiring soon or already expired: batches expiring within three days and those already expired, with Write off on the latter (see Batches and expiry dates).
- Below minimum: what is below its minimum in each storeroom, with what is already on order.
- Invoices falling due: this week’s and the overdue ones, with Pay on bank transfers.
- The storerooms: each with its value, alerts and last stock count; tapping one opens its stock.
#The automatic order proposal
Orders holds every order to suppliers with its status: proposal (the night audit’s, not yet touched), draft, sent, partly received, received or cancelled. The note at the top flags the proposals waiting and See proposals shows only those in the list.
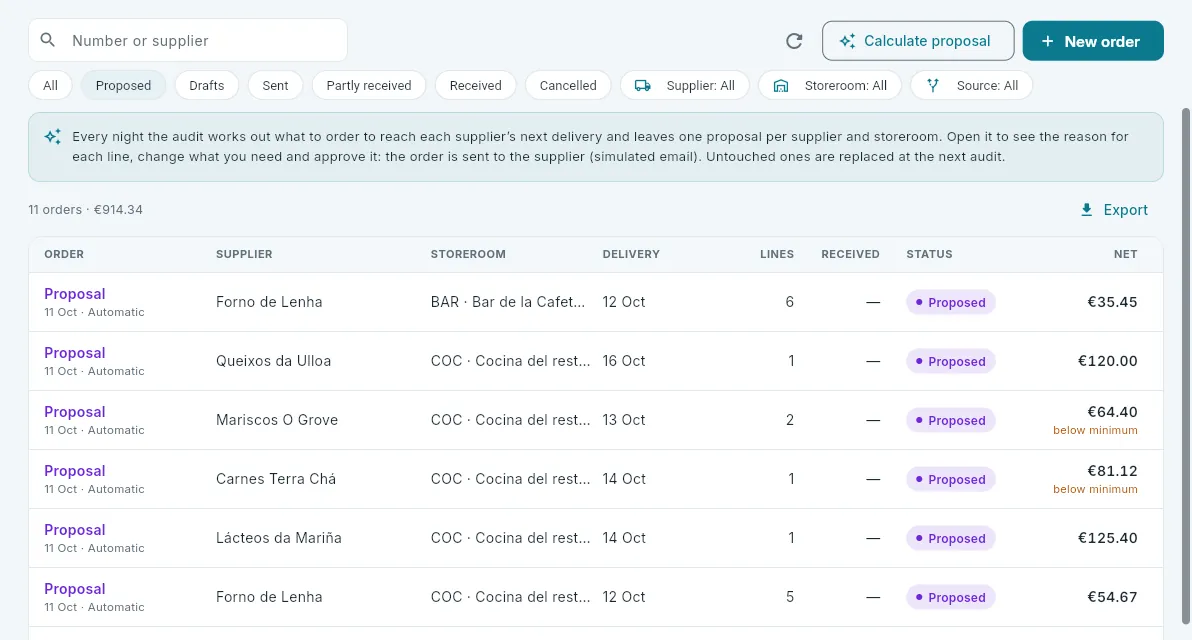 123456
- 1Search by number or supplier.
- 2Calculate proposal redoes it now, and New order creates one by hand.
- 3By status (here, the proposals)…
- 4…by supplier, by storeroom and whether it is automatic or manual.
- 5What the proposals are.
- 6Each proposal: supplier, storeroom, delivery date, lines and amount excluding VAT; “below minimum” if it does not reach the supplier’s minimum order. Click it to open it.
A proposal has no number (it is not a document): it takes one when saved or approved. Those nobody touches are replaced by the next night audit with up-to-date ones; those saved as drafts are not. When opened, it shows everything needed to decide.
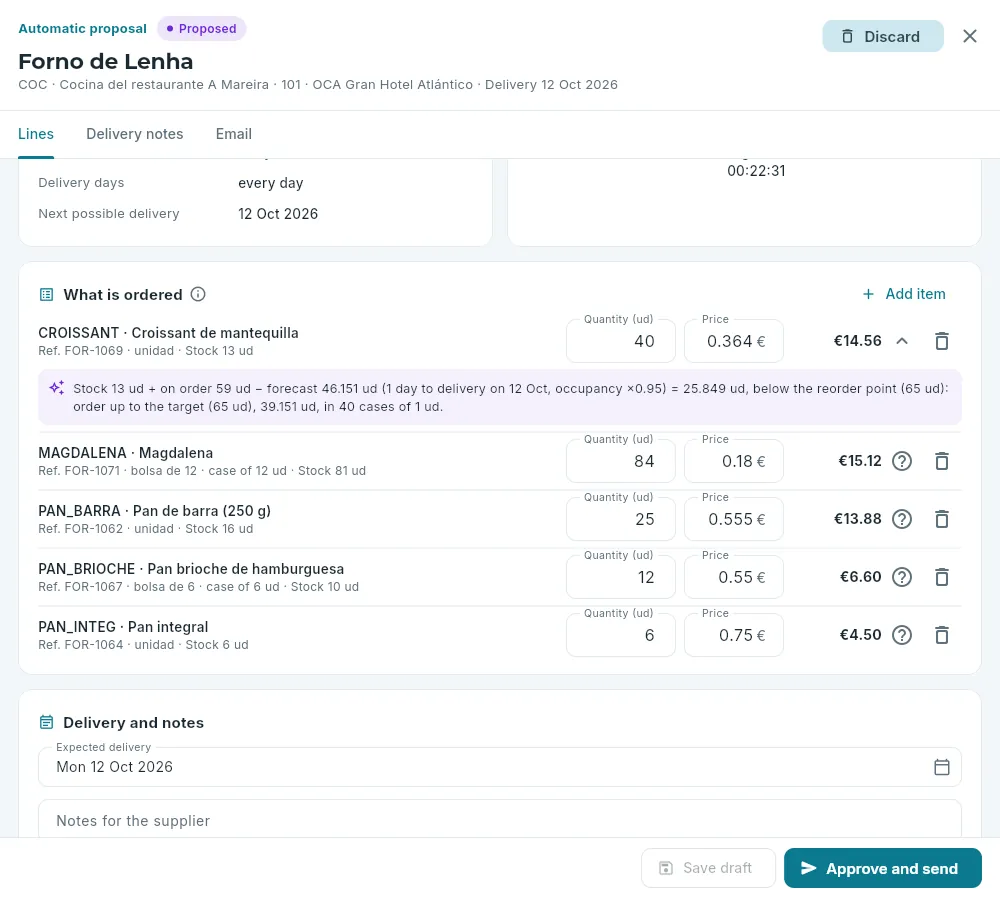 123456
- 1An automatic proposal, its supplier, storeroom and delivery.
- 2Discard deletes it (the next night audit will propose whatever is needed again).
- 3The lines: reference, pack size and stock; the quantity and price can be changed.
- 4Why?: where the quantity comes from (below, the calculation).
- 5Add item and each line’s bin.
- 6Save draft or Approve and send: the order is emailed to the supplier.
This is how a Why? reads: “Stock 4 kg + on order 0 − forecast 5.2 kg (2 days until delivery on Tuesday, occupancy ×1.1) = −1.2 kg, below the reorder point (2 kg): order up to the target (6 kg), 7.2 kg, in 8 cases of 1 kg”.
In Overview, click Review on a proposal (or, in Orders, See proposals and click one).
Check the Why? of anything that surprises you. Change the quantity or price, remove what you do not want and add what is missing.
Check the expected delivery and, if needed, type the notes for the supplier (they go in the email).
Click Approve and send and confirm.
A sent order can no longer be changed: it is received (see below). If what is missing is no longer coming, Nothing more to come marks it as received; a draft, or a sent order of which nothing has arrived, can be cancelled with a reason (let the supplier know: the cancellation is not sent to them automatically).
#An order placed by hand
For anything the night audit does not propose —a wine for a dinner, an extra order before an event—, New order.
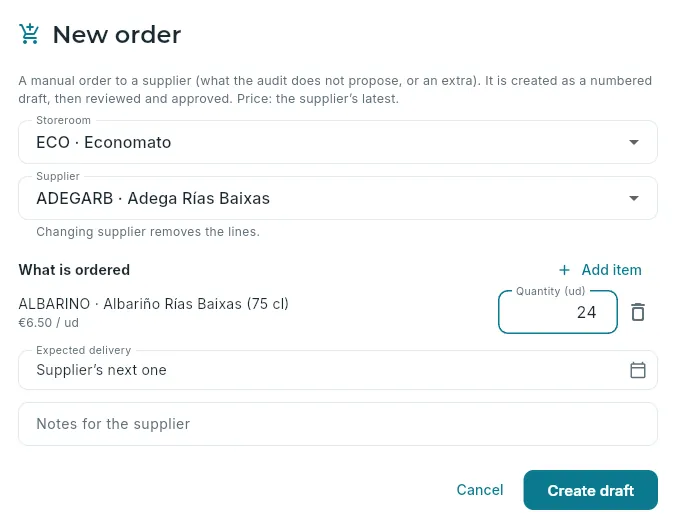 12345
12345
- 1The storeroom and the supplier (changing it clears the lines).
- 2What that supplier provides, with its latest price.
- 3The quantity, in the item’s unit.
- 4The delivery: the supplier’s next possible one unless you choose another; and the notes for the email.
- 5Create draft: it is saved with a number; then it is approved like a proposal.
#Receiving goods
When the driver arrives, their delivery note is received in Receiving. At the top is what is expected (orders sent or partly received, by delivery date) and, below, the delivery notes already recorded, with their status and whether they have been invoiced.
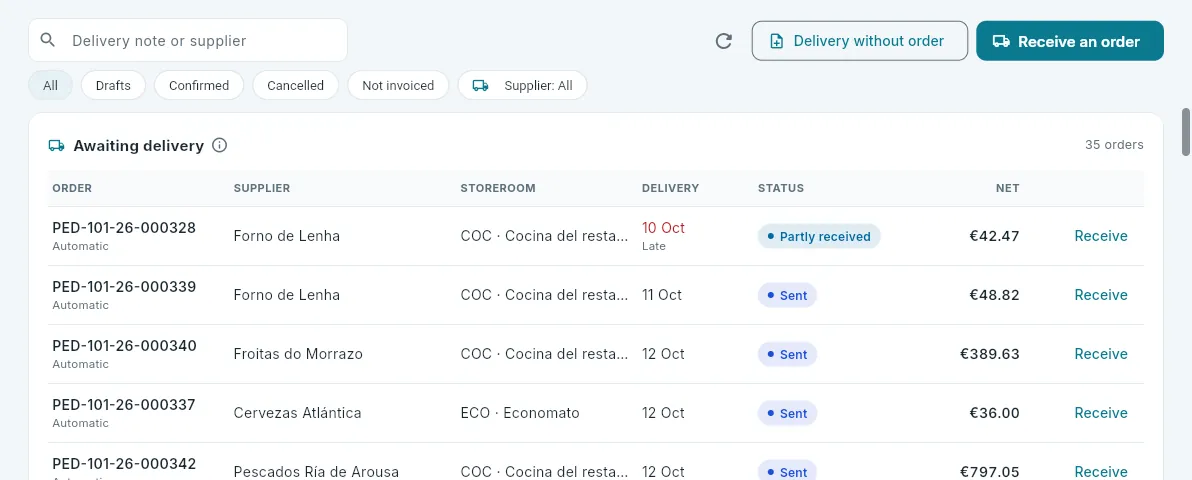 1234
1234
- 1Receive an order or a Delivery without order (a purchase at the market, a delivery nobody ordered).
- 2The delivery note filters: drafts, confirmed, cancelled, uninvoiced and the supplier.
- 3Awaiting delivery: each order with its delivery (in red, late) and its status.
- 4Receive that order.
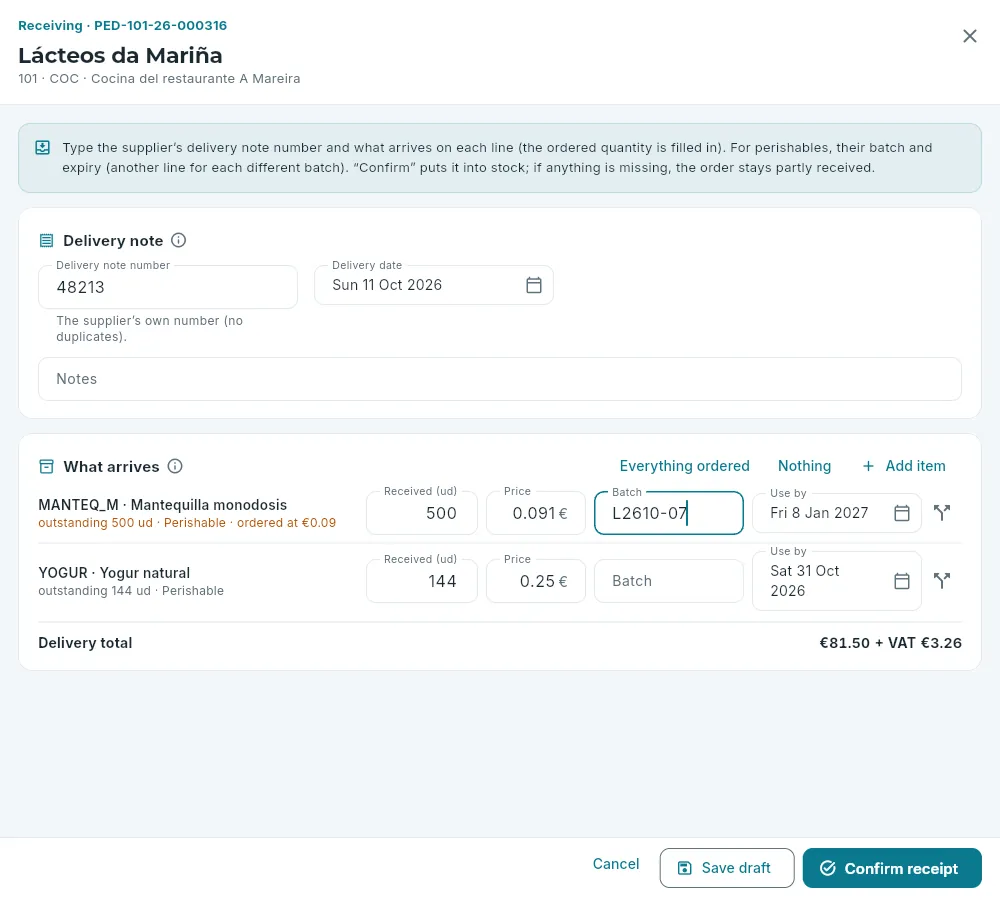 123456
- 1The order being received, its supplier and its storeroom.
- 2The supplier’s delivery note number (it cannot be repeated) and its date.
- 3Everything ordered or Nothing, and something that was not ordered.
- 4Each line: what arrives and its price; for perishables, the batch and the use-by date.
- 5Another batch: the same item with another batch.
- 6Confirm receipt: it goes into stock.
In Receiving, click Receive an order and choose the order that has arrived (or Receive on its row).
Type the supplier’s delivery note number. The date is today’s; change it if the delivery note is from another day.
Check each line: what was ordered is filled in. Change the quantity if a different one arrives and the price if the delivery note says otherwise.
For perishables, type the batch and use-by date on the label (today plus the item’s shelf life is suggested). If two batches of the same item arrive, Another batch splits the line.
Click Confirm receipt.
- A price different from the order is accepted and flagged on the delivery note: it is what to check when the invoice arrives.
- Not accepted: a perishable without a batch or use-by date, or anything that arrives already expired.
- Returning what arrived in poor condition to the supplier is done from the confirmed delivery note’s record, as long as it has not been invoiced: it leaves stock (from its batch) and is no longer invoiced.
- Save draft leaves the receiving half done, without touching stock, to finish later.
#Supplier invoices
Each supplier invoices in their own way: one invoice a month with all their delivery notes or one per delivery note. In Supplier invoices they are recorded (entered as a debt, with their due date) and paid. Accounting posts the entry for each invoice and each payment by itself (see Accounting).
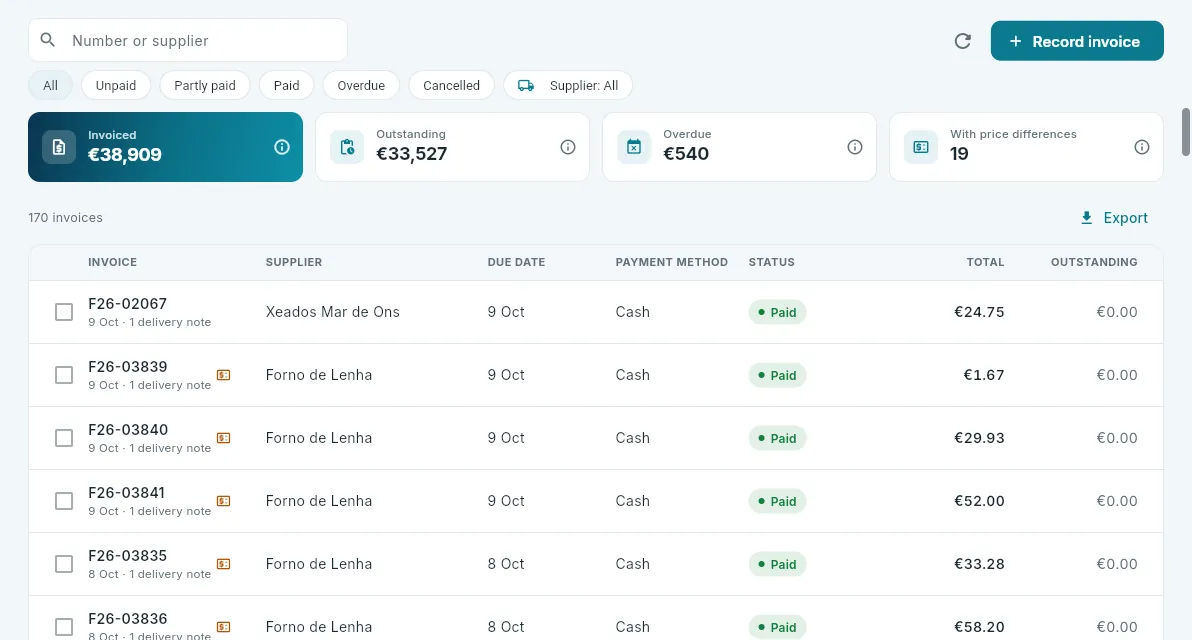 1234
1234
- 1To pay, partly paid, paid, overdue and cancelled; and the supplier.
- 2Record invoice.
- 3The amount invoiced, what is still to pay, what is overdue and those that do not match their delivery notes.
- 4Outstanding ones are ticked to pay several at once.
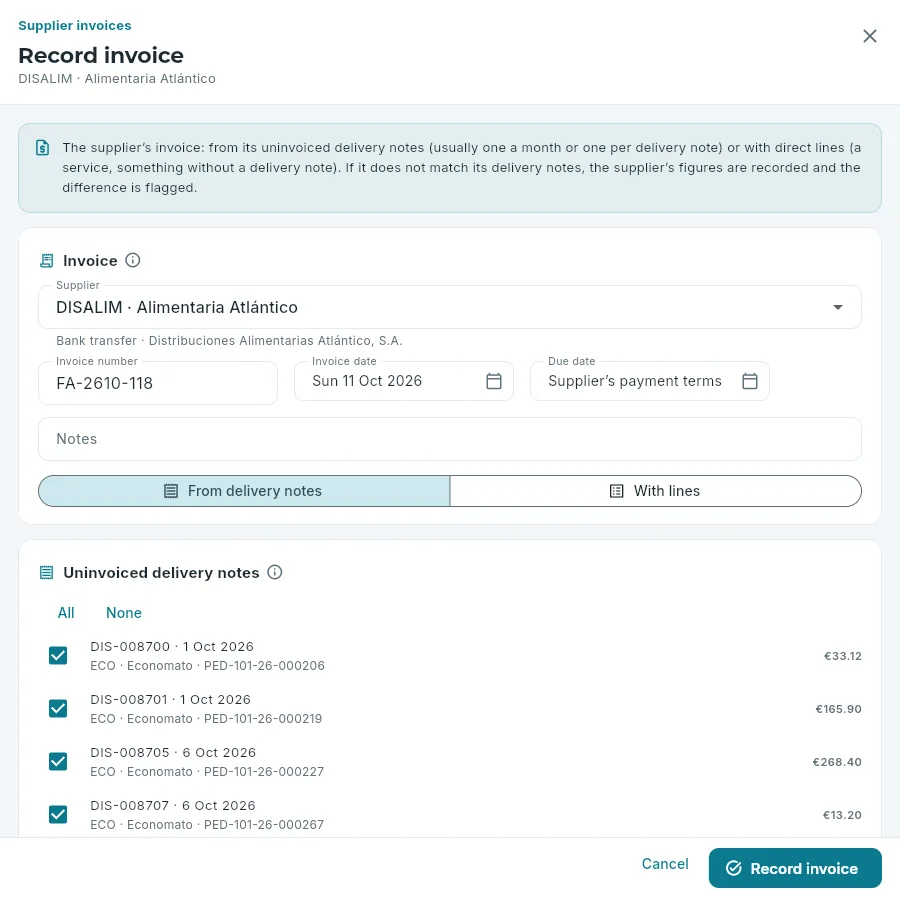 12345
12345
- 1The supplier, with their payment method.
- 2The invoice number and date and its due date (by default, from the supplier’s payment terms).
- 3From delivery notes or with lines (a service, something without a delivery note).
- 4Their uninvoiced delivery notes: tick those the invoice covers (All or None).
- 5Record invoice.
The invoice is calculated from its delivery notes: what was received less what was returned, at its price, by purchasing family and VAT rate (the family decides the expense account in accounting: food, drinks, cleaning…). An invoice belongs to a single hotel.
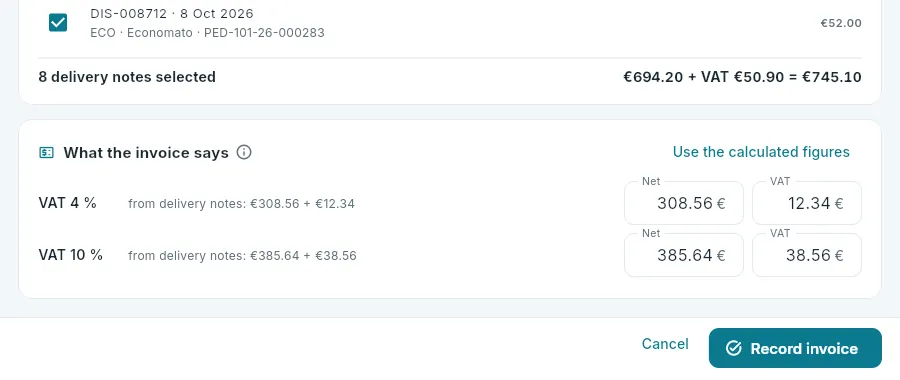 123
123
- 1What the selected delivery notes add up to: base + VAT.
- 2The invoice’s base and VAT, for each VAT rate of its delivery notes.
- 3Use the calculated figures goes back to the delivery notes’ figures.
How it is paid. It depends on the supplier’s payment method:
| Payment method | What happens |
|---|---|
| Bank transfer | It is paid from here: tick the outstanding invoices and Pay. |
| Direct debit | The bank collects it on the due date: the night audit records the payment that day. |
| Cash | It is paid on delivery: it is paid when recorded. |
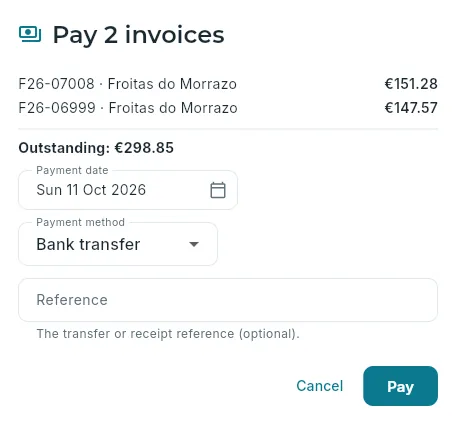 123
123
- 1The selected invoices and their total.
- 2Payment date, method and reference.
- 3Pay.
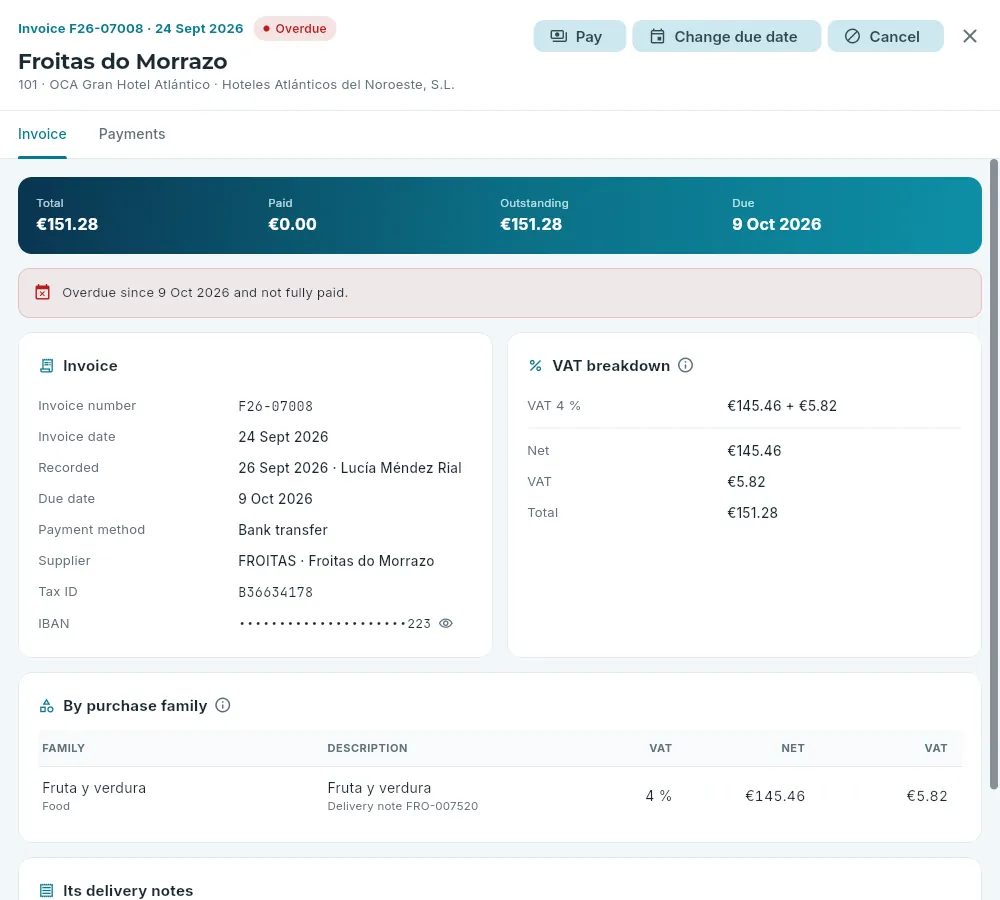 123
123
- 1Pay it from its record.
- 2The VAT breakdown, as the supplier issued it.
- 3Split by purchasing family: what accounting posts to each expense account.
#Stock
Stock is what there is in each storeroom, item by item. Stock is never typed in: it is the sum of the movements (what comes in with delivery notes and what goes out with sales, consumption, transfers and waste), and it is corrected with stock counts.
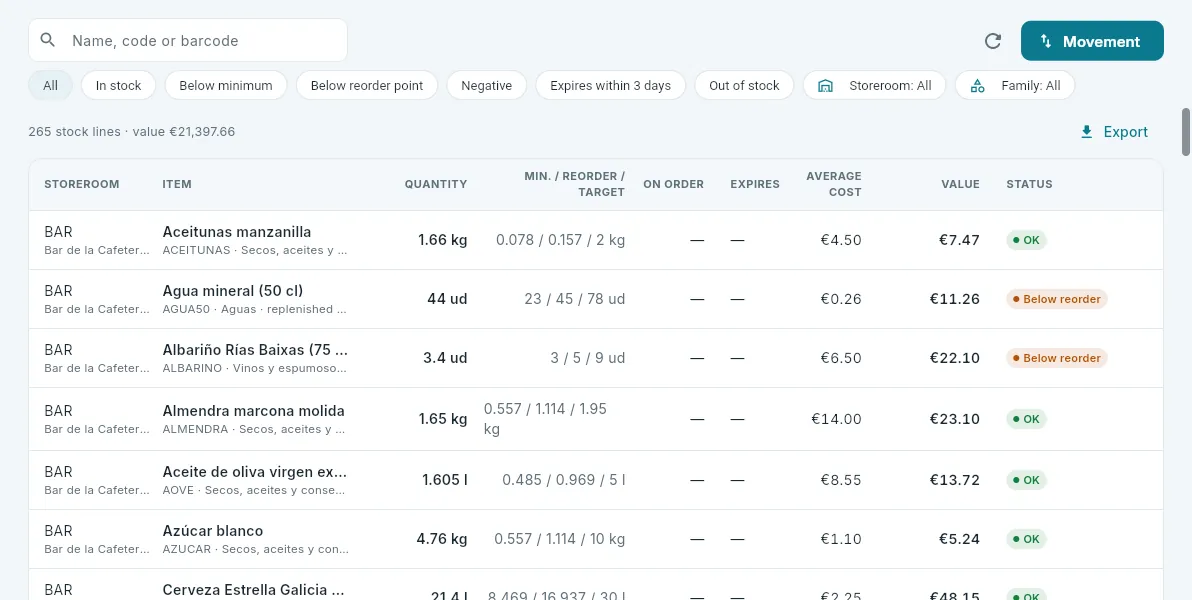 12345
12345
- 1Search by name, code or barcode.
- 2Movement: transfer, waste, internal use or replenish.
- 3In stock, below minimum, below the reorder point, negative, expiring within 3 days or out of stock.
- 4The storeroom and the family.
- 5Each row, one item in one storeroom: quantity, minimum / reorder point / target, what is on order, the nearest use-by date, the average cost, the value and its status. Click it for the item’s record.
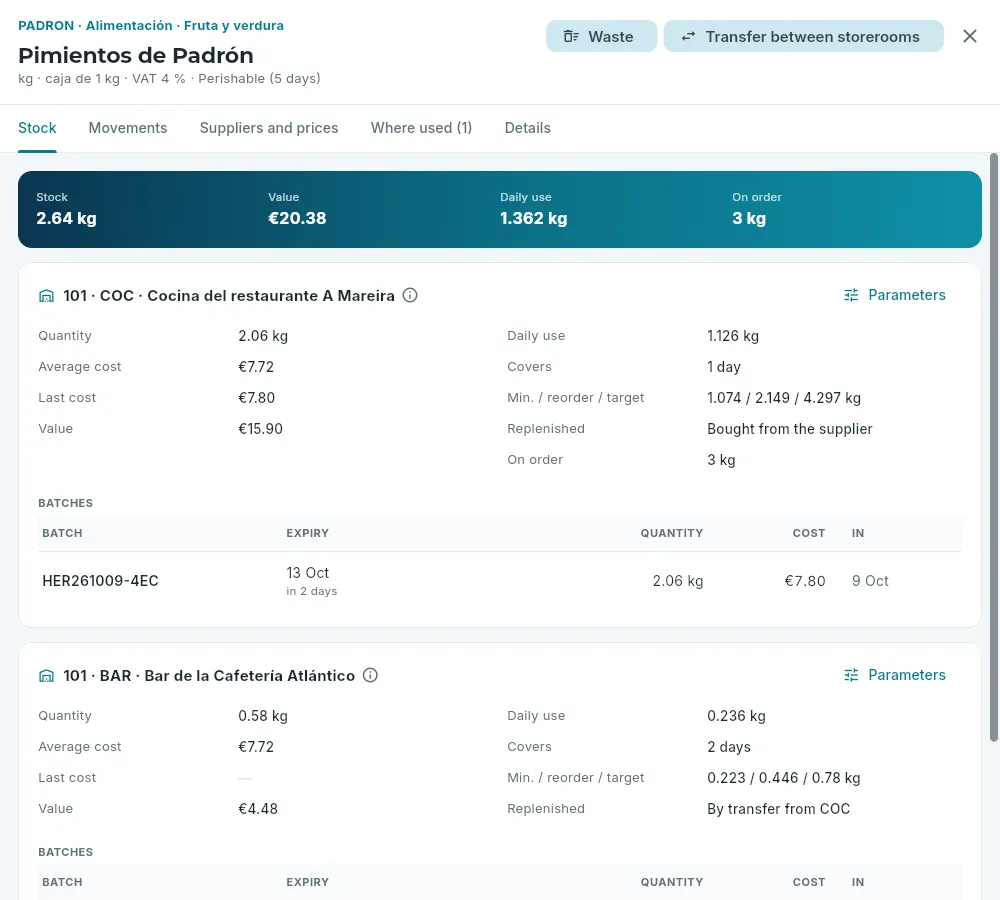 123456
- 1The code, family, unit, pack size, VAT and whether it is perishable (with its shelf life).
- 2A waste entry or a transfer of this item.
- 3Stock, movements, suppliers and prices, where used and its details.
- 4Each storeroom: quantity, average cost, last cost, daily use and the days it covers, its parameters and what is on order.
- 5Parameters: minimum, reorder point and target for this storeroom.
- 6Its batches, with their use-by date, what is left and their entry cost. A batch opens its traceability.
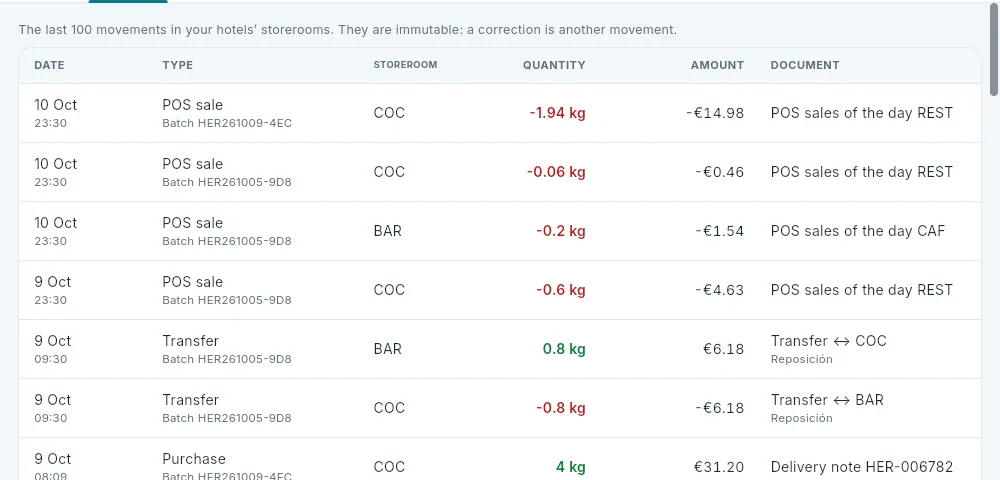 1
1
- 1Every entry and exit, with its batch and document (the delivery note, the POS bill…). They are never deleted.
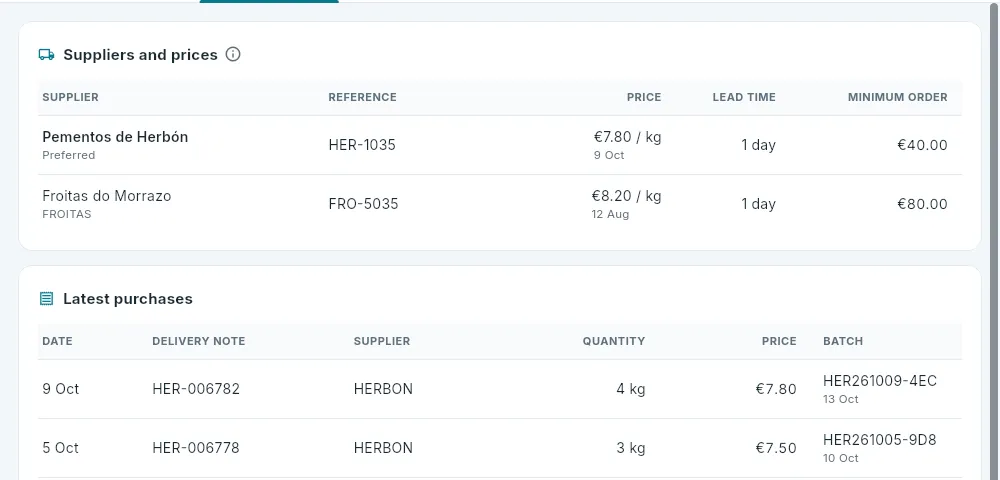 12
12
- 1Who supplies it, their reference and latest price; the preferred one, used in the proposal.
- 2The latest purchases, with their batch.
The Where used tab says which POS dishes the item goes into (its recipe costing), whether it is sold as is (a bottle, a soft drink) and whether it is a housekeeping item (amenities or minibar): see Recipe costings and stock and Housekeeping settings.
#Movements: transfers, waste and internal use
Almost everything that leaves the storeroom does so by itself: POS sales when each bill is closed, housekeeping use when each room is finished and breakfasts in the night audit. Everything else is entered with Movement (in Stock) or from the item’s record:
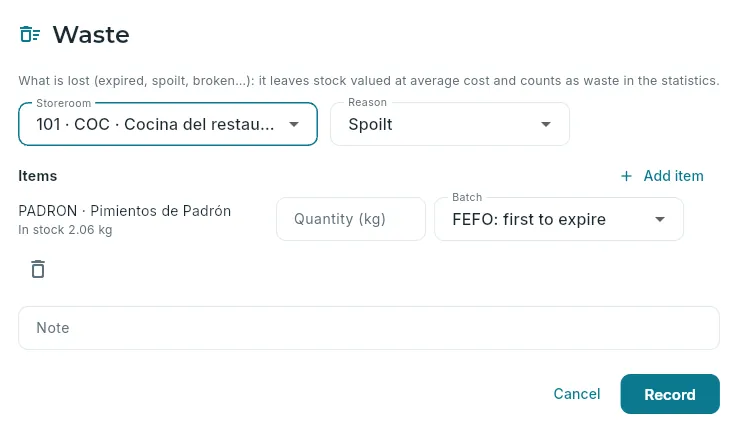 123
123
- 1The storeroom and the reason: expired, damaged, breakage or other.
- 2The items and quantities (from a specific batch, if wanted).
- 3Record: it leaves stock at average cost.
| Movement | What for |
|---|---|
| Transfer between storerooms | Moving goods from one storeroom to another in the same hotel (from the dry store to the kitchen or the bar). It goes out FEFO (below) or from the batch you choose and comes in with its batch and cost. |
| Waste | What is lost: expired, damaged, broken. It goes out at average cost and counts as waste in the statistics. |
| Internal use | What is used without being sold: breakfasts, cleaning, courtesies, staff meals, an event. |
| Replenish from its storeroom | Brings to a storeroom, from its source storeroom (the dry store), what it needs to reach the target for items replenished by transfer. In the demo it is done every morning. |
Every movement is recorded in the event log and is immutable: a correction is another movement.
#Batches and expiry dates
Perishable items (fish, meat, dairy, bread, fruit…) are always received with their batch and use-by date, and each batch is tracked separately. What leaves them goes out FEFO (first expired, first out: the first to expire first), without touching what has already expired, which only leaves when it is written off. Expiry dates brings together what is expiring soon and what has expired.
 1234
1234
- 1The storeroom and how many days to look ahead.
- 2Write off expired stock (whatever is ticked or, with nothing ticked, everything).
- 3What has expired, what is expiring soon and what is pending identification.
- 4Each expired batch can be ticked. Clicking the row opens its traceability.
- Already expired: batches in stock whose date has passed. It is the “write-off proposal” the night audit leaves every night: it has to be thrown away and written off as “expired” waste.
- Expiring soon: what should be used first (let the kitchen or bar know, or move it to another storeroom).
- Pending identification: if a perishable is sold or used with no live batch to cover it, the shortfall stays negative in a special batch, SIN-LOTE, until the next count, which brings it back to zero by counting the real batches.
- The date can be a use-by date (not consumed afterwards) or a best before date (marked “best before”).
 12
12
- 1The batches, as “expired” waste, at average cost.
- 2Write off.
 123
123
- 1Where it came from: the supplier, the delivery note, the order, how much and at what price.
- 2What it was used for: POS, housekeeping, internal use, transfers, waste and what is left.
- 3Each movement of the batch, day by day, with its destination.
In Expiry dates (or in Overview), look at Already expired.
Remove the expired stock from the storeroom and tick its batches (with none ticked, all the expired ones in the chosen storeroom are written off).
Click Write off and confirm.
#Stock counts
A stock count means counting what is really there and adjusting stock to the count. It can cover a whole storeroom (at month end) or just some families (in the demo, every Sunday the kitchen’s fish and meat are counted: the fresh-produce count).
 123
123
- 1The storeroom.
- 2The families to count (none: the whole storeroom).
- 3Open.
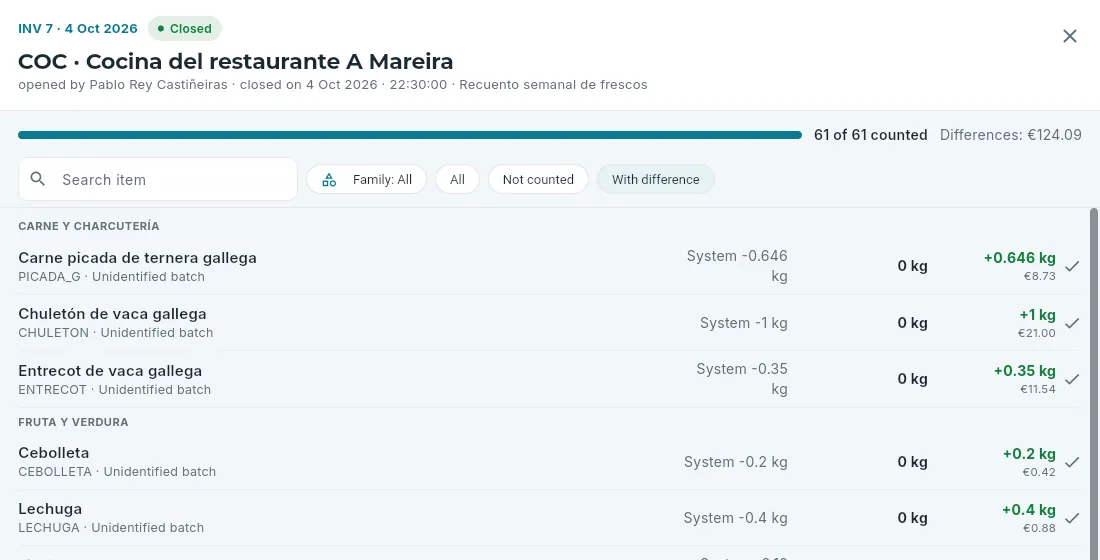 123
123
- 1The stock count, its storeroom and its status.
- 2Search, a family, what is still to count or what has a difference.
- 3Each line: what the system said and what was counted; the difference, in green if there was extra and in red if there was a shortfall.
In Stock counts, click Start a stock count, choose the storeroom and, if it is not a full count, the families, and click Open. What the system says at that moment is taken: one line per item and, for perishables, one per batch.
Count and type what there is on each line (best on a tablet, walking round the storeroom): each figure saves by itself when you press Enter or move to the next. The = button accepts the system’s figure.
If something turns up that was not on the list (another batch, an item), Something not listed adds it, with its batch and use-by date.
When you have finished, click Close and adjust.
#Statistics
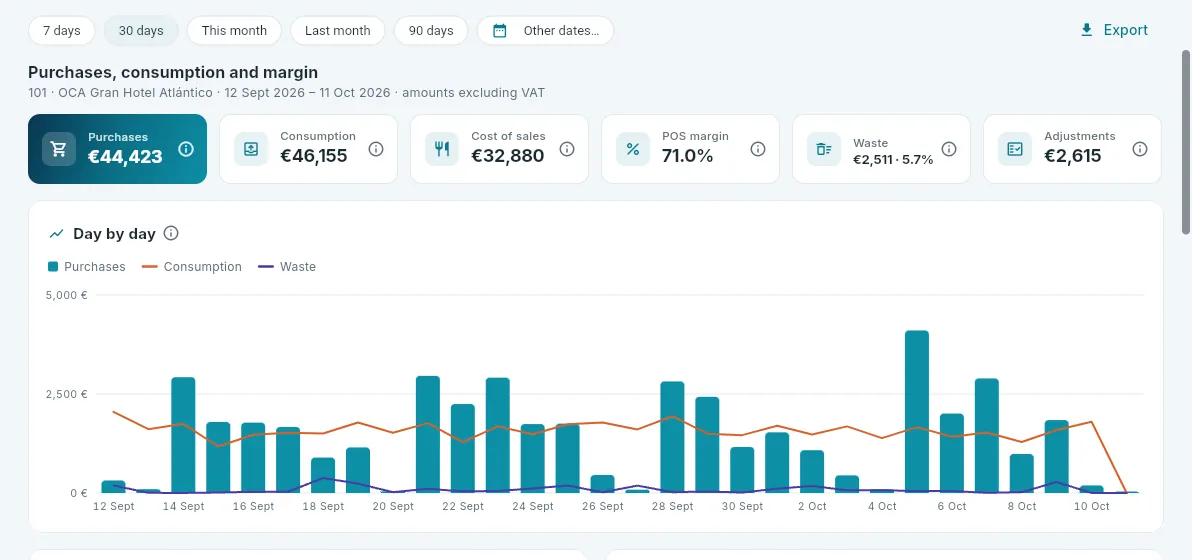 1234
1234
- 1The period.
- 2Export to CSV.
- 3Purchases, consumption, cost of sales, POS margin, waste and adjustments.
- 4Purchases, consumption and waste for each day.
Below, purchases by supplier and by family, the margin by outlet and by menu family, consumption by family and by storeroom, and waste by reason. All excluding VAT.
#Settings: suppliers, items, storerooms and families
Settings has four lists. Suppliers and items belong to the whole chain (every hotel buys with the same details); storerooms belong to each hotel; purchasing families have two levels (family and sub-family) and decide the expense account in accounting and the default VAT for their items.
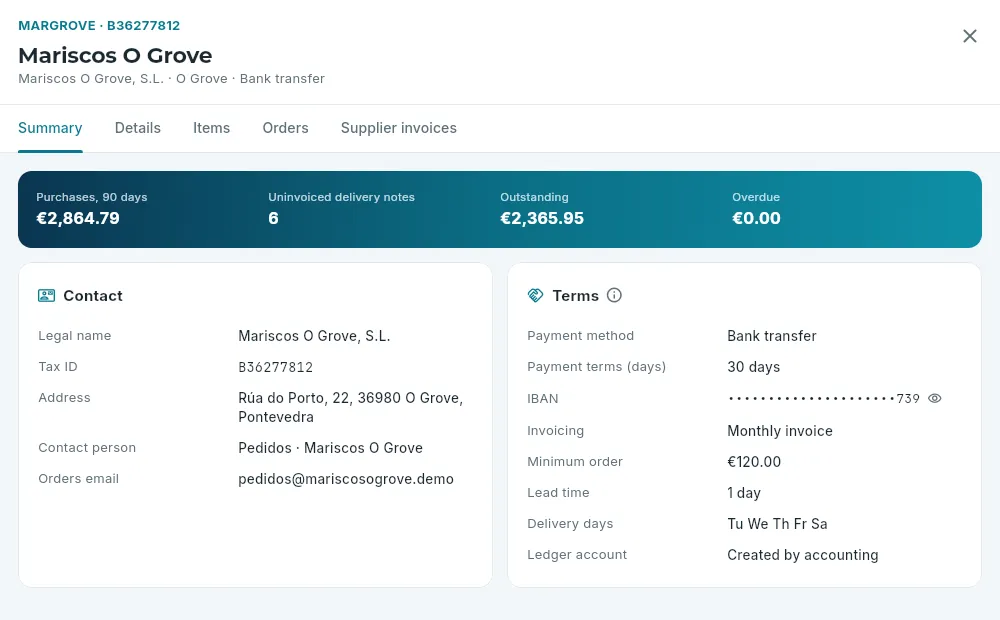 123
123
- 1Overview, details, items, orders and invoices.
- 2Purchases, uninvoiced delivery notes, outstanding and overdue amounts.
- 3Their terms: payment method and terms, IBAN, invoicing, minimum order, lead time and delivery days.
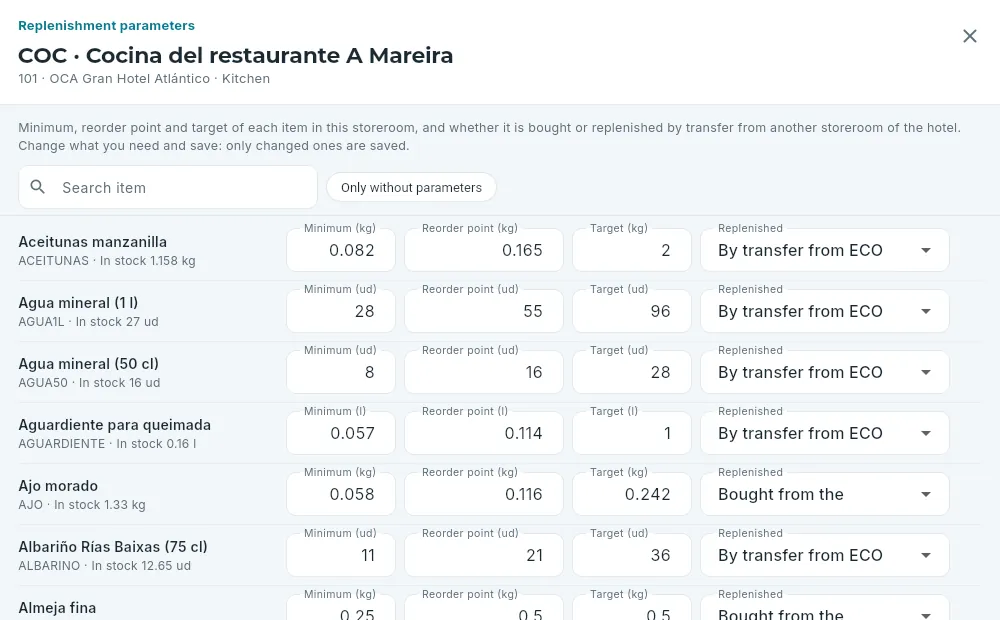 123
123
- 1Search, or only those without parameters.
- 2Minimum, reorder point and target.
- 3Whether it is bought from the supplier or replenished from another storeroom.
- The supplier: company name and tax ID (checked), contact and the orders email (in the demo, .demo addresses only), the payment method and payment terms (which set their invoices’ due dates), the IBAN (required except for cash), whether they invoice monthly or per delivery note, their minimum order, lead time and delivery days, which decide when an order can arrive.
- The item: code and name, family, pack size and barcode; the unit (for stock and for the recipe costings: once it has movements it can no longer change), the units per case (orders are rounded to cases), the VAT, whether it carries excise duty, whether it is perishable (with its shelf life and type of date), its allergens and its suppliers with their reference and price, one of them the preferred one. A new allergen on a stock item is added to the POS dishes that use it.
- Each storeroom’s replenishment parameters: the minimum (below it, an alert), the reorder point (if what will be left at the next delivery falls below it, an order is proposed) and the target (how far to order up to); and whether it is bought from the supplier or replenished by transfer from another storeroom in the hotel (the kitchen and the bar, from the dry store). All of a storeroom’s are changed at once and only the changed ones are saved.
#Stock, the POS and housekeeping
Stock goes down by itself with what happens in the rest of the hotel:
- POS: each outlet says which storeroom it uses (the restaurant, the kitchen; the café, the bar). When a bill is closed, each dish sold deducts the ingredients of its recipe costing that are linked to stock, and anything sold as is (a bottle of water, a beer), one unit of its item. A receipt cancelled later gives nothing back: the food has already gone out. See Recipe costings and stock.
- Housekeeping: when a room is finished, what was restocked (amenities) leaves the housekeeping storeroom and what was taken from the minibar, the minibar one (or the housekeeping one). Linen is not deducted: it goes to the laundry and comes back. See Housekeeping settings.
- Breakfasts: the night audit records as internal use what is eaten per person with breakfast.
#What each role sees
#Frequently asked questions
Why does the proposal order something that is still in the storeroom? Because it looks ahead to the next delivery: if the supplier does not come back for three days and occupancy goes up, what there is will not last. The line’s Why? shows it with its figures.
And why does it not propose something that is running out? It may already be on order (outstanding orders count), it may be replenished from the dry store (it comes by transfer, it is not bought), it may have no reorder point in that storeroom or its preferred supplier may be inactive.
An item is negative. Is the POS wrong? No: something went out without a recorded entry (a delivery note not yet confirmed, a recipe that uses more than expected). Confirm whatever is awaiting delivery and the next count will clear it up.
The supplier has brought a different batch from the one on the order. Orders have no batches: the batch is typed when receiving, the one on the label. If there are two, Another batch.
Can I change an order already sent? No: the supplier already has it. Whatever arrives is received (even if it is not what was ordered) and, if something is missing that is no longer coming, Nothing more to come.
The supplier’s invoice does not match their delivery notes. Record it as it stands (The invoice says otherwise): the difference stays visible until it is sorted out with the supplier.
Why can I not cancel an invoice? Because it already has payments: cancel the payment first (from its record) and then the invoice; its delivery notes go back to being uninvoiced.
Are orders really sent? No: in the demo the email to the supplier is simulated and only goes to .demo addresses, to the capture mailbox. See Getting started.
Management
Reports
Management reports: how the day, the month and the year are going against last year and the budget, the daily report, revenue, booking pace and pickup, cancellations and each hotel’s budgets.
Reports brings together the figures a hotel is run on: how yesterday went, how the month and the year are going, what is already sold for the coming weeks and how fast it is coming in, what is being cancelled and whether the budget is being met. Each tab is a report; they all work with the hotel selector in the top bar: with All my hotels they add up your hotels, and with one, only that one.
Before reading them, four criteria that apply to all of them:
- Excluding VAT. Amounts are excluding VAT (what really stays with the hotel), except anything marked “incl. VAT”: payments and invoices.
- Without the tourist tax. The tax is a levy the hotel collects on behalf of others: it is shown separately and is not added to revenue.
- Against last year (LY): by day and week, the same weekday 364 days earlier (a Saturday with a Saturday); by month, the same month last year. Days before OCA PMS come from each hotel’s history.
- Against budget (Bgt): the month’s budget, spread evenly over its days when the period is not a whole month.
Variances are in green if they are good and in red if not; occupancy variances, in percentage points (pp). All the figures are calculated by the database with the same criteria on every screen (the Dashboard too), and each one has its ⓘ.
#The management dashboard
The first tab, Management, sums everything up: yesterday (the last closed day), the month and the year up to yesterday, what is on the books for the next 30 days and, further down, the trend over the last few weeks.
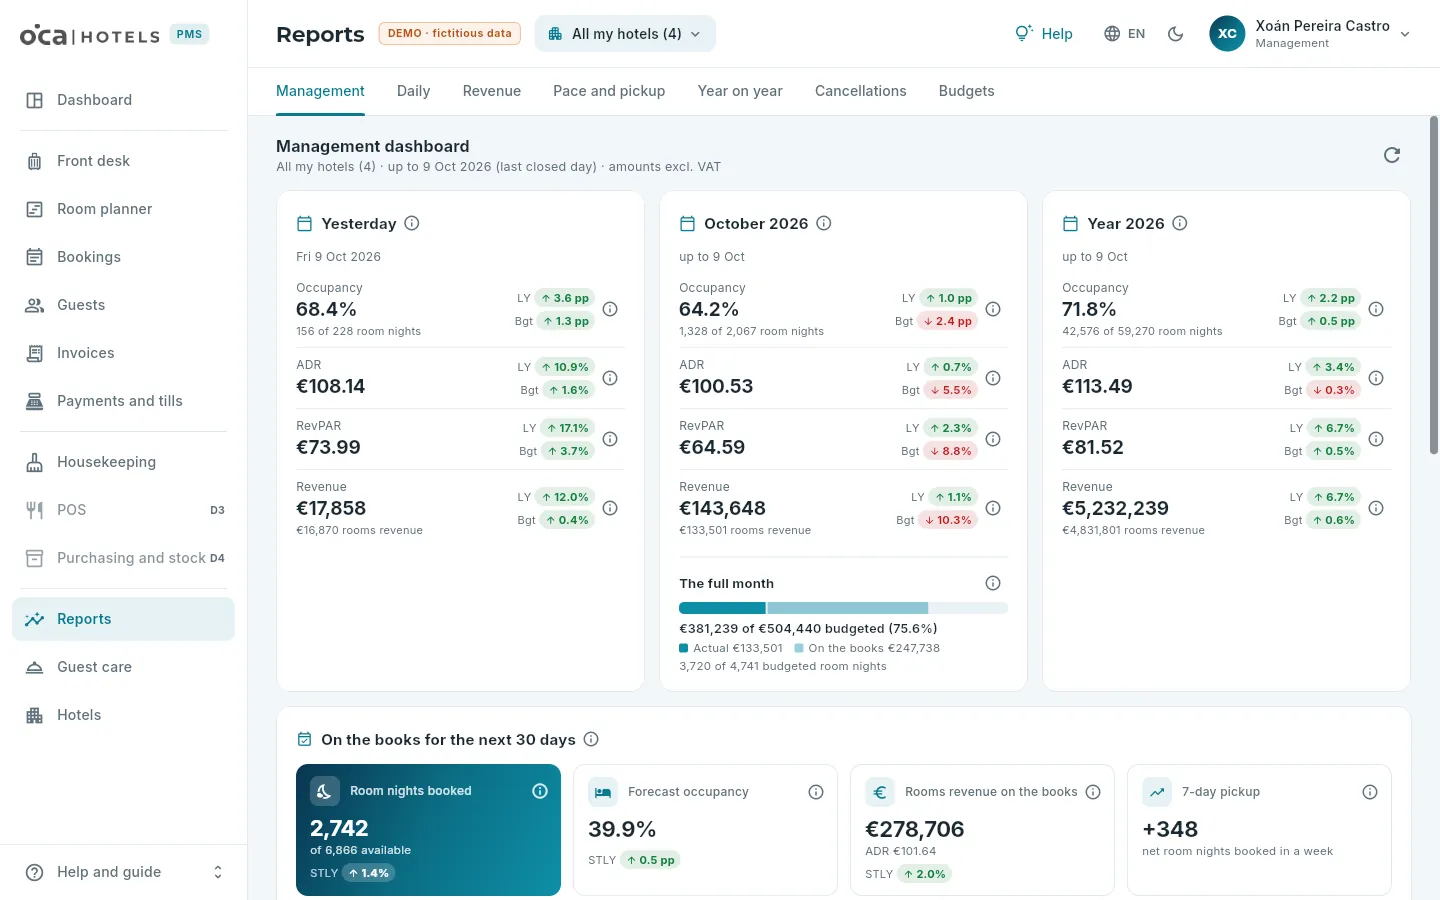 1234567
- 1The reports, one per tab.
- 2Which hotels it covers, up to which day (the last closed one) and the reminder: excluding VAT.
- 3Yesterday: occupancy, ADR, RevPAR and revenue for the last closed day.
- 4Each figure against last year (LY) and the budget (Bgt), with its ⓘ.
- 5The month, up to yesterday; below, how it would end with what is already booked, against its budget.
- 6The year, up to yesterday.
- 7What is on the books for the next 30 days against the same time last year (STLY) and what was booked in the last week.
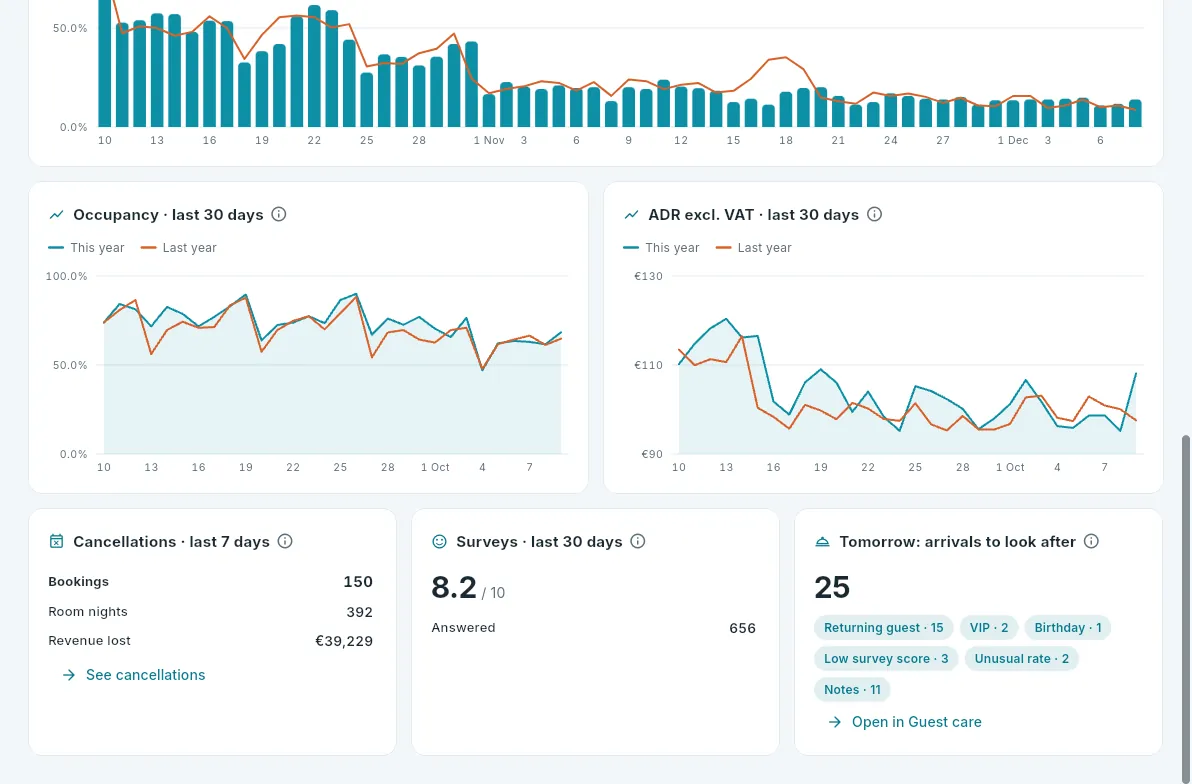 1234
1234
- 1Occupancy and ADR for the last 30 days against last year; above them, the occupancy already booked for the next 60 nights. Hover over a chart to see each day.
- 2What was cancelled in the last week, with See cancellations.
- 3The average survey score for the last month.
- 4Tomorrow’s arrivals with something to look after, by reason, with Open in Guest care.
#The daily report
Daily is the report for a closed day (yesterday by default): what was produced and how it was paid. It is the one a hotel’s management reads every morning, and the one that arrives by email when the day is closed.
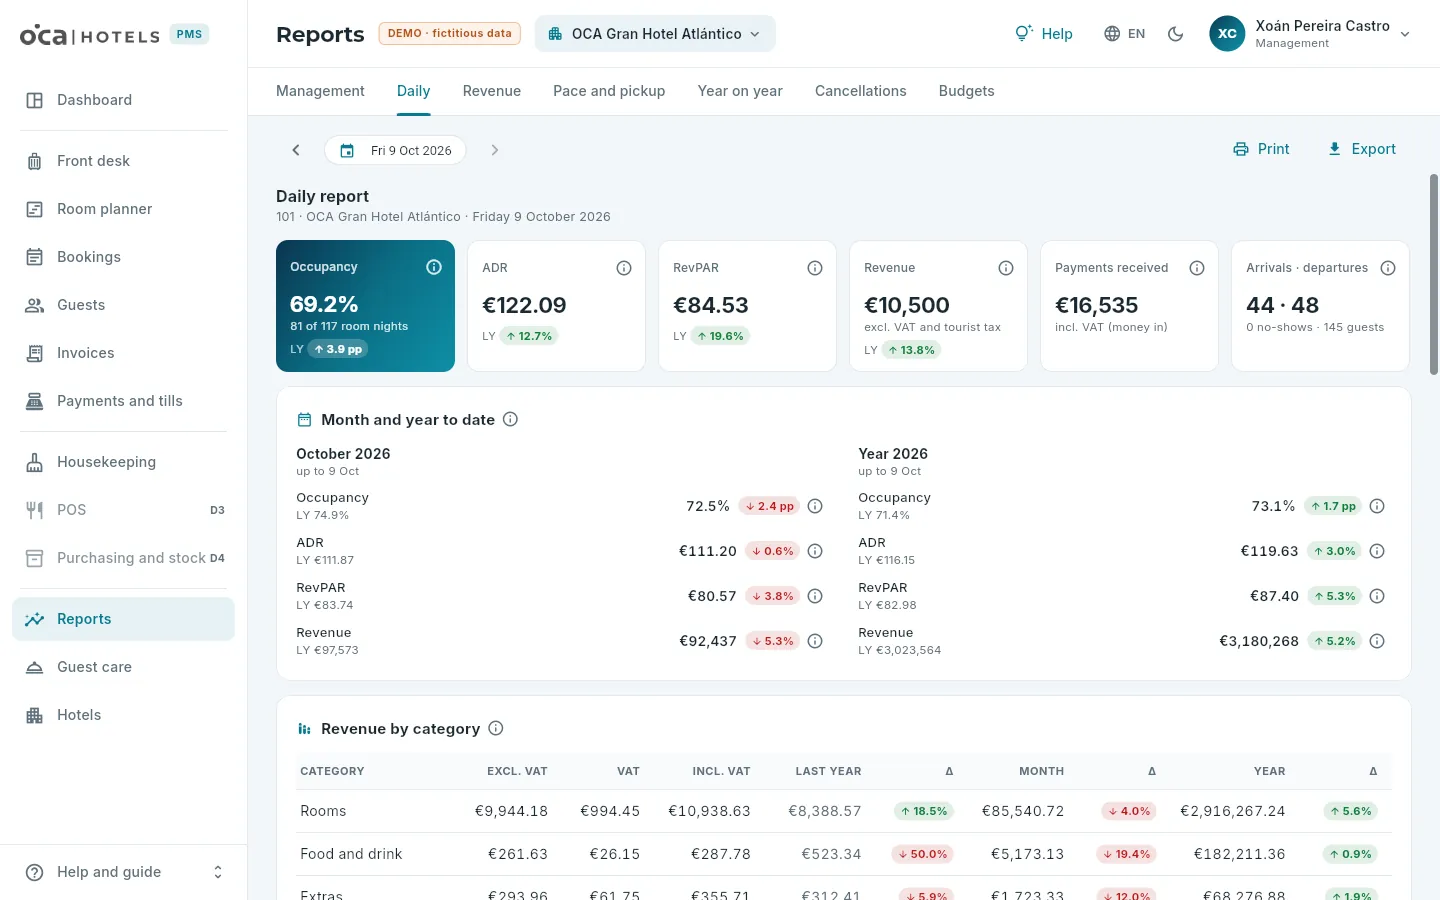 12345
12345
- 1The day: any day already closed.
- 2Print (or save as PDF) and Export to CSV.
- 3The day in figures: occupancy, ADR, RevPAR, revenue, payments received (including VAT: it is money) and arrivals and departures.
- 4Month and year to date, against last year.
- 5Revenue by category: excluding VAT, VAT and including VAT, last year, the month and the year.
Further down, in the same report:
- Payments: payments received by payment method (payments minus refunds), what was invoiced on credit, deposits (money received that is not yet applied to any invoice) and cash in and out of the tills.
- Outstanding credit by age: what agencies and companies owe for their invoices on credit, not yet due and in bands of days overdue (as of today, not as of the report date).
- VAT: accrued VAT (on what was produced that day) and invoiced VAT (on the invoices issued that day), by rate. They do not have to match: revenue is produced each night and invoiced on departure.
- Invoices and credit notes: full, simplified, on credit and corrective invoices, with the total invoiced.
- Food and drink (POS): what was sold that day at the POS outlets, including VAT, as the POS charges it: receipt sales and how many receipts, what was charged to rooms, covers, the average bill and each outlet. In revenue, the same goes into food and drink excluding VAT.
- Commission, discounts and complimentaries: what selling costs (agency commission for the day’s nights) and what is given away: discounts on folios and at the POS and POS complimentaries, at menu price.
- Day close: who closed the day and when (with one hotel chosen) and who receives the report by email.
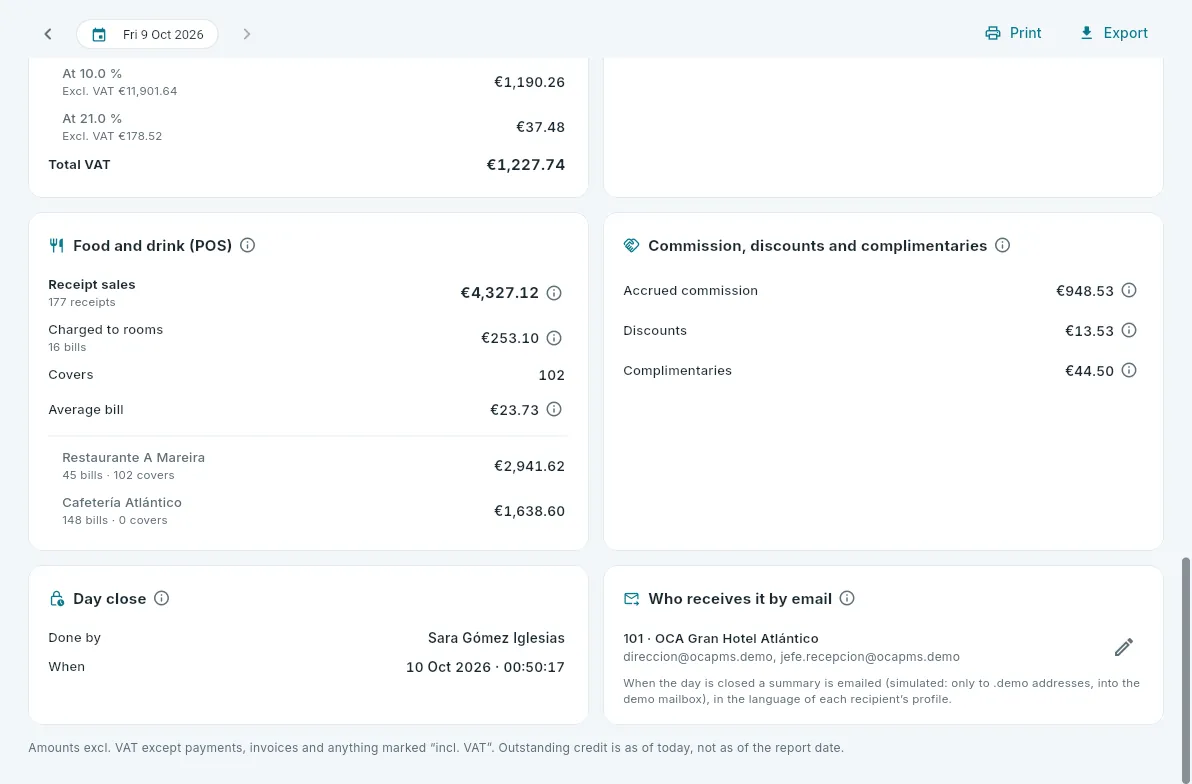 12345
12345
- 1Accrued VAT and, below, invoiced VAT, by rate.
- 2Food and drink (POS): receipt sales, charged to rooms, covers, average bill and each outlet.
- 3Commission, discounts and POS complimentaries.
- 4Who receives the report by email when the day is closed; the pencil changes it.
- 5Day close: who did it and when.
#Revenue
Revenue is what was produced in a period – the folio charges: the nights posted by the night audit and the extras – grouped however you like: by category (rooms, food and drink, extras, other), by item, by agency, by channel, by hotel, by month or by day.
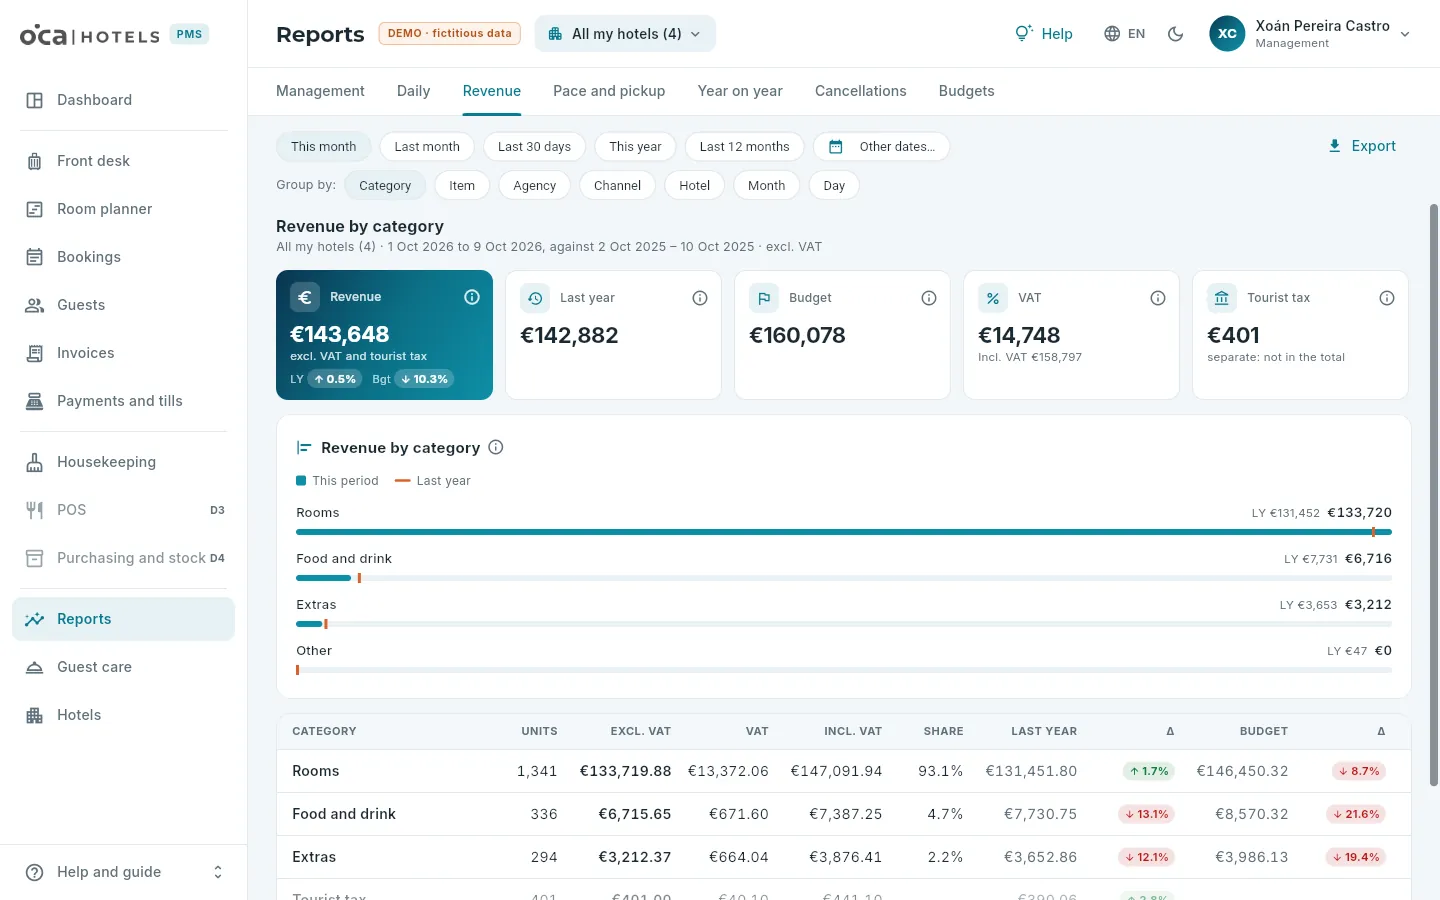 12345
12345
- 1The period: this month, last month, the last 30 days, this year, the last 12 months or other dates.
- 2Group by category, item, agency, channel, hotel, month or day.
- 3Export to CSV.
- 4Revenue excluding VAT against last year and the budget, VAT and the tourist tax, shown separately.
- 5The chart: each group against last year (the orange mark). Below, the table with units, excluding VAT, VAT, including VAT, the share and the variances.
Comparison against the budget is only by category: each hotel’s budget is by category and month (see Budgets). Last year’s data from before OCA PMS only exists by category, hotel, month or day.
#Booking pace and pickup
Pace and pickup looks ahead: for each of the coming nights, what is already booked (on the books), what has been booked in the last day, 7 days and 30 days (the pickup), what had been booked at this point last year (STLY), how that night ended last year and the budget. It is the pricing report: if a night is looking weak against last year, it is time to move the rate or the channels.
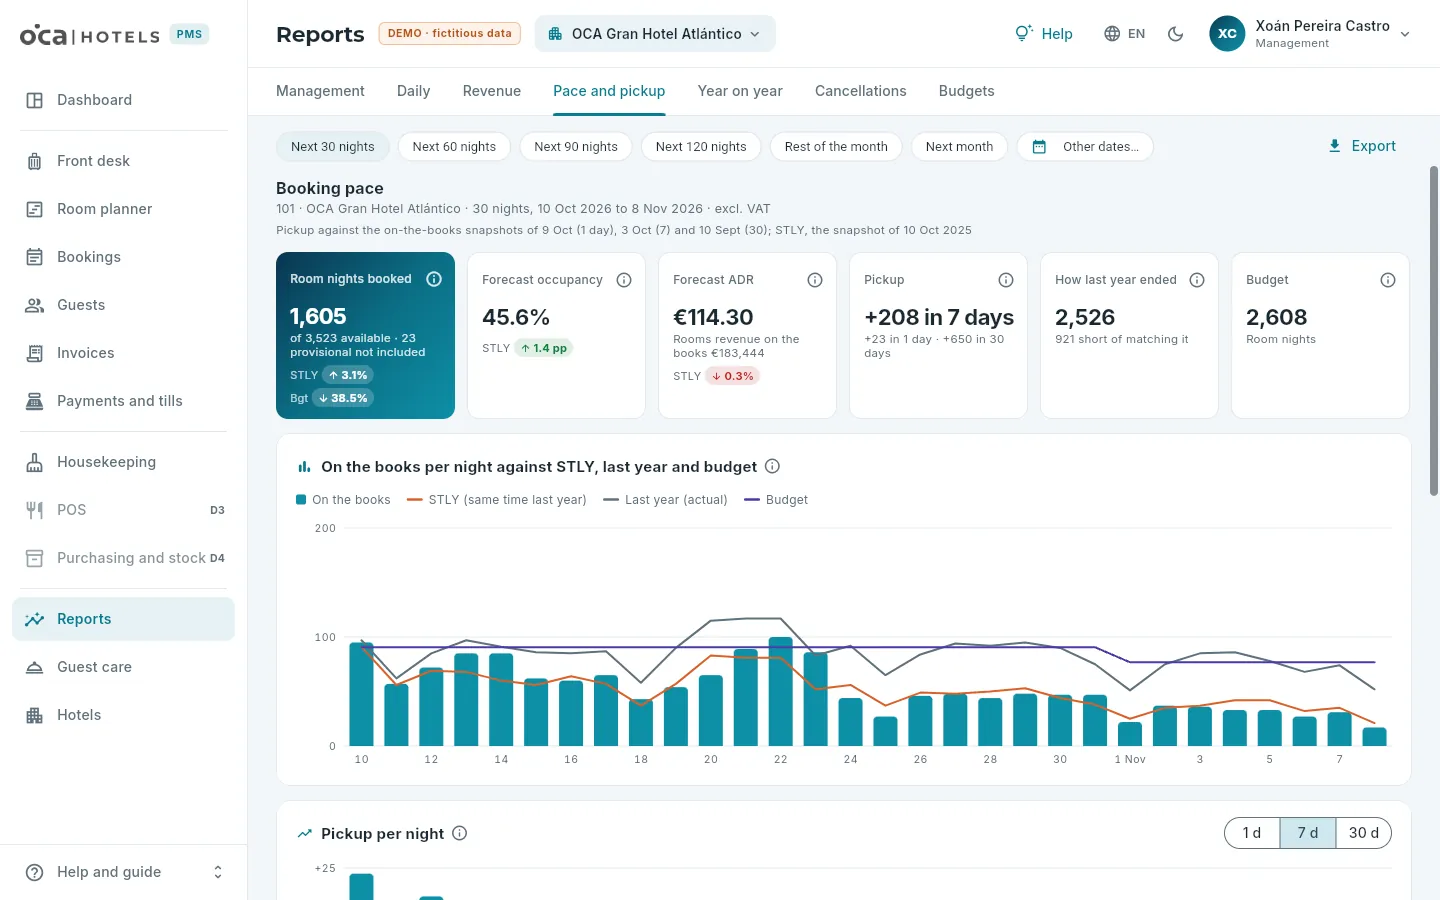 12345
12345
- 1The nights: the next 30, 60, 90 or 120, the rest of the month, next month or others.
- 2Which nights they are and which on-the-books snapshots the pickup comes from (those from 1, 7 and 30 days ago), and the STLY.
- 3What is booked against STLY and the budget, forecast occupancy and ADR, the pickup, how last year ended and the budget.
- 4Night by night: what is on the books (columns) against STLY, last year and the budget (lines).
- 5The pickup for each night, over 1, 7 or 30 days.
With one hotel chosen, further down there is what is on the books by room type (to adjust the price of each type separately) and the night by night table with all the figures, which can be exported to CSV. A negative pickup means that more was cancelled than came in during those days.
#Year on year
Year on year compares the closed days of a period with last year’s, by day, week or month: occupancy, ADR, RevPAR, revenue and room nights. At the top, the total for the period; in the chart, the indicator you choose, period by period; and below, the table with all of them, which can be exported. If a period does not have the same days as last year’s (a month that has not finished yet), the table says so.
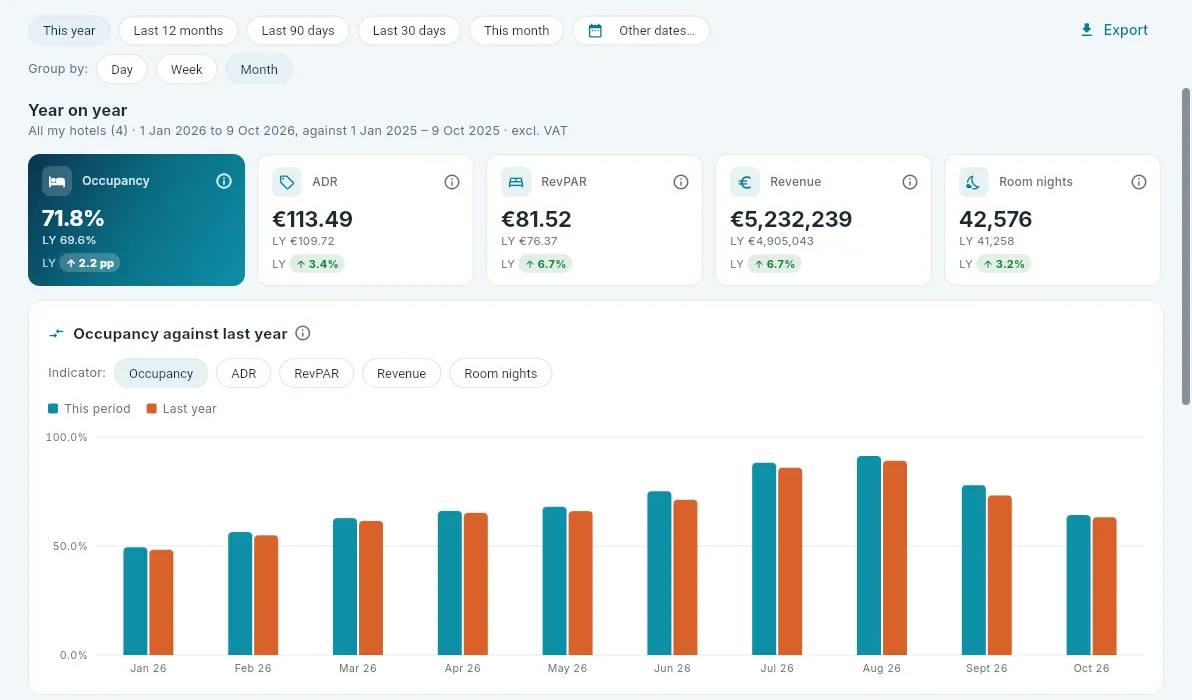 1234
1234
- 1The period.
- 2By day, week or month.
- 3The total for the period against last year.
- 4The chart’s indicator.
#Cancellations
Cancellations counts what was cancelled by its actual cancellation date (the day it was cancelled, not the day the guest was due to arrive), against what was cancelled on the same dates last year: how many bookings, how many room nights and how much revenue was lost, the cancellation rate, how far in advance bookings are cancelled and, separately, the no-shows.
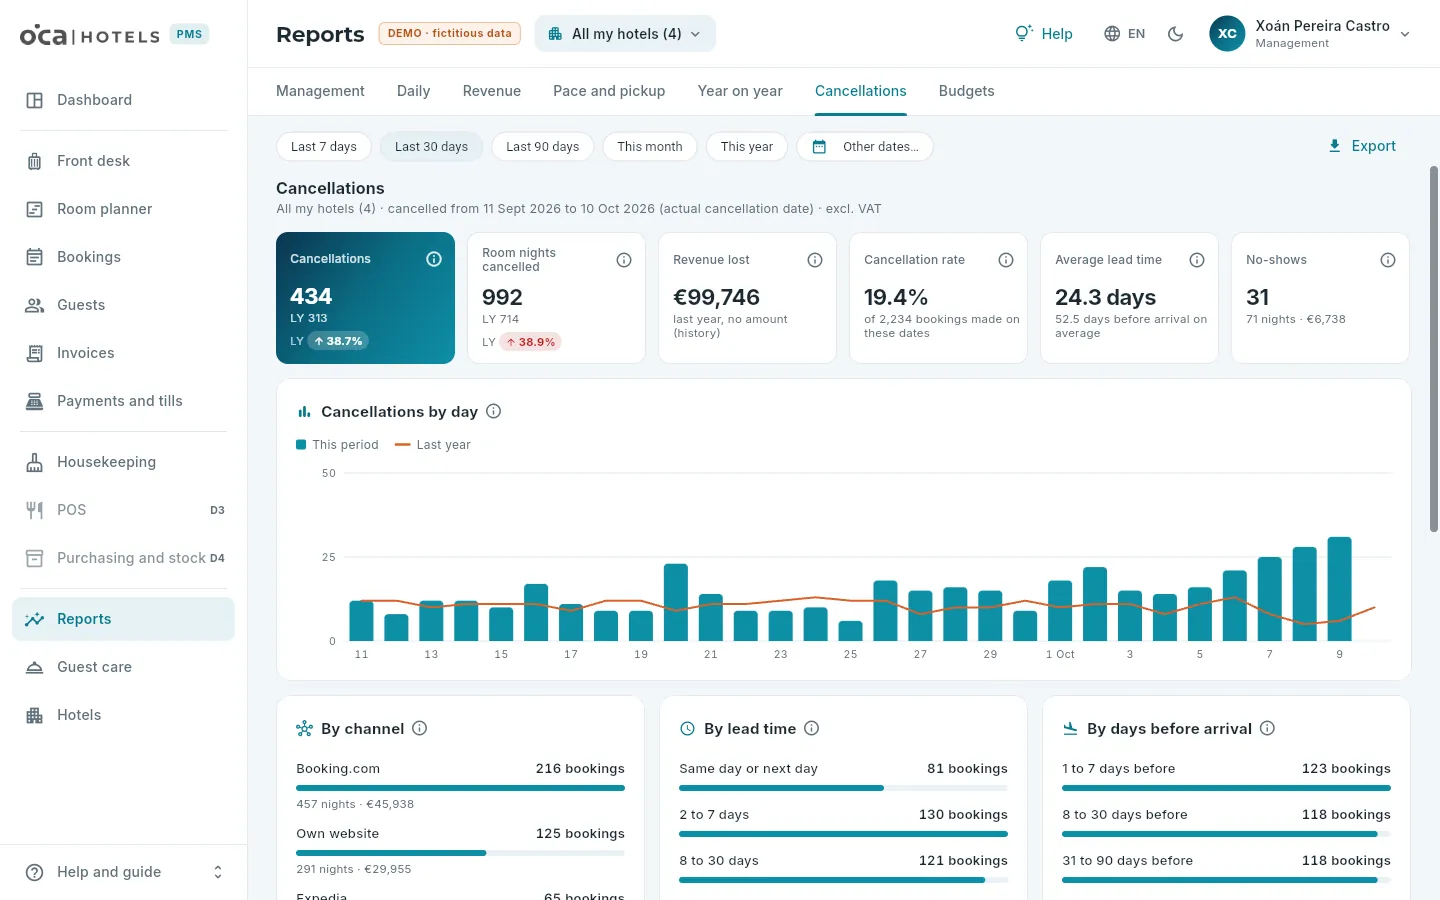 1234
1234
- 1The cancellation dates.
- 2Cancellations against last year, room nights, revenue lost, cancellation rate, average lead time and no-shows.
- 3Those for each day against the same weekday last year.
- 4By channel, by lead time (from booking to cancellation) and by days before arrival. Further down, the list: each one opens its booking.
#Budgets
The budget belongs to one hotel and one year: for each month, the expected room nights and revenue excluding VAT by category. Budgets compares it with the actual figures for closed days and with what is on the books for the nights still to come, month by month, and with last year. With All my hotels, it asks you to choose one.
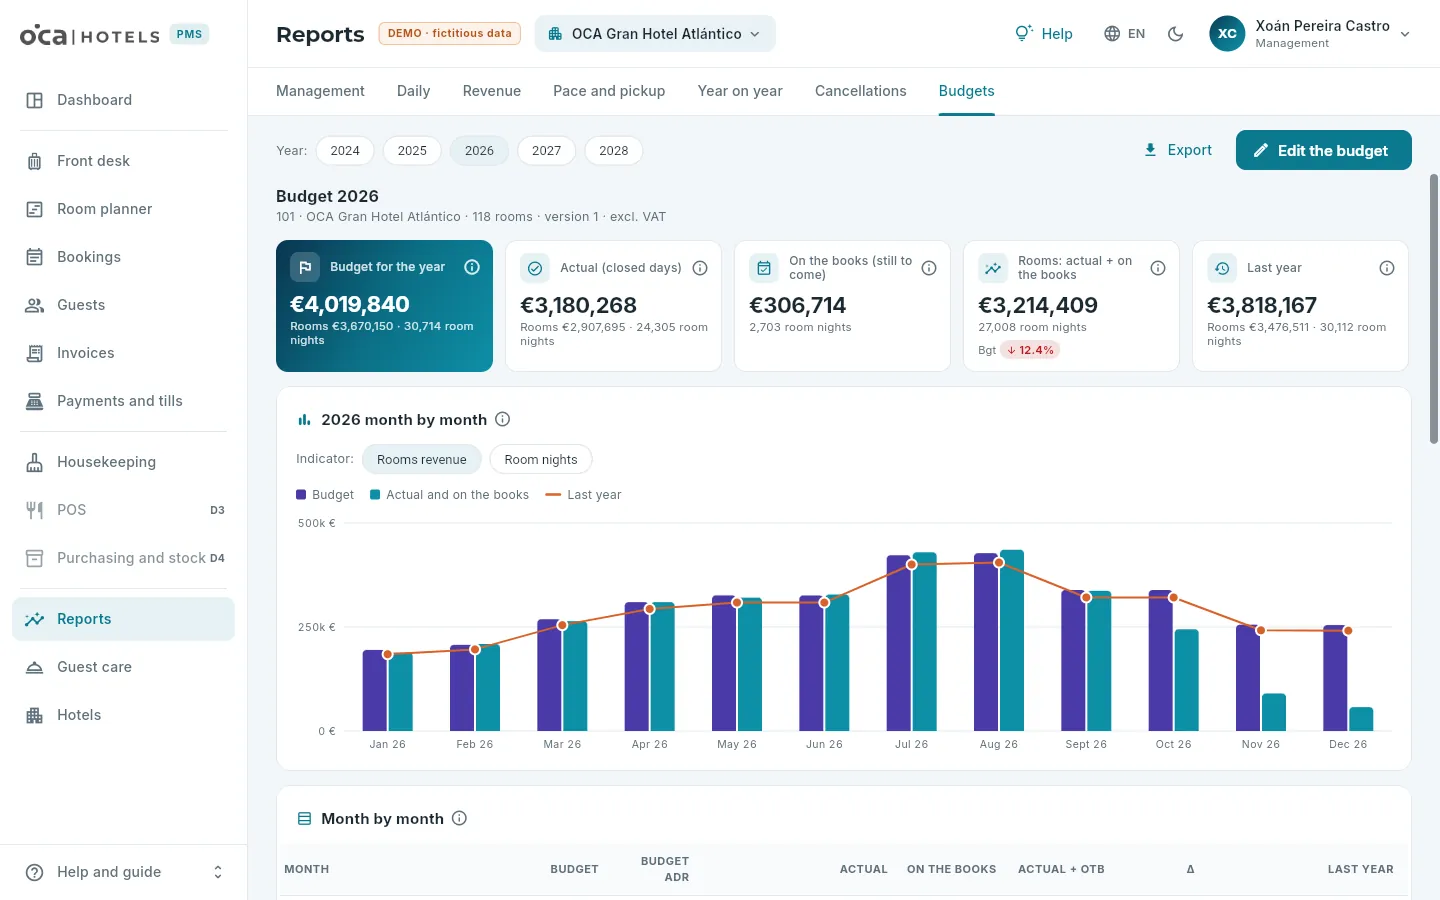 1234
1234
- 1The year.
- 2Edit the budget (with the relevant permission) and export it.
- 3The budget for the year, the actual figures for closed days, what is on the books for the rest, how rooms revenue would end and last year.
- 4The month-by-month chart, of rooms revenue or room nights: budget, actual plus on the books, and last year.
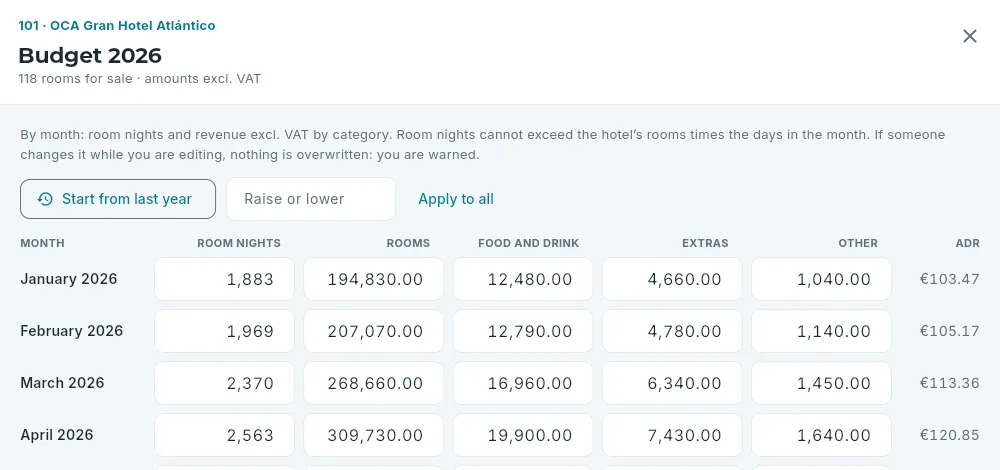 123
123
- 1Start from last year: fills each month with the previous year’s actual figures.
- 2Raise or lower by a percentage and apply it to all.
- 3Each month: room nights, rooms, food and drink, extras and other, excluding VAT; on the right, the resulting ADR.
Choose the hotel in the top bar and, in Budgets, the year.
Click Create the budget (or Edit the budget, if it already has one).
Click Start from last year to begin with the previous year’s actual figures and, if you like, enter a percentage in Raise or lower and click Apply to all.
Adjust whichever months you want.
Click Save the budget.
#What each role sees
Management
Guest care
Looking after guests: the arrivals that deserve a special touch (repeat guests, VIPs, birthdays, a low previous survey, an unusual price), satisfaction surveys and the emails guests receive.
Guest care helps make every guest feel well received. It has three tabs:
- Arrivals: who is arriving tomorrow (or on the days you choose) and deserves a special touch or extra care, and why.
- Surveys: what guests think of their stay, in the HotelsQuality satisfaction surveys.
- Communications: the emails guests receive (their booking confirmation, the welcome sheet, the survey…), their templates and what each hotel sends. Only those who can change templates (management) see it.
Everything follows the hotel selector in the top bar: with All my hotels, yours; with one, only that one.
#Arrivals to look after
By default, Arrivals shows tomorrow’s arrivals that have something to look after: with time to prepare the room, a welcome amenity or a greeting from the management. Each one shows its reasons:
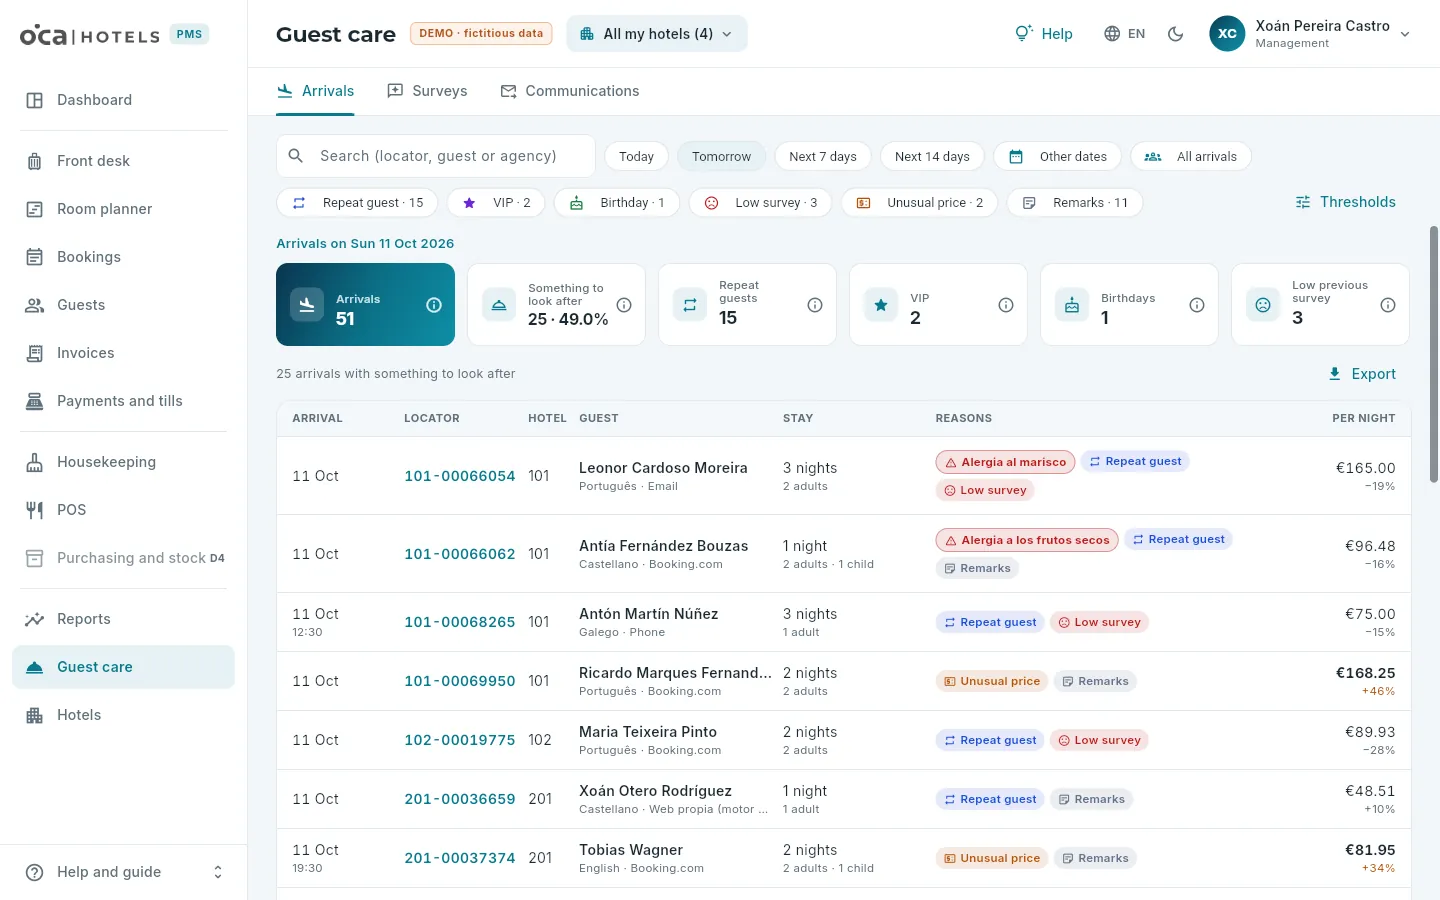 123456
- 1The three tabs.
- 2The dates (tomorrow by default; up to 15 days) and All arrivals, to also see those with nothing special.
- 3The reasons, with how many arrivals each one has: click one to see only those.
- 4Each hotel’s thresholds for an unusual price and a low survey.
- 5How many are arriving, how many have something to look after (and what share they are) and how many for each reason, each with its ⓘ.
- 6Each arrival: the day and expected time, the booking, the hotel, the lead guest with their language and channel, the stay, the reasons and the price per night against that of its room type. Click it to see the details.
| Reason | When it appears | What to do |
|---|---|---|
| Repeat guest | The lead guest or a registered guest has stayed before at any hotel in the chain. | Welcome them as a familiar face: look over their previous stays and what they asked for then. |
| VIP | The lead guest’s record is marked as VIP. | Let management and housekeeping know: room inspected and a welcome amenity. |
| Birthday | The lead guest or a guest has a birthday during the stay. | A small gift in the room or birthday wishes on arrival. |
| Low survey | Their last survey scored below the hotel’s low score. | Take special care of this stay: read what they did not like and inspect the room before they arrive. |
| Unusual price | Its average nightly price differs a lot from that of the other bookings of the same room type that month. | Check the rate, the nights and the occupancy: it may be a data-entry mistake or a special condition. |
| Remarks | The booking has remarks. | Read them and prepare whatever they ask for. |
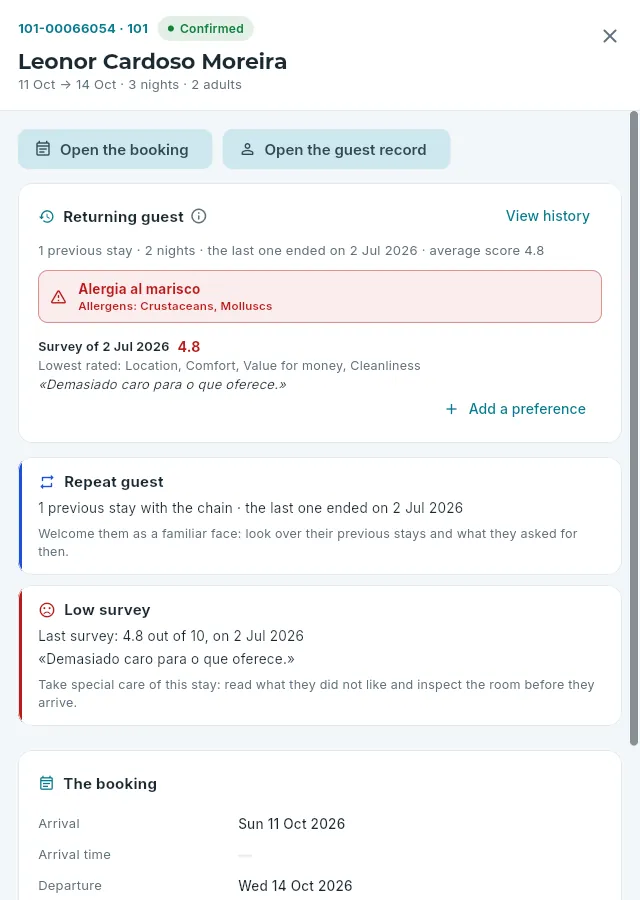 12345
12345
- 1The booking record and the guest record.
- 2Returning guest: what we already know about them, the important things first (here, an allergy), with View history and Add a preference.
- 3Each reason, with its details (here, how many previous stays and when the last one ended) and what to do.
- 4Their last survey: the score, the date and what they wrote.
- 5The booking: dates, arrival time, rooms, guests, channel, language and previous stays.
Returning guests. If the lead guest has stayed with the chain before or has something recorded, the details of their arrival begin with the Returning guest card: their stays and average score, their preferences (important ones, such as an allergy or an accessibility need, first and in red), what their stays show (what they ask for, the floor, arrival time, what they usually have), what they last asked for and their latest survey. View history opens their record with everything and Add a preference records whatever they say when booking or calling (see Guests). The same card appears in their booking’s summary. And in the list, each of the lead guest’s important preferences has a red chip next to the reasons, so it can be seen without opening anything.
The thresholds decide when an arrival is flagged for an unusual price (how far its price may differ, above or below) or for a low survey (the score below which it is flagged). They are set per hotel and changed by anyone with the Budgets permission (management and accounts), with Thresholds.
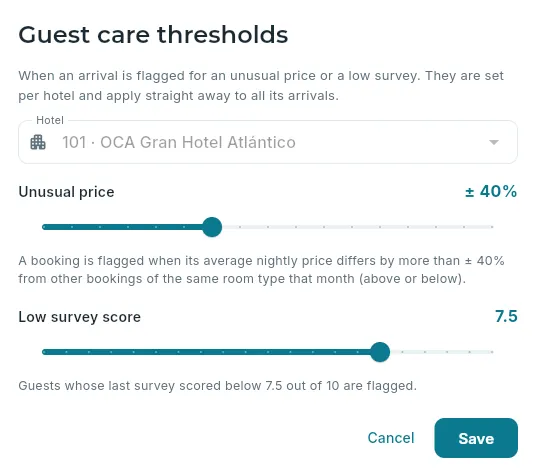 12
12
- 1How far a booking’s price may differ from that of the others of its type that month.
- 2The low score: below it, the arrival is flagged with Low survey.
#Satisfaction surveys
When a stay ends, the guest receives a HotelsQuality survey by email (if the hotel sends them and the lead guest has an email address). In the demo, HotelsQuality is simulated: the email goes to the capture mailbox and the answers are made up by the demo itself throughout the day. Surveys shows those for the stays ending on the chosen dates.
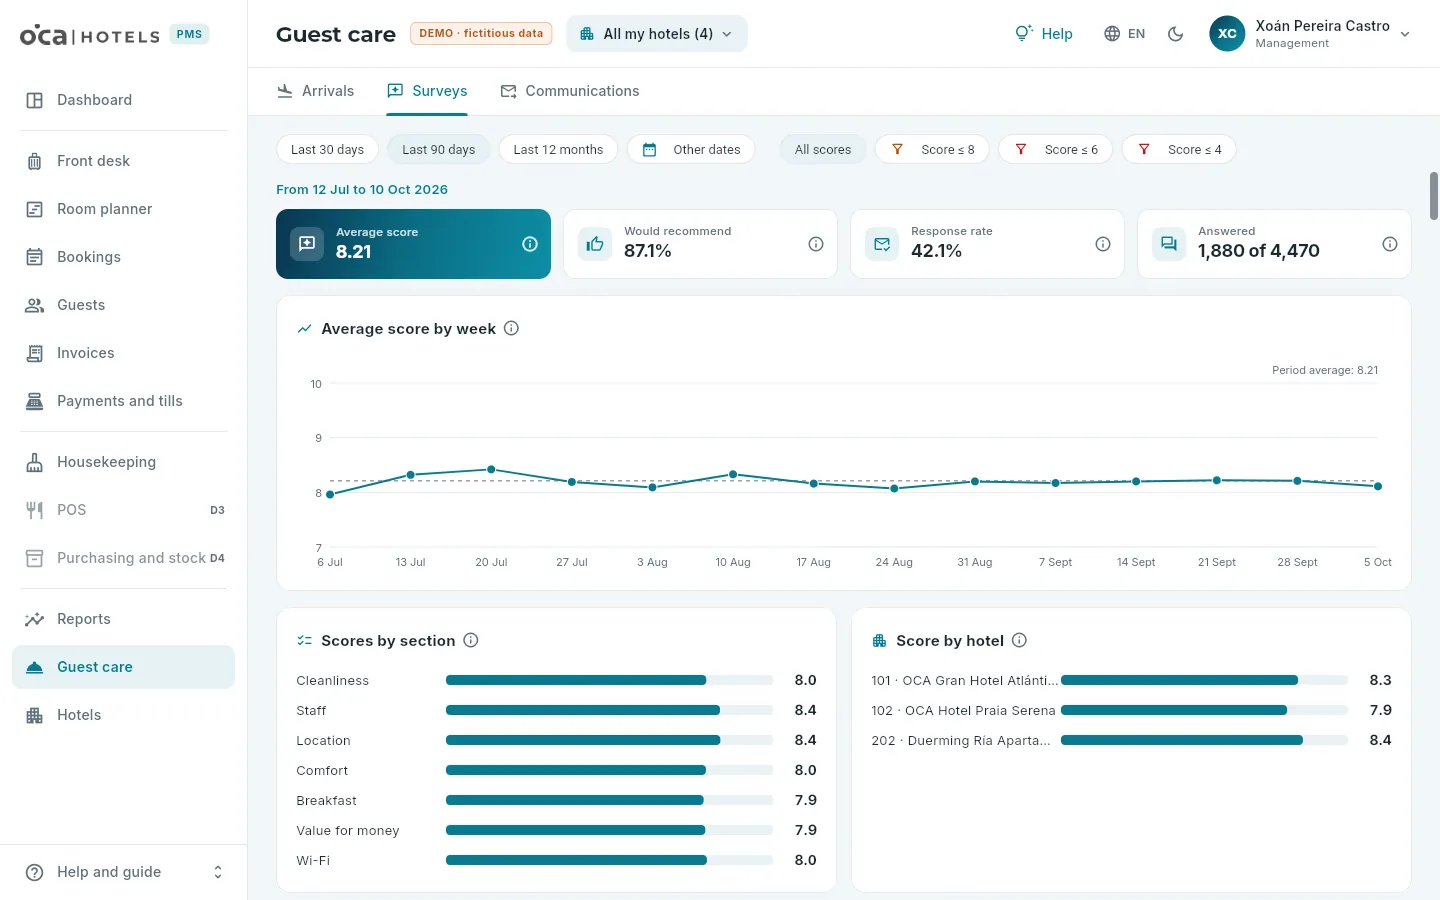 123456
- 1The dates (of departure).
- 2Filter the answers by maximum score, to read the worst ones first.
- 3The average score, who would recommend us, the response rate and how many have been answered.
- 4The score week by week; the dashed line is the period average.
- 5The score for each section: cleanliness, staff, location, comfort, breakfast, value for money and Wi-Fi.
- 6The score for each hotel. Further down, the answers, one by one.
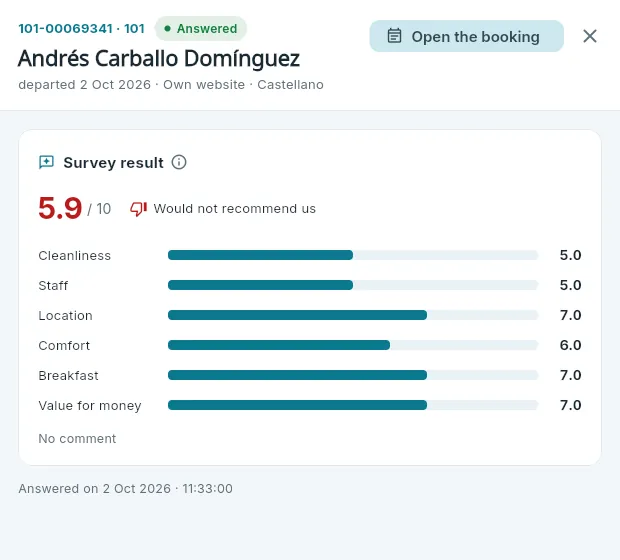 12
12
- 1The stay’s booking.
- 2The overall score, whether they would recommend us, the score for each section and their comment, exactly as they wrote it (with Personal data).
#Emails to the guest
OCA PMS writes to the guest at six moments: when their booking is confirmed, changed or cancelled, at check-in
(the welcome sheet, with their room and the hotel Wi-Fi), when the stay ends (the survey) and when housekeeping
lets them know about lost property. Each email comes from a template, in the guest’s language. In the demo everything
is simulated: emails go to the capture mailbox and only to .demo addresses, and they all carry “OCA PMS · DEMO · fictitious
data” at the bottom.
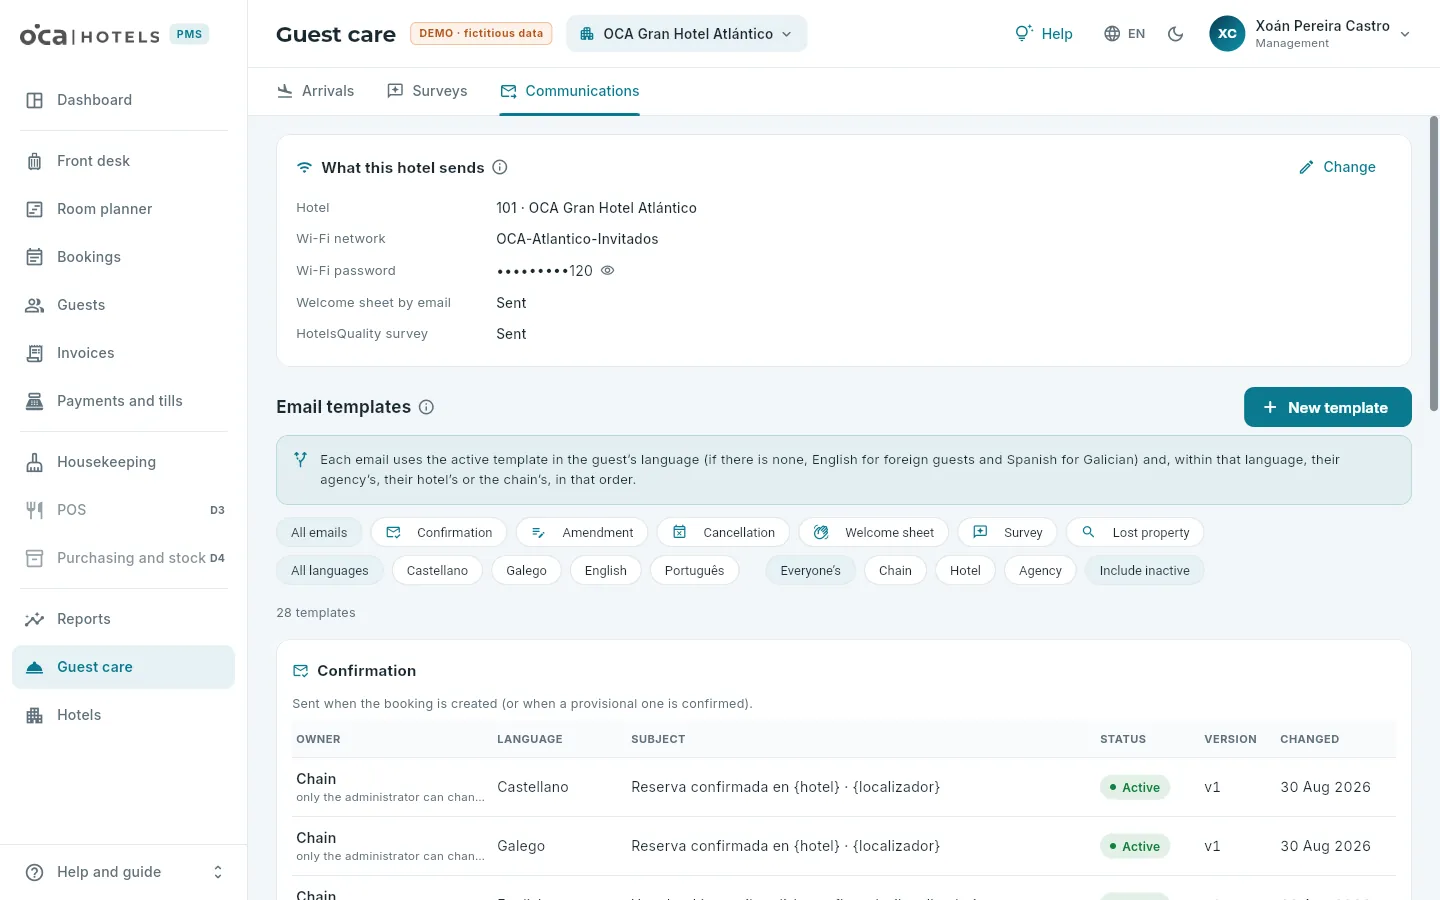 123456
- 1What this hotel sends: the Wi-Fi network and password (for the welcome sheet) and whether it sends the welcome sheet and the survey.
- 2Change these options.
- 3New template.
- 4Which template is used for each email.
- 5Filter by email, by language and by whose template it is (the chain’s, a hotel’s or an agency’s).
- 6Each template: whose it is, the language, the subject, whether it is active, its version and when it changed. Click it to open it.
Which template is used. For each email, the active template in the guest’s language is looked for (if there is none, English for foreign guests and Spanish for Galician speakers) and, within that language, the one for their agency or company, their hotel or the chain, in that order. That way, a company can have its own confirmation, and a hotel its own welcome sheet. Without any active template for an email, that email is not sent.
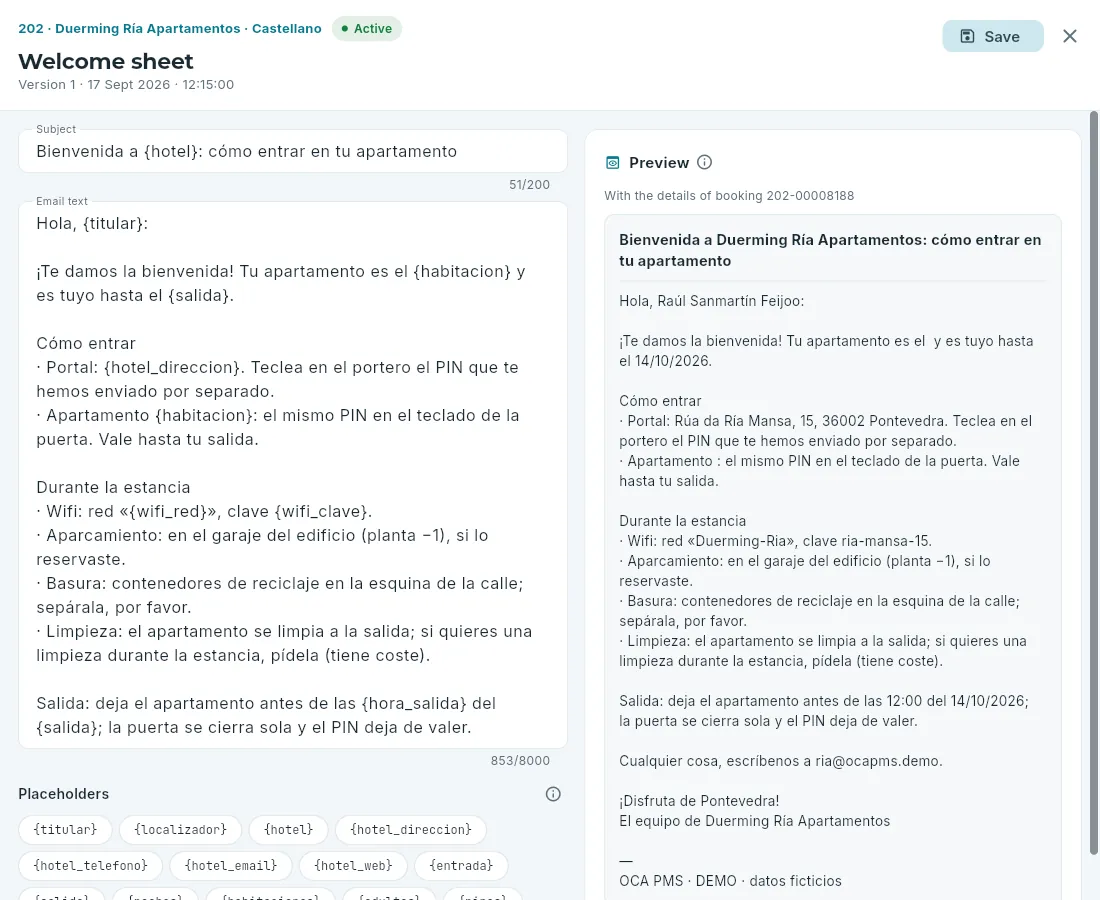 12345
12345
- 1The subject.
- 2The text, with placeholders in braces that are replaced with the booking details:
{titular},{habitacion},{wifi_clave}… - 3The placeholders: click one to insert it where the cursor is; hovering over it tells you what it inserts.
- 4The preview: how it would reach a guest, with the details of a real booking at the hotel.
- 5Save: the template moves up a version.
Choose your hotel in the top bar and, in Communications, open the template for that email and that language.
If it is a chain template, click Make one for my hotel: a copy opens for your hotel (only the administrator can change chain templates).
Change the subject and the text. To insert a booking detail, place the cursor and click its placeholder.
Check the preview and click Save.
#What each role sees
Management
Hotels
The chain’s properties and each one’s record: its details, its room inventory, its rates and pricing rules, its history and its business date.
The Hotels section brings together the chain’s properties that you have access to – in the demo, four: two hotels, a guest house and some holiday apartments – and the record of each one. The record is the reference for how each hotel works in OCA PMS: its company and tax scheme, its rooms, its rates and the rules used to price its bookings. With the Set up hotels permission (management and system administrator), new hotels and companies are also set up here and each hotel is configured.
#The hotel list
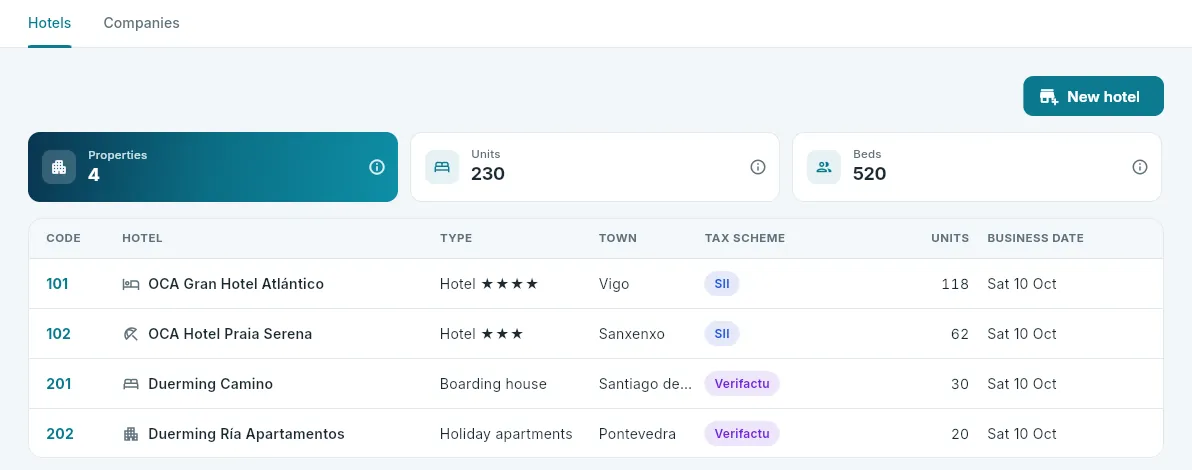 123456
- 1The hotels and the companies that invoice for them.
- 2New hotel: the set-up wizard (see Setting up a hotel).
- 3How many properties you can see, their units (rooms or apartments) and their beds, each with its ⓘ.
- 4Each property, with its code, type and town. Click it to open its record.
- 5The tax scheme of its company: SII or Verifactu.
- 6Its business date: the day the hotel has open.
If you choose one hotel in the hotel selector in the top bar, the list shows only that one. The figures at the top add up the ones you can see.
#The hotel record
The record opens in a panel on the right, with six tabs: Summary, Inventory, Rates, Folio items, History and Technical (these last two, with the Technical data permission).
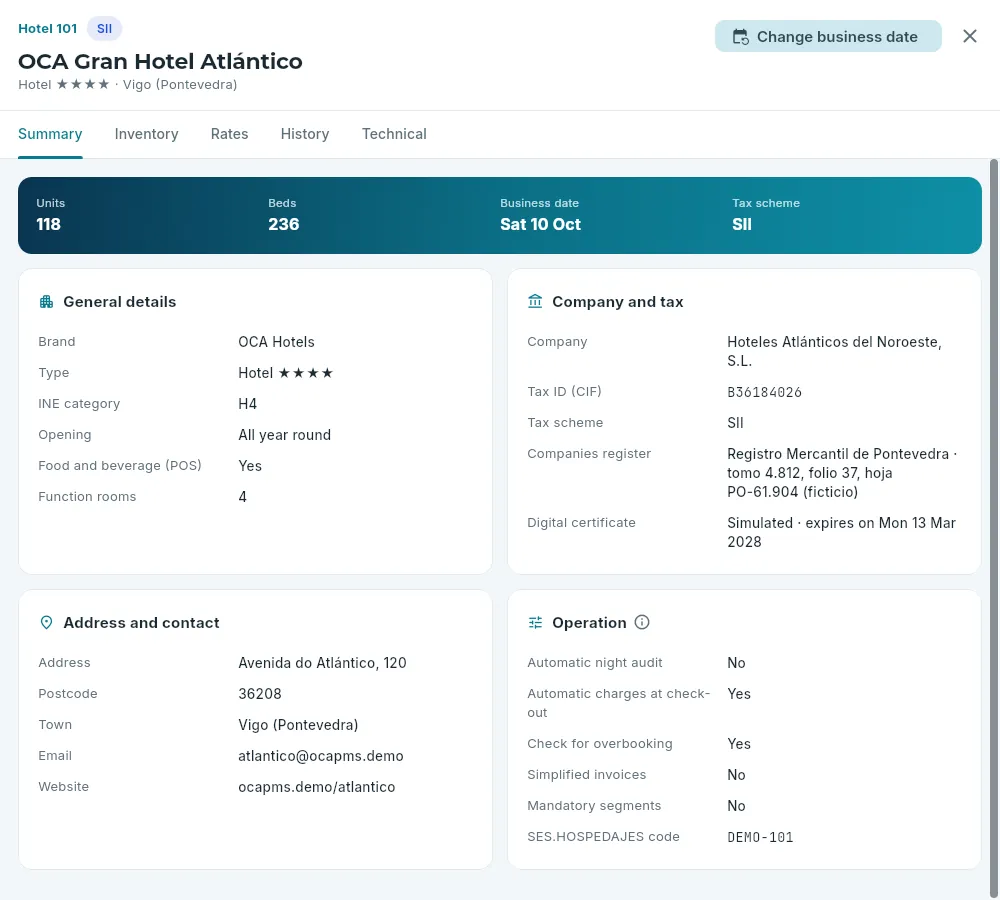 1234567
- 1Code, name, type and category, town and tax scheme.
- 2Change business date, with the corresponding permission.
- 3The tabs.
- 4Units, beds, business date and tax scheme.
- 5General details: brand, type, INE category, whether it opens all year round or seasonally, food and beverage and function rooms.
- 6Company and tax: the company that issues the invoices, its tax ID (CIF), its scheme and its digital certificate (simulated in the demo).
- 7Operation: how the hotel works in OCA PMS (night audit, charges at check-out, overbooking, simplified invoices, segments and SES.HOSPEDAJES code), with its ⓘ.
#Inventory
The inventory is the rooms the hotel has for sale, organised into types (Single room, Double room, Superior double room, Suite…). Bookings are sold by type, and each physical room belongs to a type.
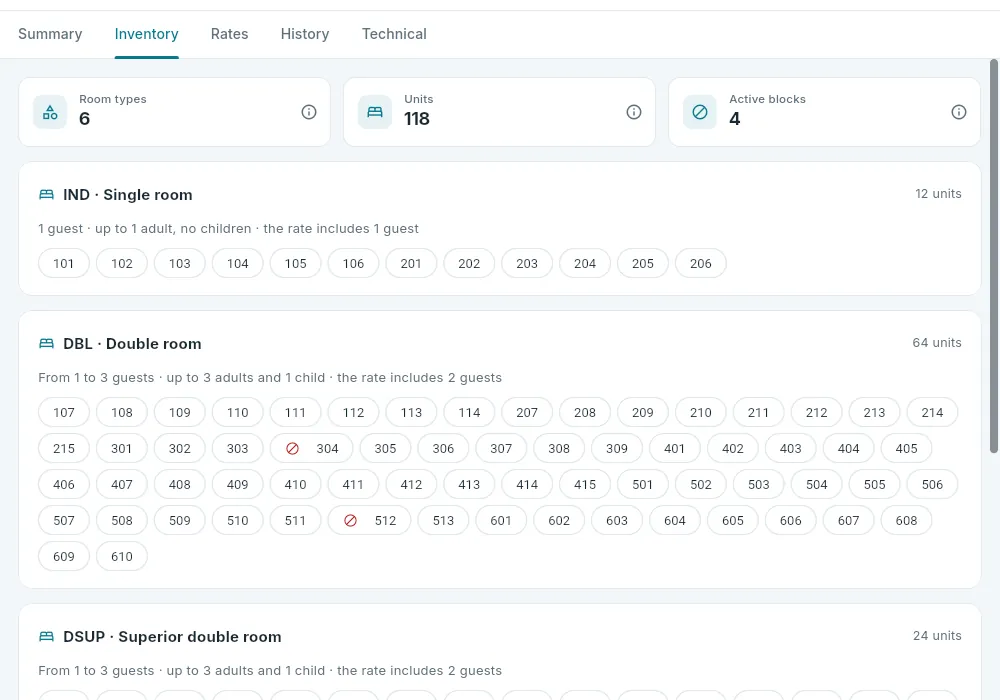 1234
1234
- 1How many types, how many rooms and how many active blocks it has, each with its ⓘ.
- 2Each type, with its code and name; on the right, how many rooms it has.
- 3Its capacity: from how many to how many people, the maximum number of adults and children and how many people the price includes.
- 4Each room; hover over it to see its floor, beds and features. The red symbol marks those with a block.
- Capacity and base occupancy. Each type says how many people fit (for example, the Double room at 101, from one to three, up to three adults and one child) and how many the price includes (the base occupancy: two in the Double room). Above that, the extra adult and child supplements are charged, and below it the single-use discount may apply (see Rates).
- Rooms have their number, floor, beds and features (estuary view, bathtub, accessible, quiet…). In the room planner, the floor filter and each room’s short record come from here.
- Active blocks (today’s or future ones) appear at the end, with the room, the reason, the dates and the note. They are created and removed from the room planner.
With the Set up hotels permission, the inventory is changed here: new types, rooms by ranges and each room’s menu (see Configuring a hotel).
#Rates
The Rates tab brings together everything that decides the price of a booking at that hotel: the rates, their prices by type and season and, below them, the pricing conditions, the cancellation policies, the board types with their supplements and the seasons.
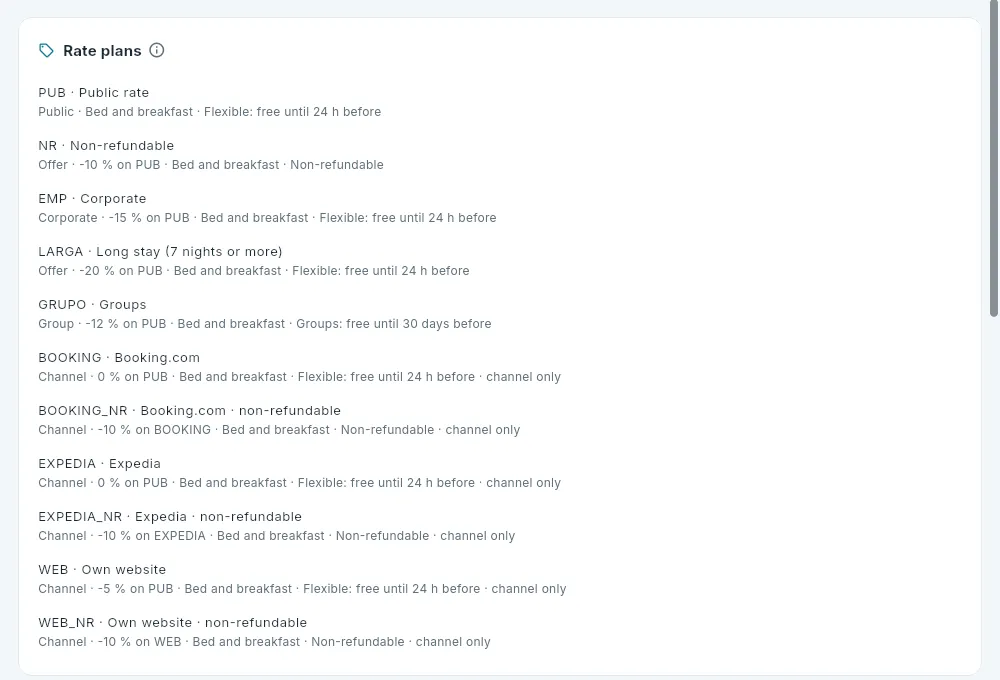 1234
1234
- 1The ⓘ sums up how rates work.
- 2A root rate: the public rate, with its own prices, its default board and its cancellation policy.
- 3A child rate: the non-refundable rate, 10% cheaper than the public rate.
- 4Channel rates: they are not sold at the front desk; their price comes with each booking.
- Root and child rates. A root rate has its own price table; a child rate is defined by an adjustment on its parent (−10%, −15%…), and its price only changes if the parent’s does. So raising the public rate also raises the corporate, non-refundable and long-stay rates at the same time.
- Rate types: public, corporate, group, offer and channel. Channel rates (Booking.com, Expedia, own website) are used for bookings that come in through the channel manager and do not appear in the new booking form in Bookings.
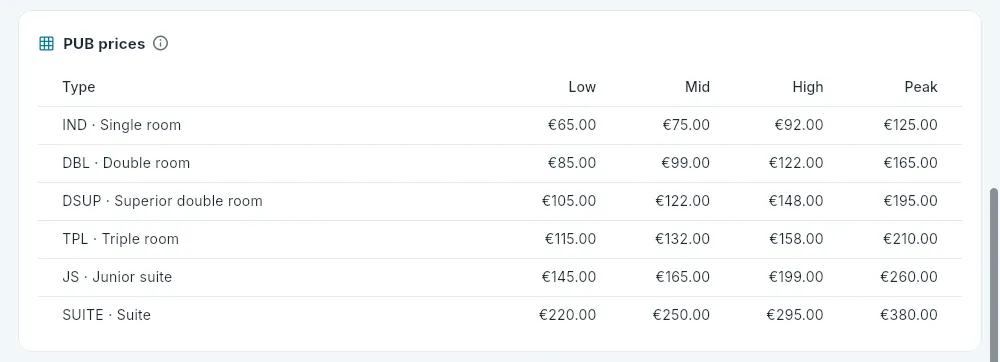 12
12
- 1The prices of each root rate: per room and night, including VAT, room only and for the base occupancy.
- 2One column per season level: low, mid, high and peak.
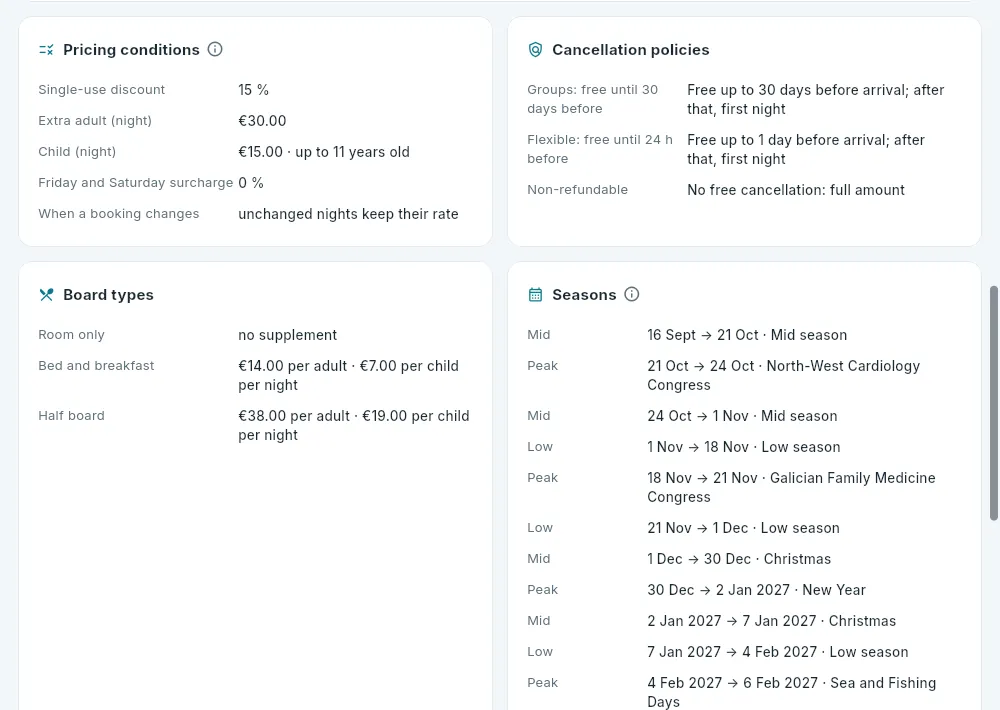 1234
1234
- 1The hotel’s own pricing conditions: single-use discount, extra adult and child supplements (with the age up to which a guest counts as a child), Friday and Saturday surcharge and what to do with the price when a booking changes.
- 2The cancellation policies: until when a booking can be cancelled free of charge and what is charged after that.
- 3The board types the hotel offers, with their supplement per adult and per child per night (“no supplement” if there is none).
- 4The current and future seasons: which level each period has (trade fairs and conferences, at peak).
- Pricing conditions. The single-use discount (just one person in a room meant for two or more), the extra adult and child supplements, the Friday and Saturday surcharge and the re-rating rule when a booking changes: keep the price of the nights that do not change or recalculate them all.
- Cancellation policies. Up to how many days before arrival a booking can be cancelled free of charge and what is charged after that (nothing, the first night or the full amount); non-refundable ones have no free cancellation. Each rate has its own.
- Board types. Each hotel offers its own, with one supplement per adult and another per child, per night, added to the room price. The prices in the tables are always room only.
- Seasons. Each period of the calendar has a level: low, mid, high or peak (trade fairs, conferences, Easter, New Year…). Dates with no season count as mid. Each night’s level decides which price column is used. The current season and future ones are shown, with the year when it is not the current one.
The exact order in which all this is applied is in How the price is calculated. With the Set up hotels permission, prices and the season calendar are changed here (see Configuring a hotel).
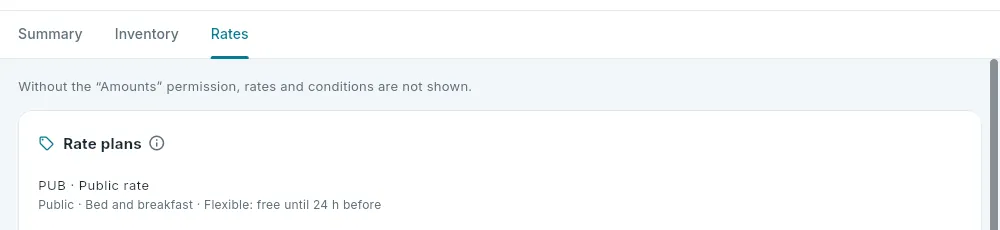 1
1
- 1Without Amounts you can see the rates, the seasons, the board types and the policies, but neither the prices nor the conditions: the database does not send them.
#Setting up a hotel
A new hotel is set up all at once with the New hotel wizard (in the list, with the Set up hotels permission): the hotel, its company if it is a new one, its rooms, its public rate and what is copied from another hotel. It takes up the whole screen, because the types, the rooms and the price table need room, and it has six steps: each one is checked before moving on, what has been filled in is shown on the left and you can go back to any step already done. Nothing is created until the last one; if you leave before that, what you filled in is lost and nothing is left half done.
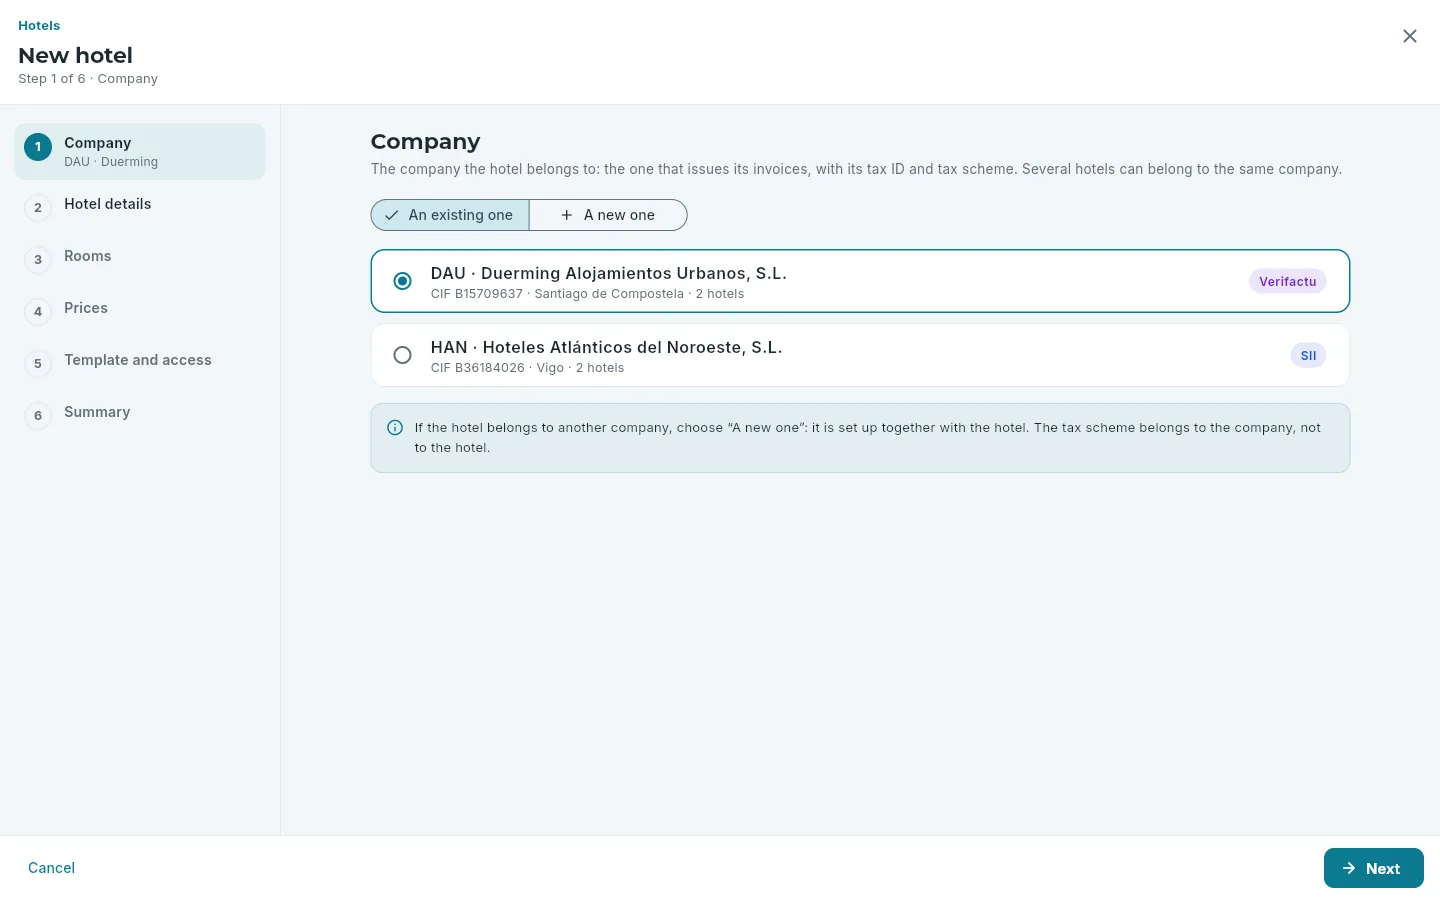 1234
1234
- 1The six steps, with what has already been filled in; click one to go back to it.
- 2A company that already exists or a new one, which is set up with the hotel.
- 3Each company with its tax ID (CIF), its town, its hotels and its tax scheme.
- 4Next: checks the step and moves on to the next one.
- Company: the business that invoices for the hotel, with its tax ID (CIF) and its tax scheme (Verifactu or SII: see Invoices). Several hotels can belong to the same one. If it is another business, A new one asks for its code, its registered name, its CIF (checked as you type it), its scheme and its registered address.
- Hotel details: the three-digit code (the next free one for its company is suggested: 103, 203…; it is the one in its booking references and does not change), the name and brand, the type and stars (its category for the INE comes from them), the address (town and province, required), whether it opens all year round or seasonally, the check-in and check-out times, whether it has food and drink (this turns on the POS), the tourist tax and its SES.HOSPEDAJES code.
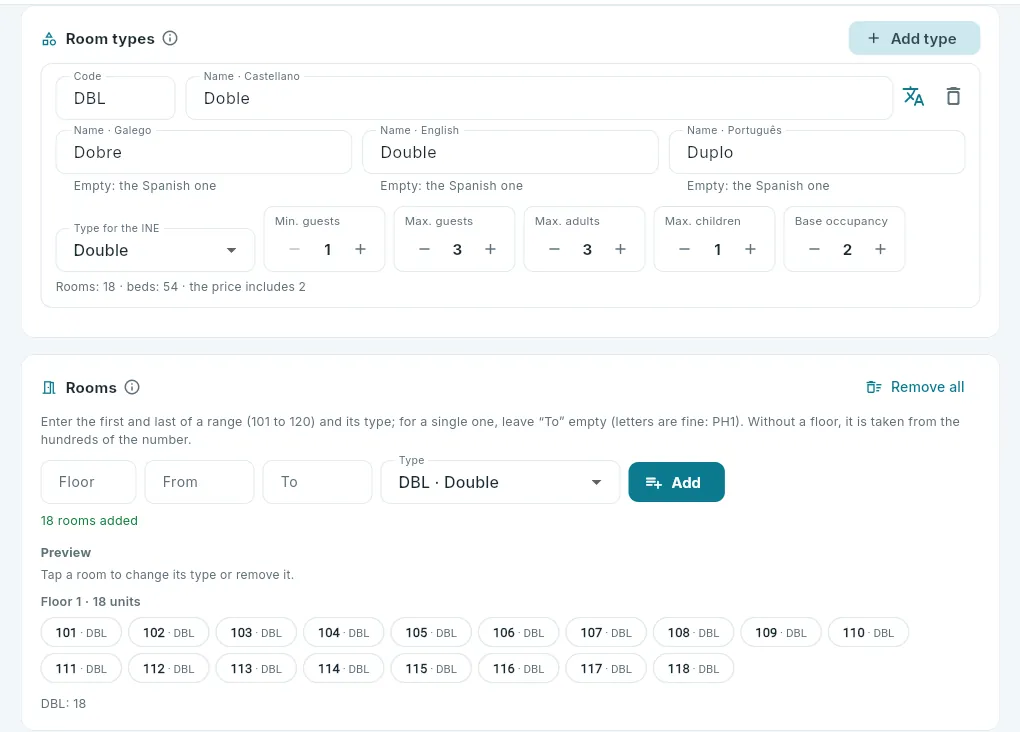 123
123
- 1Each type: code, name (one, or one per language), type for the INE, beds, adults, children and base occupancy.
- 2The rooms by ranges (101 to 118) with their type.
- 3The preview: tap a room to change its type or remove it.
- Rooms: first the types (what is sold): Add type offers ten to start from (single, double, triple, family, junior suite, suite, studio, one- and two-bedroom apartments and a bed in a shared room, already named in all four languages) or a blank one, and each one is adjusted. Then the rooms, by ranges: the first and the last and their type (for just one, leave “To” empty; numbers with letters such as PH1 are fine); the floor comes from the hundreds of the number if it is not given. At the top, the types, units and beds are counted.
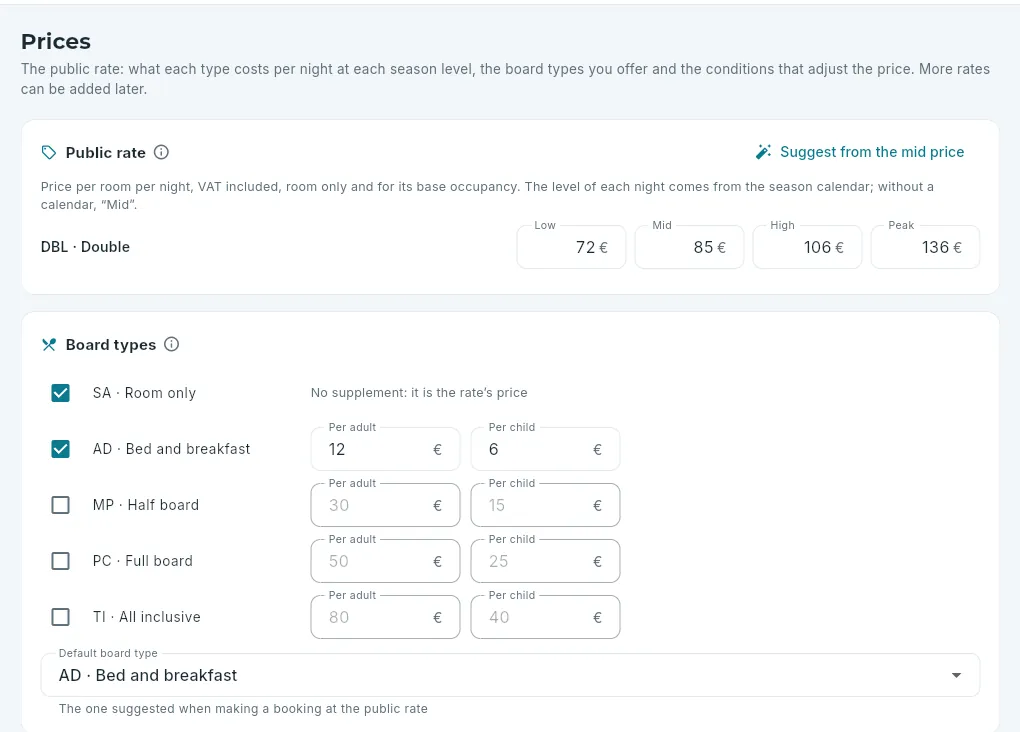 123
123
- 1Suggest from the mid price: low, high and peak from the mid price.
- 2The price of each type by season level.
- 3The board types offered, with their supplement per adult and per child, and the one suggested by default.
- Prices: the public rate, the hotel’s reference price: each type per night and season level (low, mid, high and peak), including VAT, room only and for its base occupancy; the board types with their supplements; the conditions (single-use discount, extra adult, child, Friday and Saturday surcharge, the age up to which a guest is a child, VAT on accommodation) and, if you want, the non-refundable rate, a child rate of the public one with its discount.
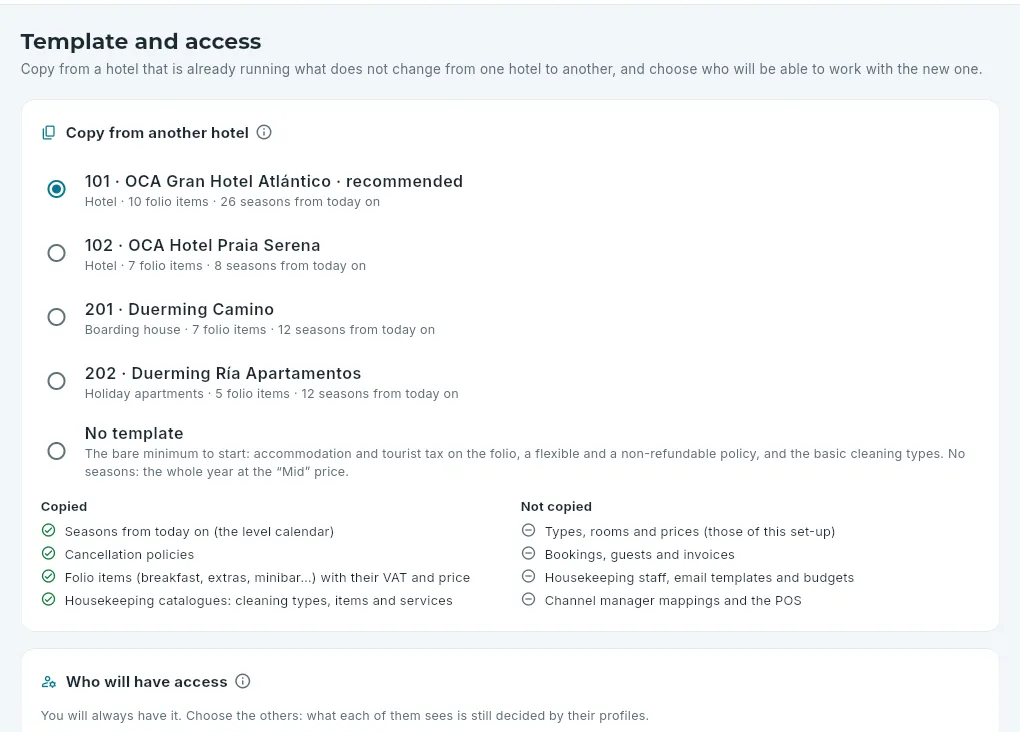 12
12
- 1Which hotel to copy from (the recommended one, the most similar) or no template.
- 2What is copied and what is not.
- Template and access: from a hotel that is already working, what does not change from one hotel to another is copied, and you choose who else will be able to work with the new one (you will always have access; what each person sees is still decided by their profiles).
| Copied from the template | Not copied |
|---|---|
| The seasons from today onwards (the calendar of levels) | The types, the rooms and the prices (those from the set-up) |
| The cancellation policies | Bookings, guests and invoices |
| The folio items (breakfast, extras, minibar…) with their VAT and price | Housekeeping staff, email templates and budgets |
| The housekeeping catalogues: cleaning types, items and services | The channel manager mappings and the POS |
With no template, the hotel starts with the minimum: accommodation and the tourist tax on the folio, a flexible policy and a non-refundable one and the basic cleaning types, and no seasons (all year at the mid-season price).
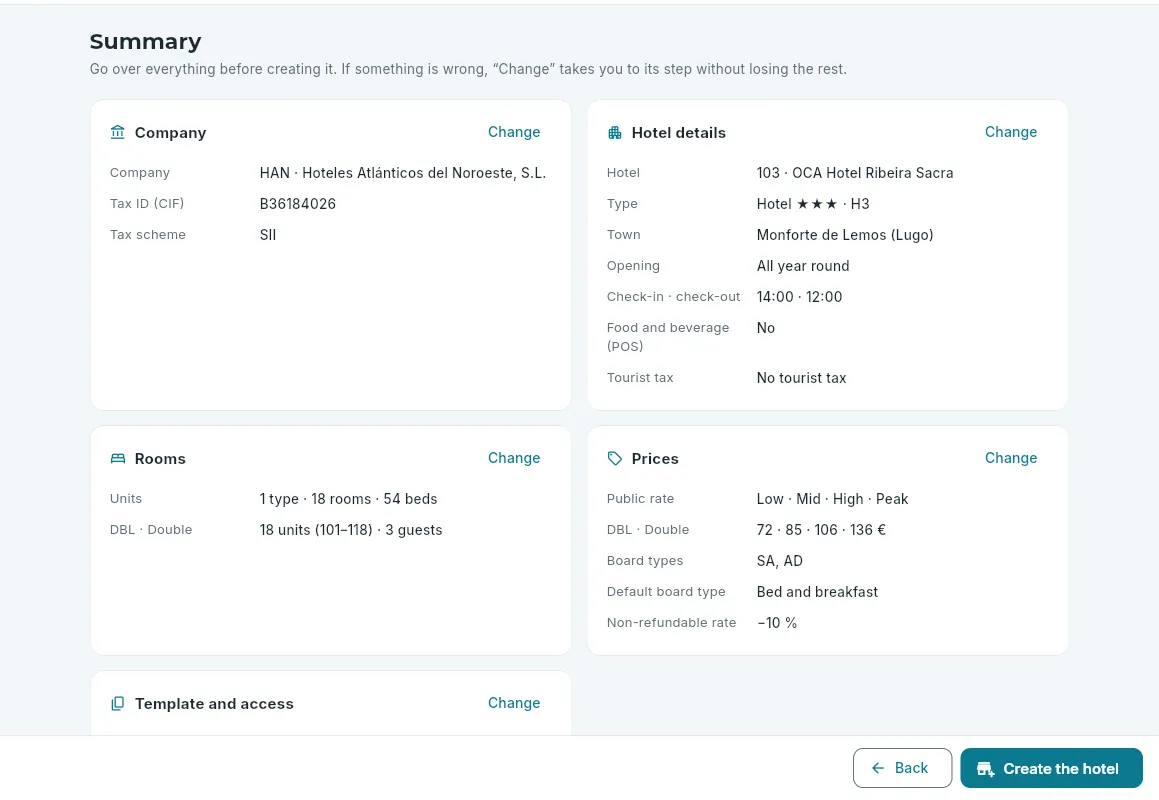 12
12
- 1Each step, summarised; Change takes you to it without losing the rest.
- 2Create the hotel: creates everything at once.
- Summary: everything above; Change goes back to the step without losing the rest. Create the hotel creates everything at once, or nothing if something fails: the hotel with today’s business date, its inventory, its rate (and the non-refundable one), what was copied, its front desk till and access. When it finishes, its record opens.
#Configuring a hotel
With the Set up hotels permission, each hotel’s record lets you change what was filled in when it was set up. Each change is saved with its version: if someone else changed the same thing in the meantime, you are warned and their change is not overwritten; and each one is recorded in the event log.
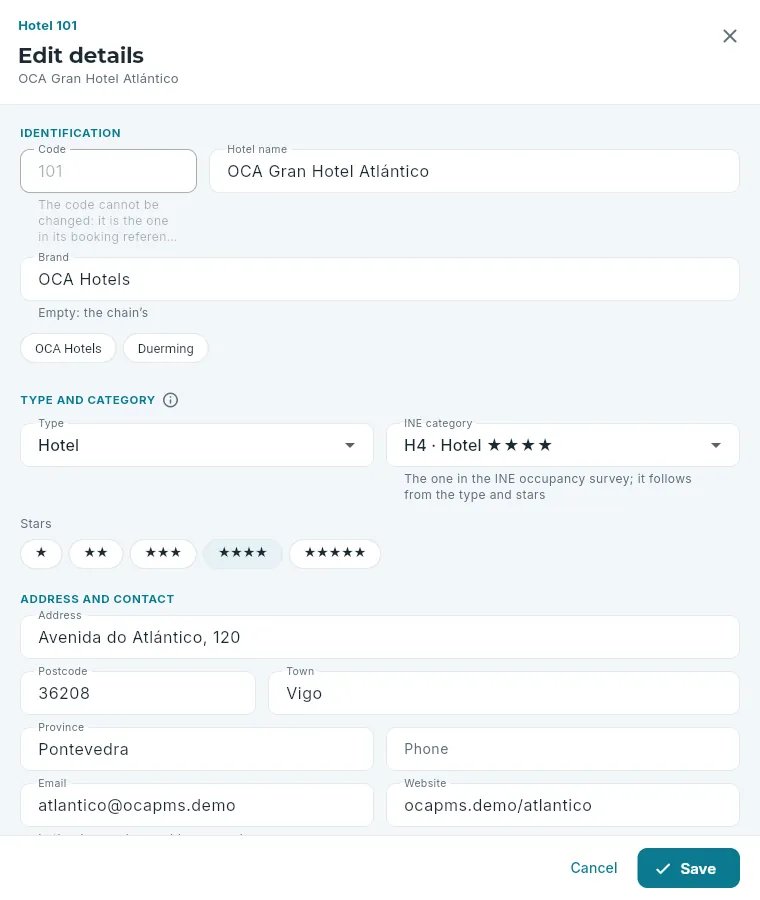 123
123
- 1The code, which does not change.
- 2The name, the brand, the type and category, the address, opening and times, the services…
- 3Save: only what has changed.
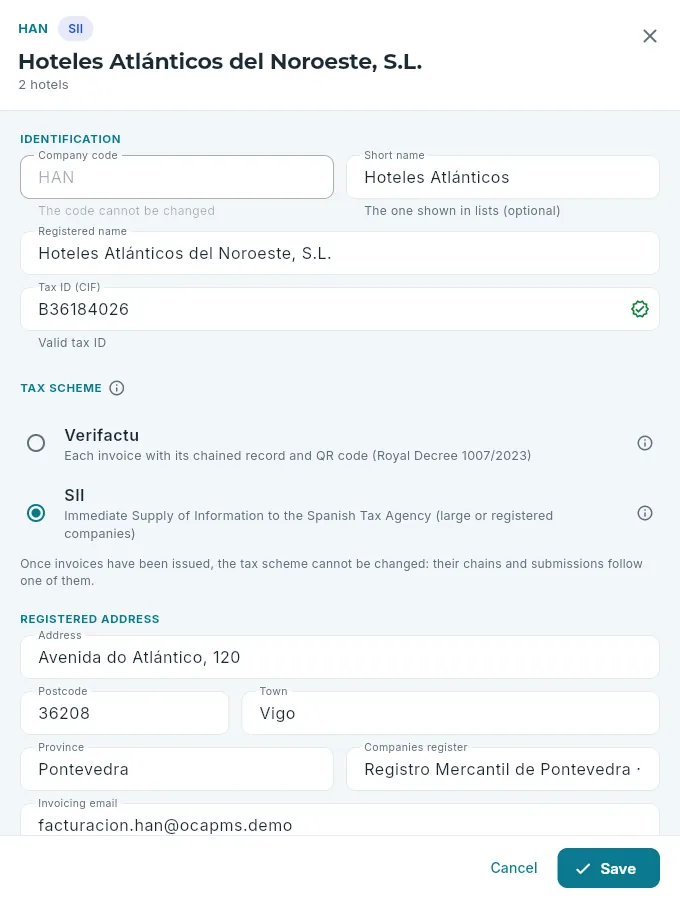 123
123
- 1Code, short name, registered name and CIF, checked as you type.
- 2The tax scheme: once invoices have been issued, it can no longer be changed.
- 3The registered address and the invoicing email.
- Hotel details (Edit details in the record): the same as in the set-up, except the code. Only what changes is sent.
- Companies (the section’s Companies tab): the chain’s businesses, how many with Verifactu and how many with the SII, and their hotels; New company sets up another. The tax scheme cannot be changed once the company has issued invoices: its record chains and submissions follow one scheme.
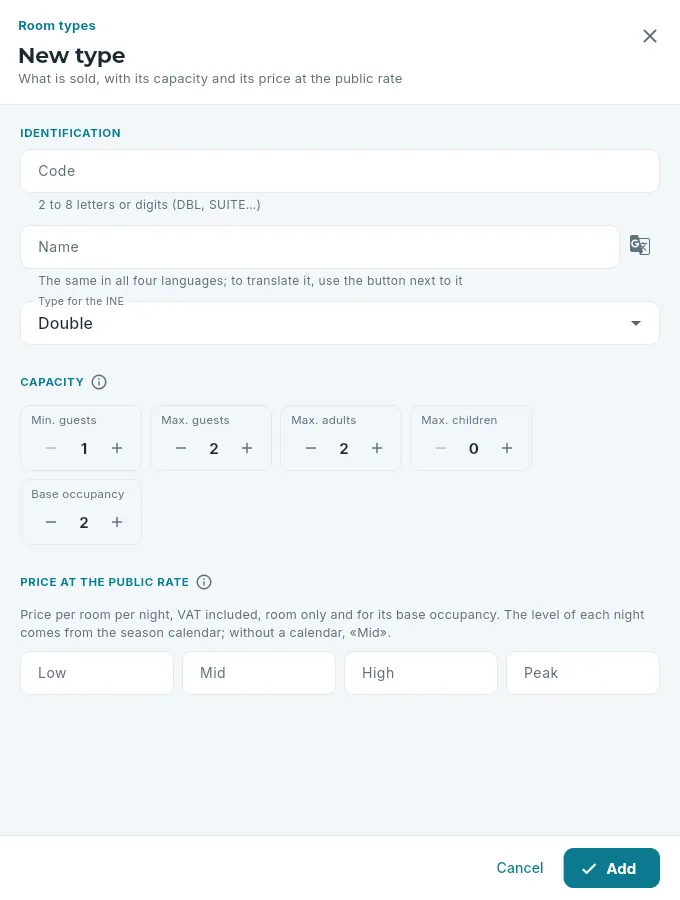 123
123
- 1Code, name and type for the INE.
- 2Its capacity and base occupancy.
- 3Its price in the public rate, by level.
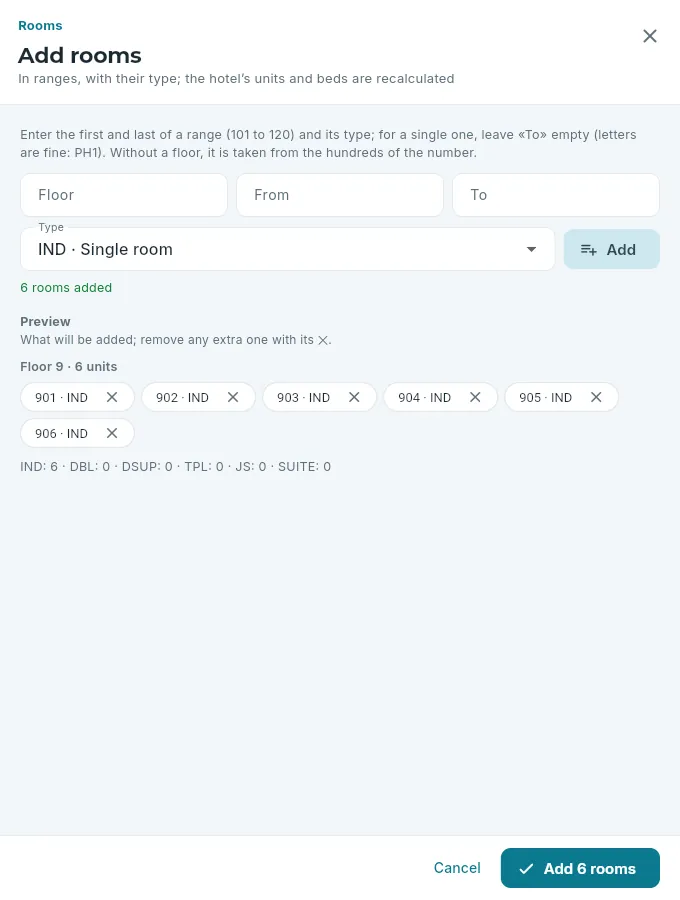 123
123
- 1A range and its type.
- 2What will be added; the cross removes one.
- 3Add 6 rooms creates them.
- Types (New type or the pencil of an existing one, in Inventory): its name, its type for the INE, its capacity, its price in the public rate and whether it is still sold. Capacity cannot be lowered if there are bookings from today onwards that would not fit.
- Rooms (Add rooms): by ranges, as in the set-up; the hotel’s units and beds are recalculated automatically. Each room’s menu (when you click its number) changes its type, its floor, its beds and its features, or retires it (it is no longer sold or shown in the room planner; its history is kept and it can be added again). With bookings assigned from today onwards, it can neither change type nor be retired.
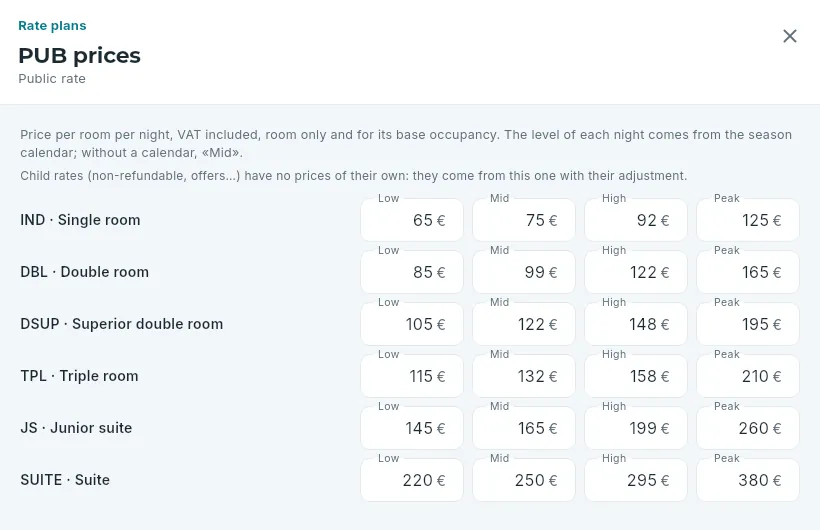 12
12
- 1Only parent rates have prices; child rates come from them.
- 2Each type by level: low, mid, high and peak.
- Prices (Edit prices, under each parent rate in Rates): the type-by-level table. A price that already existed cannot be left empty. Save applies them from now on; bookings already made keep their price. Child rates (the non-refundable one, offers, the corporate rate) follow their parent with their adjustment.
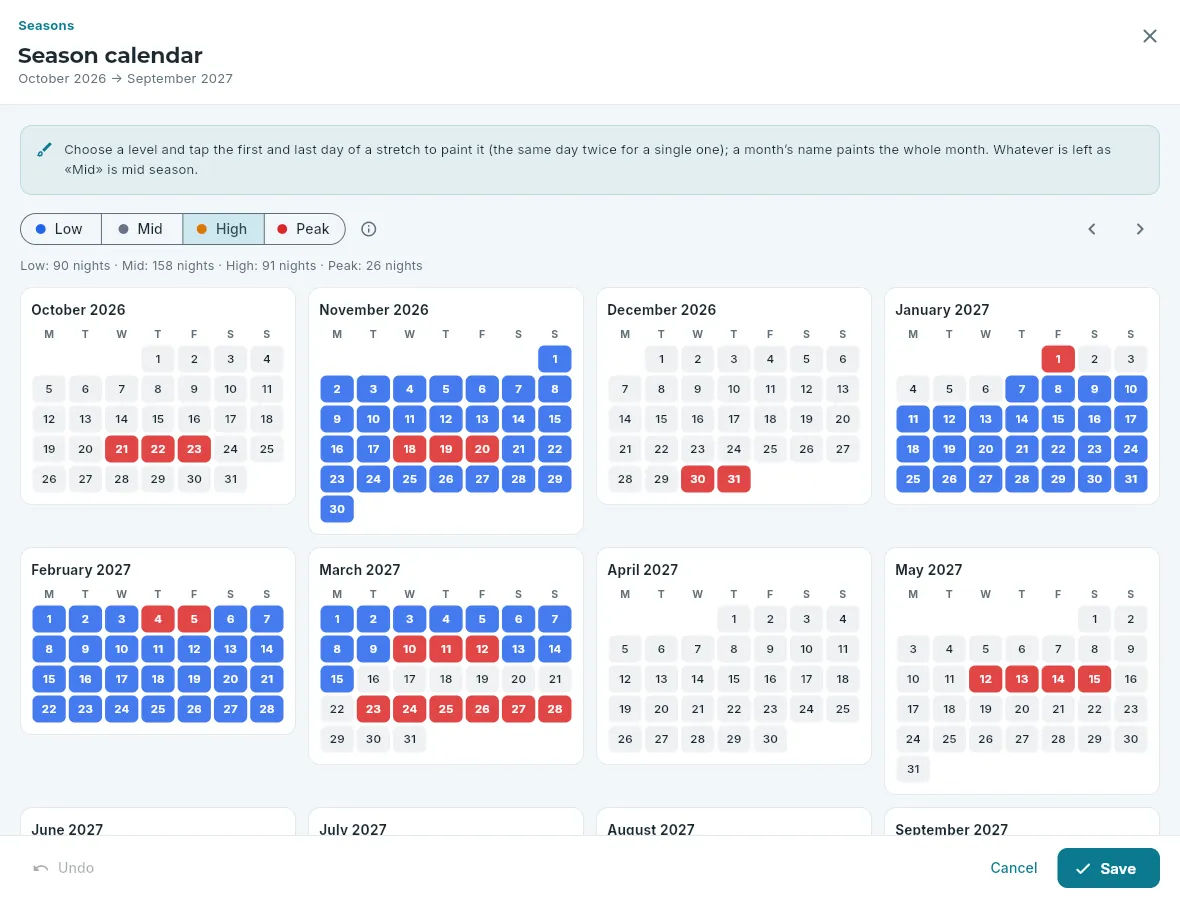 123
123
- 1The level you paint with.
- 2Six months earlier or later.
- 3Save: the periods in those twelve months replace the ones there were.
- Season calendar (Edit calendar, in Seasons): twelve months with each night’s level. Choose a level and tap the first and last day of a period to paint it (the same day twice, for a single day); a month’s name paints the whole month. Whatever is left at mid is mid season. Paint the exceptional first (high and peak) and leave the rest at mid.
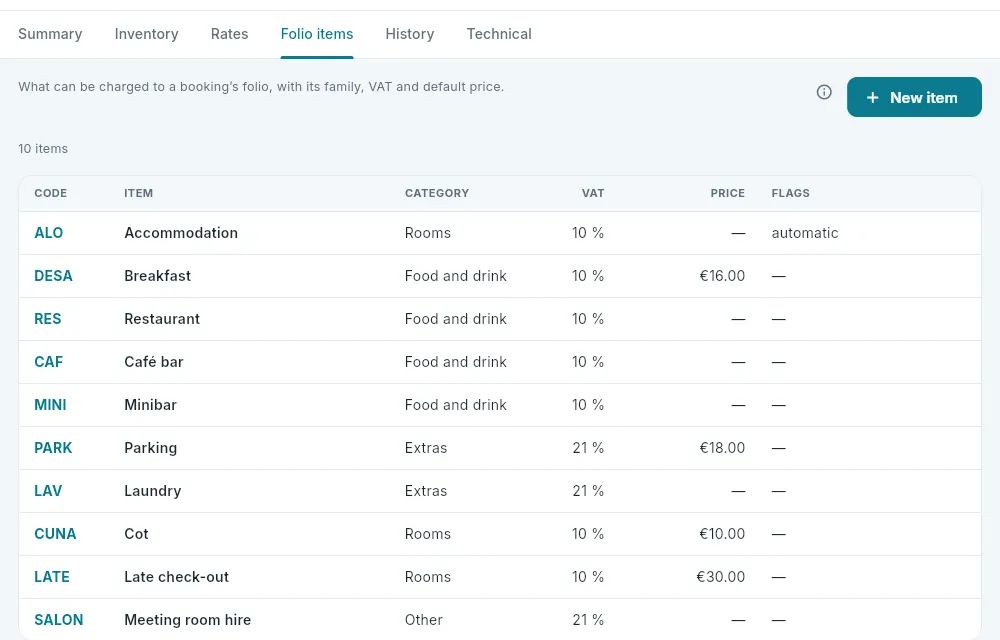 12
12
- 1New item.
- 2Each item: its family (for reports), its VAT (for the invoice), its default price and its flags. Click it to change it.
- Folio items (the Folio items tab): what can be charged to a booking’s folio (accommodation, tourist tax, breakfast, extras…), with its name in each language, its family, its VAT, its default price (empty: it is entered when charging it) and its flags: whether it is entered by hand or added by the PMS, whether it is commissionable, whether it is subject to VAT and whether it is active. Accommodation (ALO) and the tourist tax (TASA) are used by the night audit: they cannot change family or be deactivated. What has already been charged to folios does not change.
#Changing the business date
The business date is the day the hotel has open: the hotel’s “today” for arrivals, departures, occupancy, the room planner and cancellations. It is normally moved forward by the night audit (see The night audit); it is only changed by hand in special cases, for example to redo a night audit.
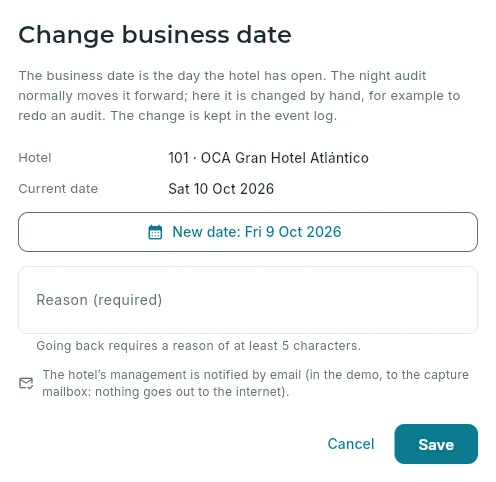 123456
- 1What it is and when it is changed by hand.
- 2The hotel and its current business date.
- 3The new date: between 30 days ago and tomorrow.
- 4The reason: required if you go back (at least five letters).
- 5The hotel’s management is notified by email (in the demo, to the capture mailbox).
- 6Save changes it.
Open the hotel’s record and click Change business date.
Click New date and choose the day in the calendar.
If you go back to an earlier date, type the reason; if you move forward, it is optional.
Click Save.
#History
The History tab shows the hotel’s last 200 events, from the most recent to the oldest: bookings created, check-ins, assignments, cancellations, blocks, business date changes, the demo reload… Each one says what happened, when and who (or which connector) did it, and when you expand it, it shows what it stores. It comes from the permanent event log, which cannot be changed or deleted. Technical shows the hotel exactly as it is in the database.
 12
12
- 1From the permanent event log.
- 2Each event: what, when and who; expand it to see the details.
#Each hotel, with its own rules
OCA PMS is designed for different kinds of hotel: what in other systems would mean changing the software is just a detail in each hotel’s record here. That is how the demo has, side by side, a city hotel open all year round, a beach hotel that only opens in season, a guest house and some apartments, each with its own rules:
| What | Where to see it | In the demo |
|---|---|---|
| Opening season | Summary → Opening; in the room planner, closed days | 102 opens from April to October; the rest, all year round |
| Rooms, types and capacities | Inventory | From 101, with 118 rooms, to the 20 apartments at 202 |
| Rates, seasons and board types | Rates | Each hotel has its own |
| Single-use discount, supplements and weekend surcharge | Rates → Pricing conditions | 101 has no weekend surcharge; 102, 10% |
| What to do with the price when a booking changes | Rates → Pricing conditions | Keep the price of the nights that do not change |
| Cancellation policies | Rates → Cancellation policies | Flexible (24 hours or 7 days), groups (30 days) and non-refundable |
| Automatic night audit, charges at check-out, overbooking check… | Summary → Operation | Depends on the hotel |
Some rules are not shown in the record yet but already apply: the locator format, the invoice number format and the simplified invoice limit (€3,000), which belong to the chain; the check-in and check-out times (14:00 and 12:00), the overbooking allowed per type and night (none), whether a new booking starts as confirmed or provisional, the maximum number of nights per booking (60) and how far in advance you can book (two years); and, for the front desk: whether check-out requires the folio to be paid (at all of them), whether the audit marks no-shows automatically (at 202), whether check-in asks for all the guests (at none), the PIN locks (at 202) and the tourist tax (at 201: one euro per adult per night, plus its VAT, for the first five nights). The rules for housekeeping, guest communications and Guest care are changed in their own sections: Housekeeping and Guest care.
Management
Legal obligations
What the hotels must report or keep by law: bookings and guest registers to SES.HOSPEDAJES, the INE occupancy survey, Verifactu and SII submissions, and data protection (GDPR), with its texts, consents, access log and retention periods.
A hotel has obligations that are not part of its business, but that it cannot fail to meet: telling the police who is staying, answering the monthly survey from the INE (Spain’s National Statistics Institute), sending its invoices to the Spanish Tax Agency and looking after its guests’ personal data. The Legal obligations section brings all of that together. OCA PMS does it by itself from what already happens at the hotel – a booking, a check-in, an invoice – and here you can see whether everything has arrived on time, what has failed and how to correct it.
It has four tabs: SES.HOSPEDAJES, INE, Verifactu and SII and GDPR. What belongs to each hotel follows the hotel selector in the top bar; what belongs to each company (Verifactu and SII, retention), the companies of your hotels.
#What each regulation requires
Guest registration (Royal Decree 933/2021). Every accommodation provider must register its guests and report them to the Spanish Ministry of the Interior through the SES.HOSPEDAJES platform. Two things are reported: the contract (the booking: dates, people, rooms, how it is paid and whether it was booked online), as soon as it is confirmed, changed or cancelled, and the guest register (the details of each guest aged 14 or over: ID document, name, nationality, date of birth, sex, residence and contact details; for minors, their relationship to the adult), on check-in. The deadline is 24 hours from the event, and what is reported is kept for 3 years.
The INE occupancy survey. Spain’s National Statistics Institute asks each establishment, every month, for its guests and overnight stays by place of residence (by autonomous community or by country), rooms occupied, average prices (ADR and RevPAR) and staff employed. It is an official statistic and answering it is compulsory. There is one survey per type of accommodation: hotels (EOH), tourist apartments (EOAP), hostels (EOAL) and rural tourism (EOTR).
Verifactu and the SII. Every invoice issued must reach the Spanish Tax Agency (AEAT): SII companies (Suministro Inmediato de Información) do so through their VAT books; the rest, with Verifactu, a chained record of each invoice that the invoicing software sends when the invoice is issued (see Invoices).
Data protection (GDPR and Organic Law 3/2018). When a guest’s details are collected, they must be informed of who processes them, what for and for how long, and of their rights; sending them marketing requires their consent (the satisfaction survey can be sent on legitimate interest, unless they object); you must know who accesses their data; it must not be kept longer than necessary (except what another law requires to be kept: invoices 6 years, guest registers 3); and their rights of access, rectification, erasure, objection, restriction and portability must be respected.
- 1A booking is confirmedIts contract goes to SES.HOSPEDAJES in the next batch.
- 2Check-inThe guests’ details, their consents and their guest register.
- 3InvoicingVerifactu or SII, depending on the company.
- 4The month closesThe INE survey is calculated automatically, then reviewed and sent.
#SES.HOSPEDAJES
SES.HOSPEDAJES is the panel for what is reported to the Ministry of the Interior. Every booking confirmed, changed or cancelled and every check-in records a submission; complete ones go out by themselves in batches every few minutes, and the service replies to each one: accepted (with its code) or with error.
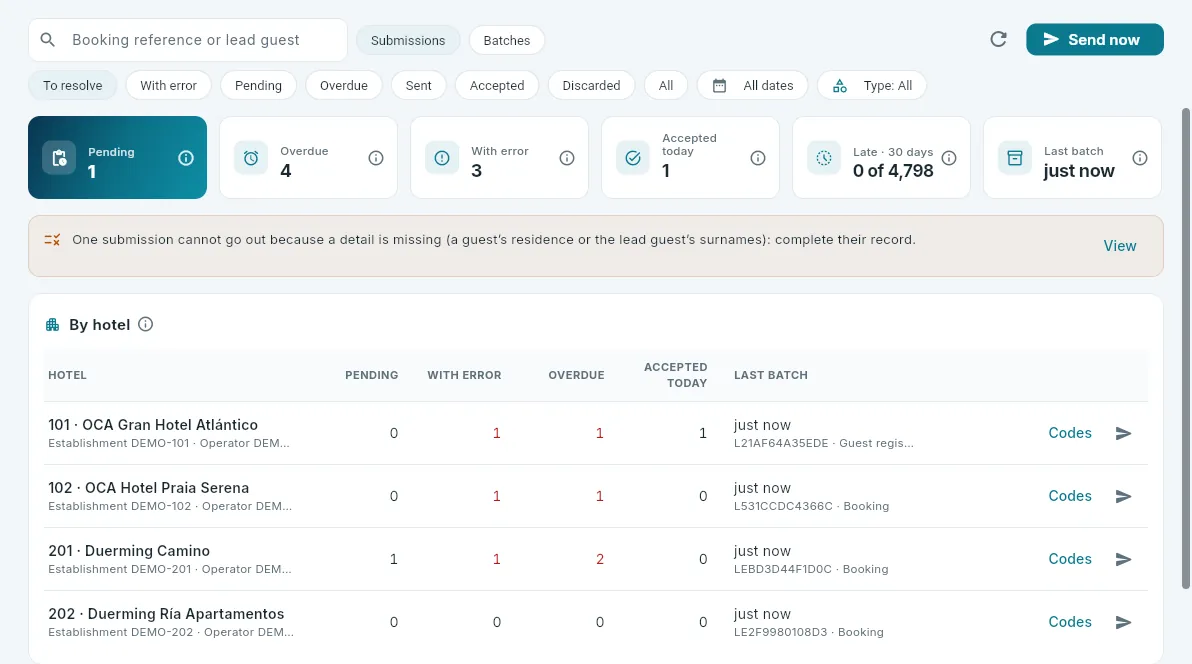 123456
- 1View the submissions or the batches; on the left, search by booking reference or lead guest.
- 2Send now whatever is complete, without waiting for the next batch.
- 3The list filters: to resolve, with error, pending, overdue, sent, accepted, discarded, dates and type.
- 4What is pending, what is overdue, what came back with error, what was accepted today, what went out late in 30 days and the last batch.
- 5The warnings: what falls due within 6 hours, what cannot go out because a detail is missing, and hotels that are not set up.
- 6Each hotel: its codes, what is pending, with error and overdue, what was accepted today and its last batch; Codes and the arrow that sends its submissions now.
Below, the list of submissions (on opening, those to resolve): when the event happened and its deadline, the hotel, the reference (the booking reference; with “/1”, the guest register for its first room), the lead guest, how many people, its status and, if there is one, the error or what is missing. Each one opens its record.
- What is reported. Confirmed bookings (a provisional one, when it is confirmed); their changes of dates, people, rooms or lead guest; and their cancellation. A no-show is not reported: there was a contract, but no stay. The guest register, on check-in; if the check-in is undone, it is cancelled.
- New, change and cancellation. If the earlier submission has already reached the service, a change is reported as a change and a cancellation as a cancellation, with the code of what it replaces or cancels; if it had not gone out yet, it is simply updated or discarded.
- Incomplete ones do not go out. If an essential detail is missing (the residence of a guest aged 14 or over, the lead guest’s surnames), the submission waits as pending until the record is completed. Everything else is sent and, if it is wrong, the service rejects it.
- Batches. Every few minutes, by hotel and type, up to 100 submissions with the data at that moment. A batch with no reply within 30 minutes returns its submissions to pending.
#Correcting a submission with an error
When the service rejects a submission, its record explains the error, says who it refers to and how to correct it.
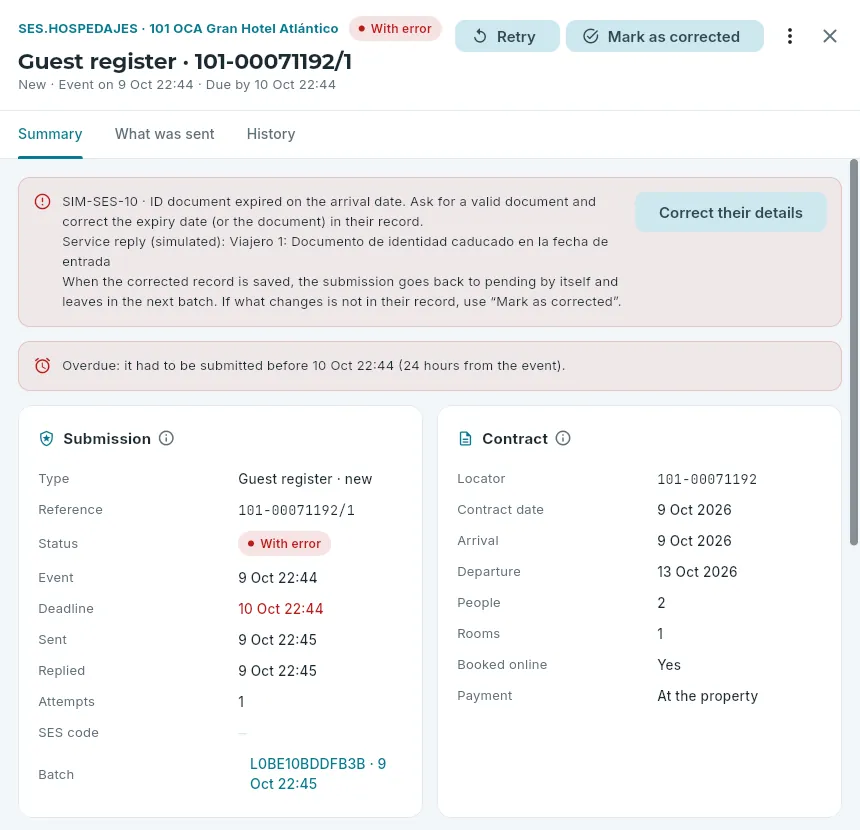 123456
- 1Retry, Mark as corrected and, under “⋮”, Discard.
- 2Its tabs: Summary, What was sent (what is sent, with the service’s field names) and History.
- 3The error, explained, and the service’s (simulated) reply.
- 4Correct their details opens the guest record.
- 5Whether its deadline has passed.
- 6The submission (when it was sent, in which batch, its code) and the contract being reported.
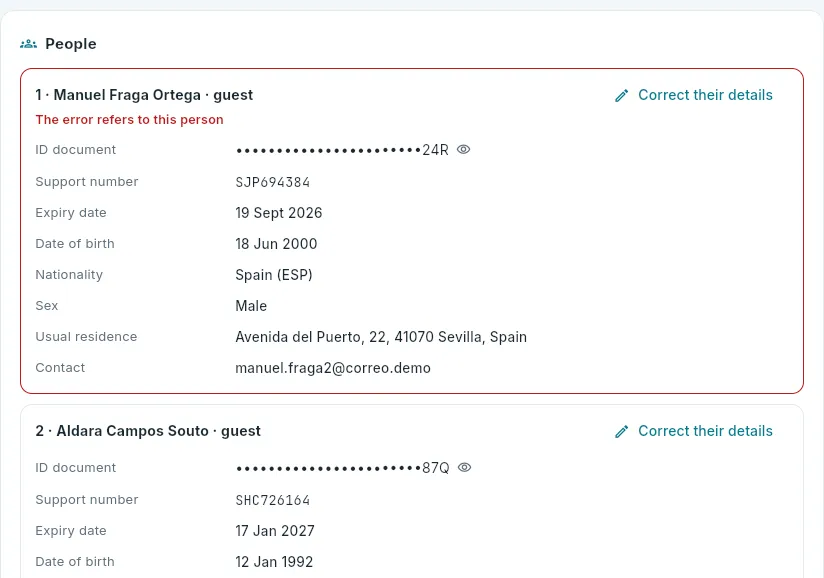 12
12
- 1The person the error refers to, outlined in red; Correct their details opens their guest record.
- 2Their details, as they are sent. The ID document is masked (the eye shows it) and viewing it is recorded in the access log.
In SES.HOSPEDAJES, filter by With error and open the submission.
Read the error: it says what is wrong and which person it refers to.
Click Correct their details on that person and correct their record (the ID document, the expiry date, the country…). Save.
The submission goes back to pending by itself and leaves in the next batch (or click Send now).
- Mark as corrected: if what needed correcting is not on the guest record (for example, a minor’s relationship in the room’s guests), it returns the submission to pending with the current details.
- Retry: sends it again exactly as it is now; useful if the error was the service’s.
- Discard, with a reason: it will not be sent (for example, if it was already reported by hand on the Ministry’s website).
The demo’s errors are made up (the service is simulated), but they imitate the usual ones:
| Code | What happens | How to correct it |
|---|---|---|
| SIM-SES-10 | The ID document had expired on the arrival date | Ask for a valid document and correct their record |
| SIM-SES-11 | The DNI or NIE support number is missing | Add it in their record |
| SIM-SES-12 | The date of birth makes no sense | Correct it in their record |
| SIM-SES-13 | The country is not an ISO code (“UK” instead of “GB”) | Correct the nationality or the country of residence |
| SIM-SES-14 | A minor without their relationship to the adult | Enter it in the room’s guests and Mark as corrected |
| SIM-SES-15 | The DNI or NIE letter does not match | Check the document |
| SIM-SES-16 | A guest aged 14 or over without an ID document | Add their document |
| SIM-SES-20 | The lead guest’s first surname is missing | Complete it in their record |
| SIM-SES-30 | Something the service does not know is being changed | Retry: it will go out as new |
#Batches and each hotel’s codes
Batches holds each sending to the service: when, whether it was scheduled sending or a manual one, its type (bookings or guest registers), the number the service gave it and how many submissions it carried, accepted and rejected. Each batch opens its record.
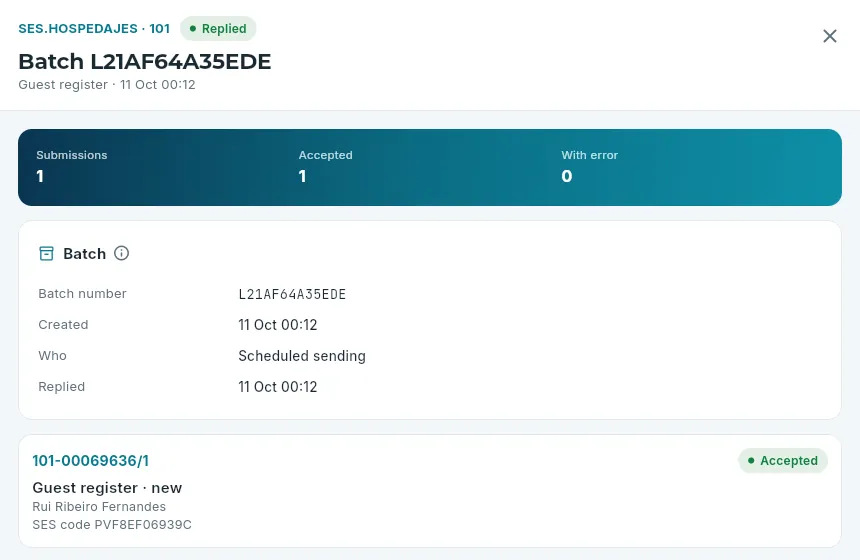 123
123
- 1How many submissions it carried, how many were accepted and how many came back with error.
- 2Its batch number, when it was created, who sent it and when the service replied.
- 3Each submission, with its result and its SES code; it opens its record.
Each hotel submits with its codes: the establishment code and the operator code (the entity that runs it), which the Ministry of the Interior gives when the hotel is registered on SES.HOSPEDAJES. They are entered with Codes in its row under By hotel.
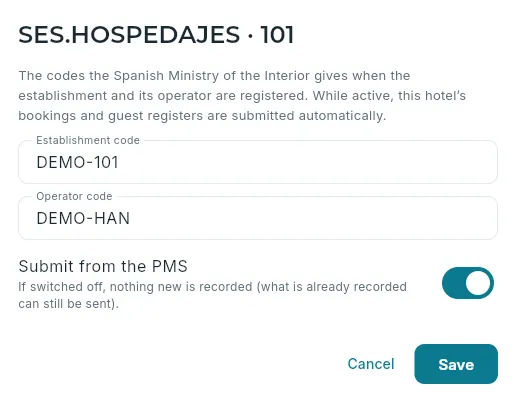 12
12
- 1The establishment and operator codes.
- 2Submit from the PMS: if switched off, nothing new is recorded for that hotel.
#The INE survey
INE holds each hotel’s occupancy survey, month by month. When the month closes, the PMS calculates it from stays, guests and what was invoiced, and it is left as a draft for you to review and send in the first days of the following month.
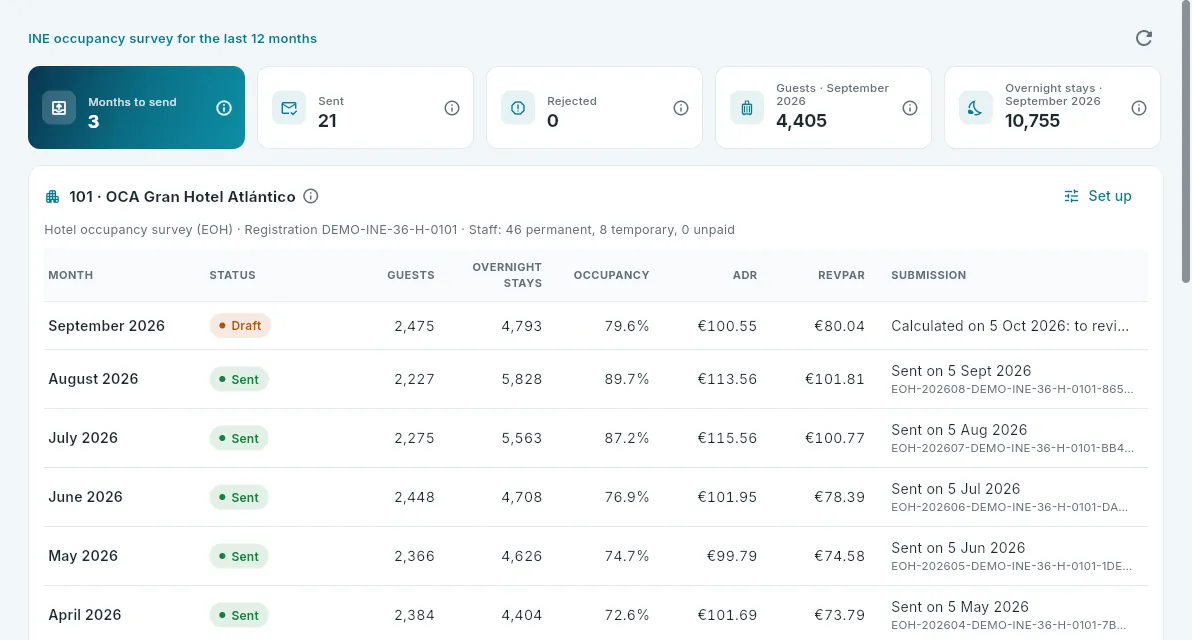 12345
12345
- 1Months to send, surveys sent and surveys rejected; on the right, guests and overnight stays for the last closed month.
- 2Each hotel, with its survey (here, the hotel one, EOH), its INE registration number and its usual staff.
- 3Set up the hotel’s survey.
- 4Last month, as a draft: calculated and waiting to be reviewed.
- 5The months sent, with their figures and the INE’s receipt.
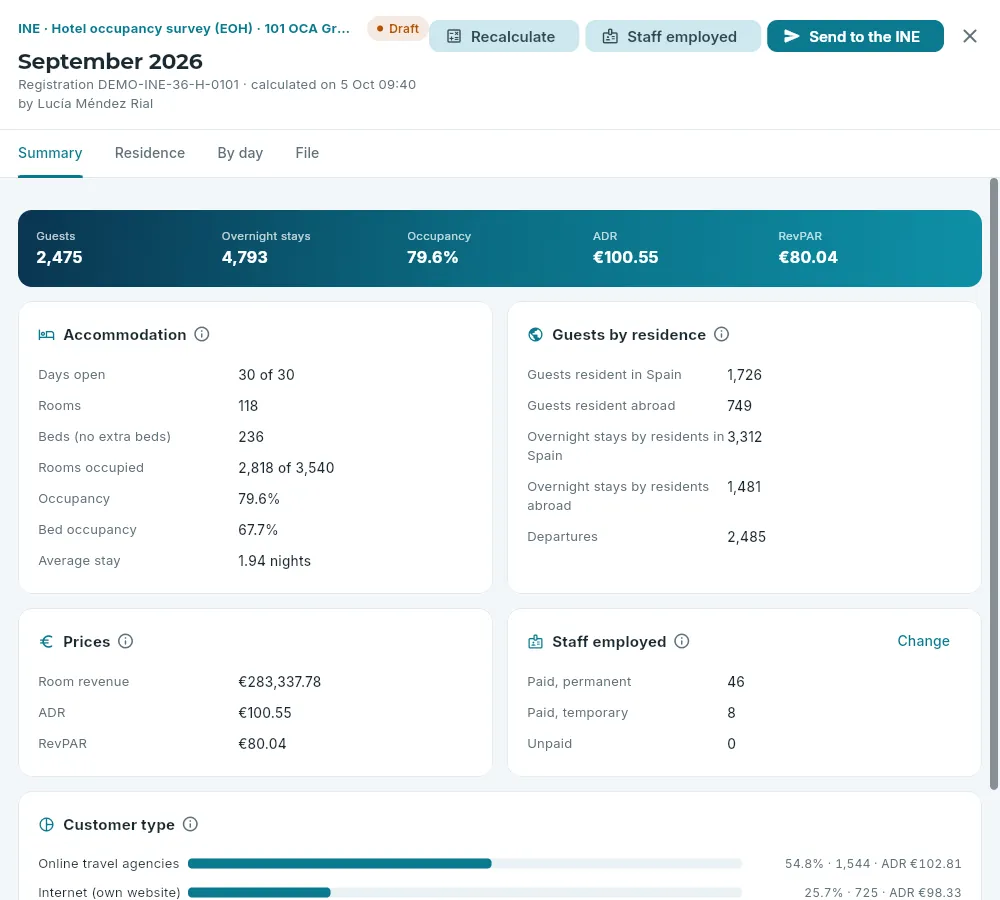 12345
12345
- 1Recalculate with the current data, change this month’s Staff employed and Send to the INE.
- 2Its tabs: Summary, Residence, By day and File (the XML that is sent).
- 3The month’s capacity and occupancy and the guests resident in Spain and abroad.
- 4Prices as the INE asks for them: room revenue, ADR and RevPAR.
- 5Staff, which is not in the PMS: the hotel declares it.
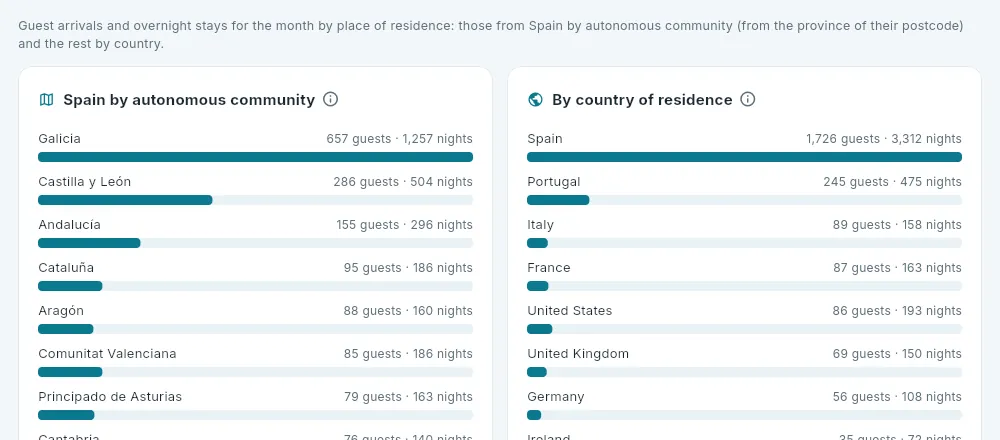 12
12
- 1Residents in Spain, by autonomous community (from the province of their postcode).
- 2By country of residence, Spain included.
In INE, open your hotel’s month in Draft.
Go over the figures and the warnings (guests with no residence, postcodes that give no province…): if you correct a record, click Recalculate.
If this month’s staff was not the usual, change it with Staff employed.
Click Send to the INE and confirm.
#Verifactu and SII
Verifactu and SII shows, by company, whether its invoices are reaching the Spanish Tax Agency. Each invoice and each ticket generates its record when it is issued (see Invoices); here you see the whole picture.
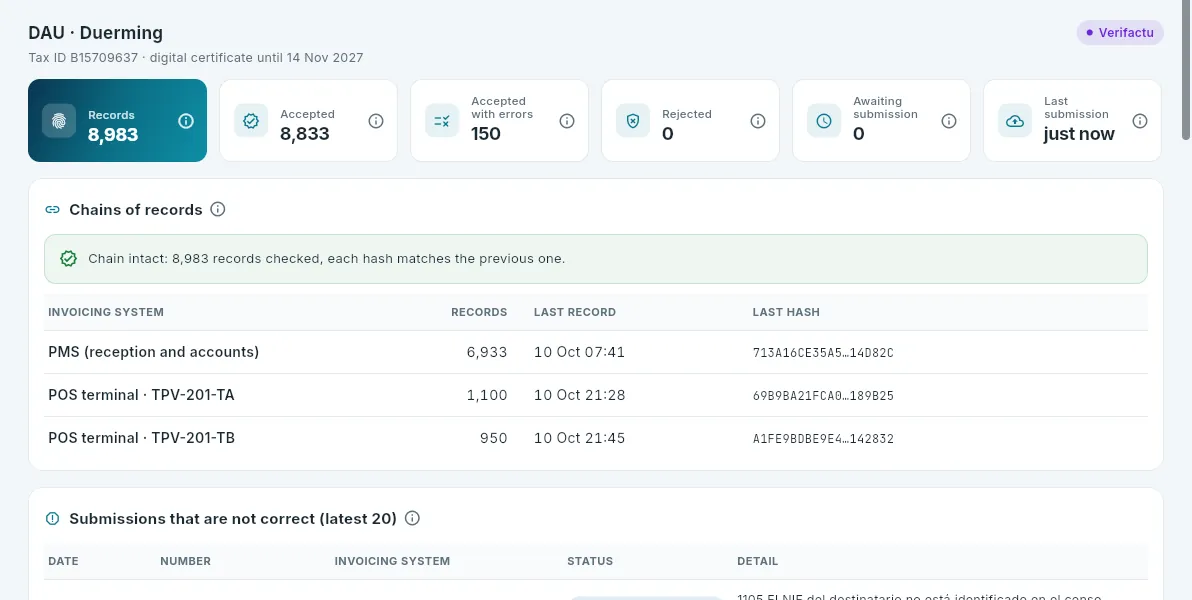 1234
1234
- 1The company, its scheme and until when its digital certificate is valid (it warns you before it expires).
- 2The records by status: correct, accepted with errors, rejected and pending submission, and the last submission.
- 3The chains: the PMS one and one per POS terminal, and the check of all their hashes.
- 4The latest records that are not correct, with the AEAT’s reply; each one opens its invoice.
- The chain. Each record carries the hash of the previous one in its invoicing system: the PMS (front desk and accounts) and one per POS terminal. The check recalculates them all: if the chain is intact, no invoice has been changed after being issued.
- Accepted with errors: the invoice stands, but the AEAT warns about something (in the demo, a tax ID not in the register); it is worth checking the detail for the next ones. Rejected must be zero.
- The SII: for SII companies (in the demo, Hoteles Atlánticos), the tab shows their invoices for the last few months (full, simplified and corrective). The SII is filed by the accountants with the export to a3innuva (see Accounting).
#GDPR: the legal texts
GDPR has four views: Legal texts, Consents, Access log and Retention. The texts are what the guest is told: the check-in information, the privacy policy and what they accept when giving their consent to marketing or the survey.
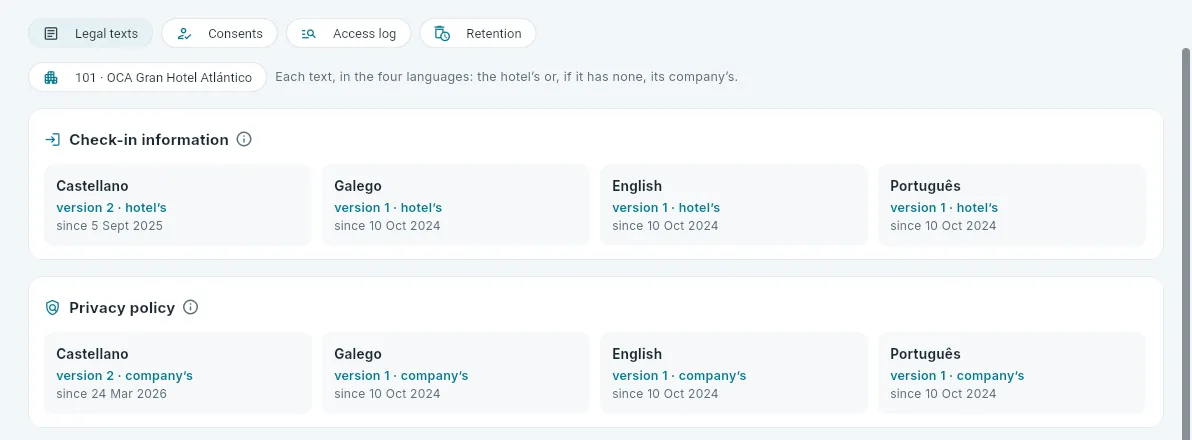 123
123
- 1The four GDPR views.
- 2The hotel: each text is its own or, if it has none, its company’s.
- 3Each text, in the four languages, with its version, whose it is (the hotel’s or the company’s) and since when it has been in force.
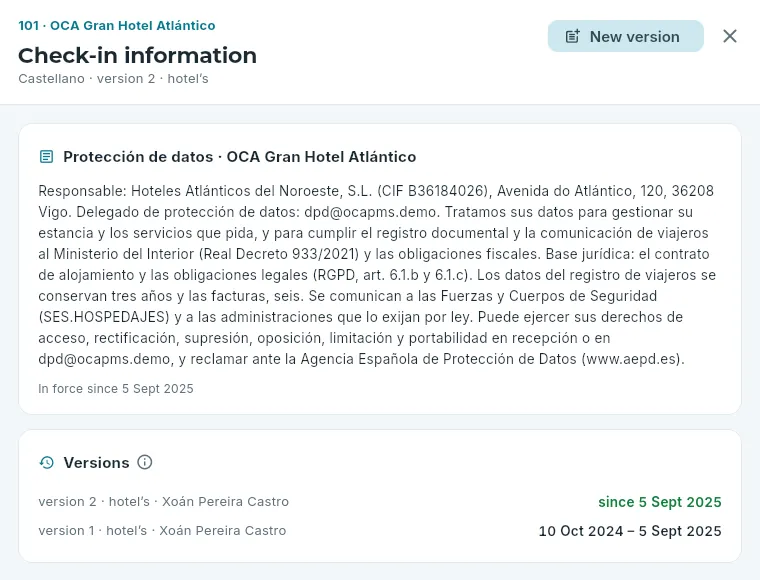 123
123
- 1New version: for this hotel or for its whole company.
- 2The current text: who processes the data, what for, on which legal basis, for how long, to whom it is disclosed and how to exercise the rights.
- 3Its versions, which are never deleted: each consent records which one it was given with.
At check-in, the hotel’s information is shown in the booking’s language (see Front desk). A new version replaces the current one from that moment on; the previous one is kept.
#Consents
Consents brings together what each guest has accepted or refused. There are two: marketing (without consent, it is not sent to them) and the satisfaction survey (sent on legitimate interest, unless they object: if they say no, the database does not create their survey).
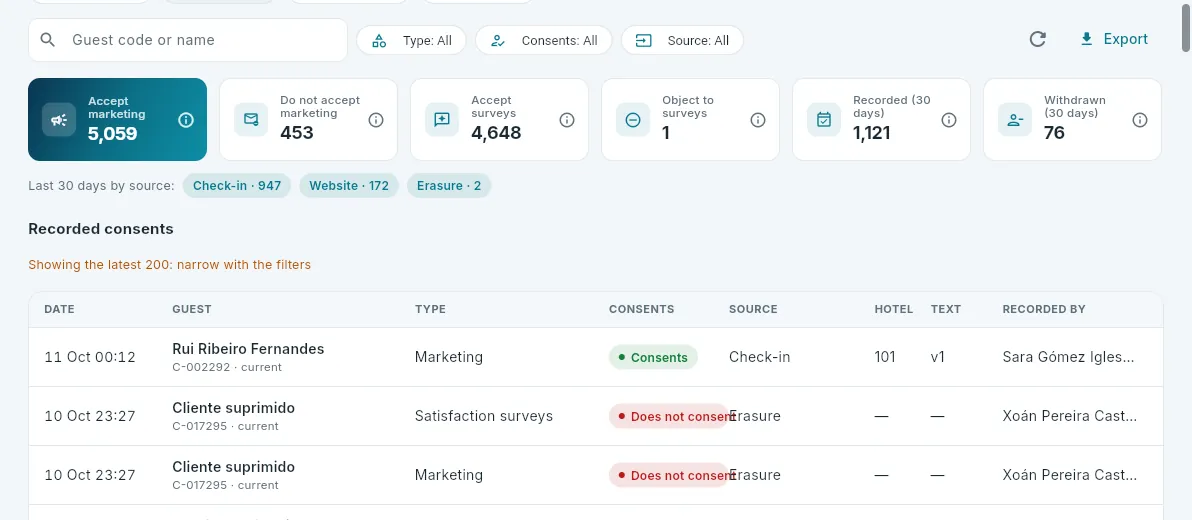 123
123
- 1Search for a guest; next to it, by type, whether they consent and where it came from.
- 2How many accept marketing and surveys, how many do not, those recorded and those withdrawn in 30 days.
- 3Each consent: date, guest, type, whether they consent, its source (check-in, website, reception, the record, an unsubscribe from an email…), the hotel and the version of the text. It opens the guest record.
Consents are never deleted: the current one is the latest of each type. They are recorded at check-in (see Front desk) or from the guest record (see Guests), or they arrive from the website and from email unsubscribes.
#The access log
Access log (only with Manage GDPR) records every time a person opens full personal data – a guest’s or a booking’s record, the check-in, the guest history, an SES submission –, edits it, exports it (CSV lists with names or ID documents, the download of someone’s data) or erases it. It never stores the values: only who, when, what and whose.
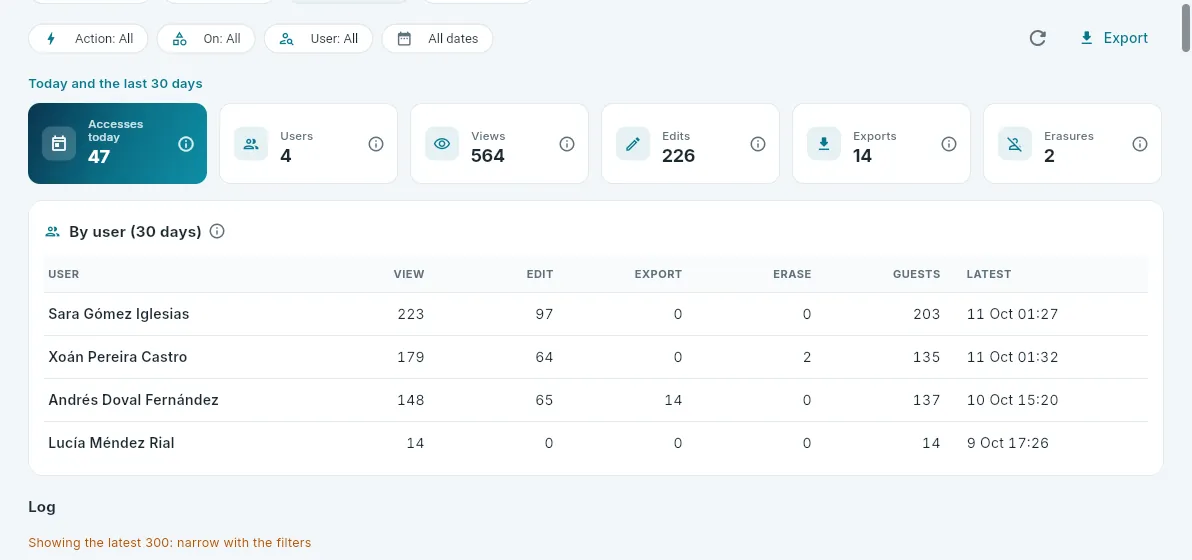 123
123
- 1Filter by action, by what it was on, by user and by dates.
- 2Today’s accesses and, over 30 days, how many people, views, edits, exports and erasures.
- 3What each person has done and with how many guests; each row filters to theirs.
#Retention
Retention shows how long each thing is kept, by company, and what is already past its period.
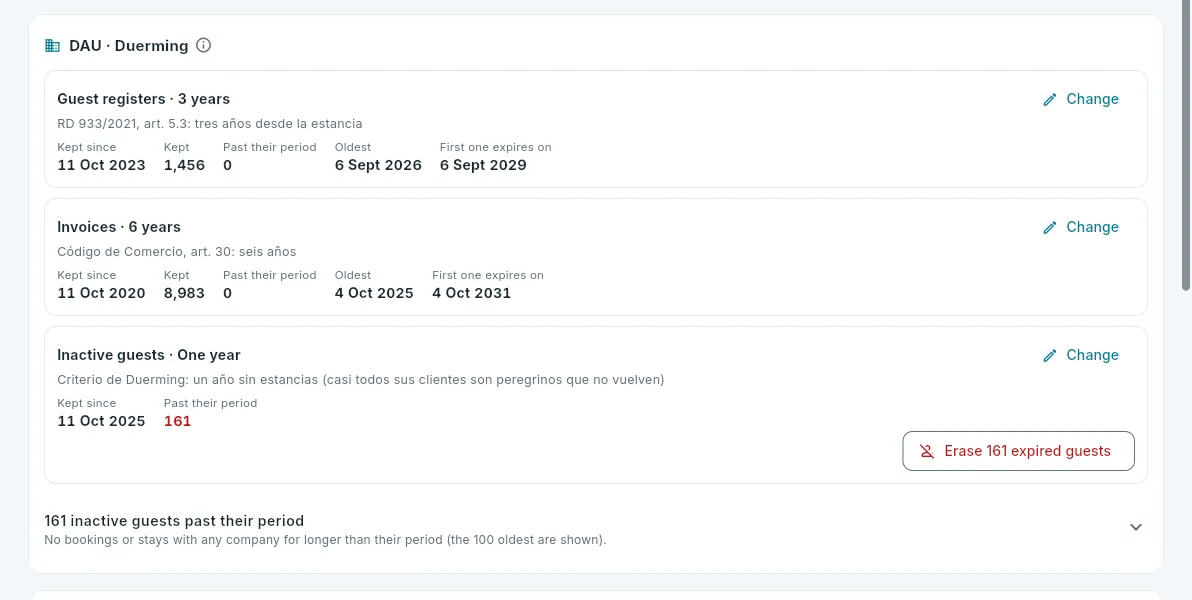 1234
1234
- 1Guest registers: 3 years (RD 933/2021). How many are kept, the oldest one and when the first one expires.
- 2Invoices: 6 years (Commercial Code).
- 3Inactive guests: whatever the company decides (here, one year). How many are past it and the button to erase them.
- 4Change a period: it can be extended, but never set below what the law requires.
- Guest registers: what was sent to SES and is past its 3 years can be deleted (Delete expired registers): the submission record stays, without personal data.
- Invoices: immutable; here only their period is reported.
- Inactive guests: a guest expires when the period has passed in every company where they stayed. Erase N expired guests anonymises them (up to 100 at a time), keeping restricted what the law requires. It asks for confirmation and cannot be undone.
- At the end, the erasures done: when, why (at the data subject’s request or because the period ended), by whom and until when what is mandatory is kept restricted. Erasing a specific guest at their own request is done from their record (see Guests).
#What each role sees
#Frequently asked questions
Do I have to send the guest registers by hand? No: they go out by themselves in the next batch, every few minutes. Send now only brings the sending forward; what you need to watch are the errors and anything overdue.
A submission has been “pending” for hours. Why is it not going out? It is probably incomplete: a guest’s residence or the lead guest’s surnames are missing. The warning on the panel points it out; complete the record and it will go out by itself.
A guest asks us to delete their data. Can we? Yes, from the GDPR tab on their guest record, unless they have a booking in progress or something pending with SES. Whatever need not be kept is anonymised; their invoices (6 years) and their guest registers (3) are kept restricted, because the law requires it.
Why is the survey’s ADR not the same as the one in Reports? Because the INE asks for it without the board supplement (breakfast, half board): in Reports, the ADR includes board.
What happens if a guest says they do not want the survey? It is recorded as a survey consent of “does not consent” and the survey is no longer sent to them: the database does not create it.
Why does the front desk not see this section? Because its work on these obligations happens at check-in: that is where it informs guests, records consents and sees the SES status of each booking and room.
By role
Executive housekeeper
The housekeeper’s shift with the housekeeping app on a tablet: the room board, inspecting what the room attendants finish, the team’s progress and sharing out what is left, faults, and the shared tablet in the housekeeping office.
The housekeeper organises the housekeeping department: shares out the work, inspects the rooms the room attendants finish, makes sure arrivals have their room ready in time and keeps an eye on faults. They do it with the housekeeping app on a tablet, going round the floors, and with the Housekeeping section of the management app on the computer in the housekeeping office (to plan the day, the work report, lost property and the settings).
This chapter follows their shift on the tablet. The housekeeping app opens at the demo address ending in /pisos/, with
the executive housekeeper’s account (see Room attendant). The demo’s housekeeper
looks after two hotels, 101 and 102: the app asks which one they are at and remembers it on that tablet (Change hotel, in
their menu).
#The room board
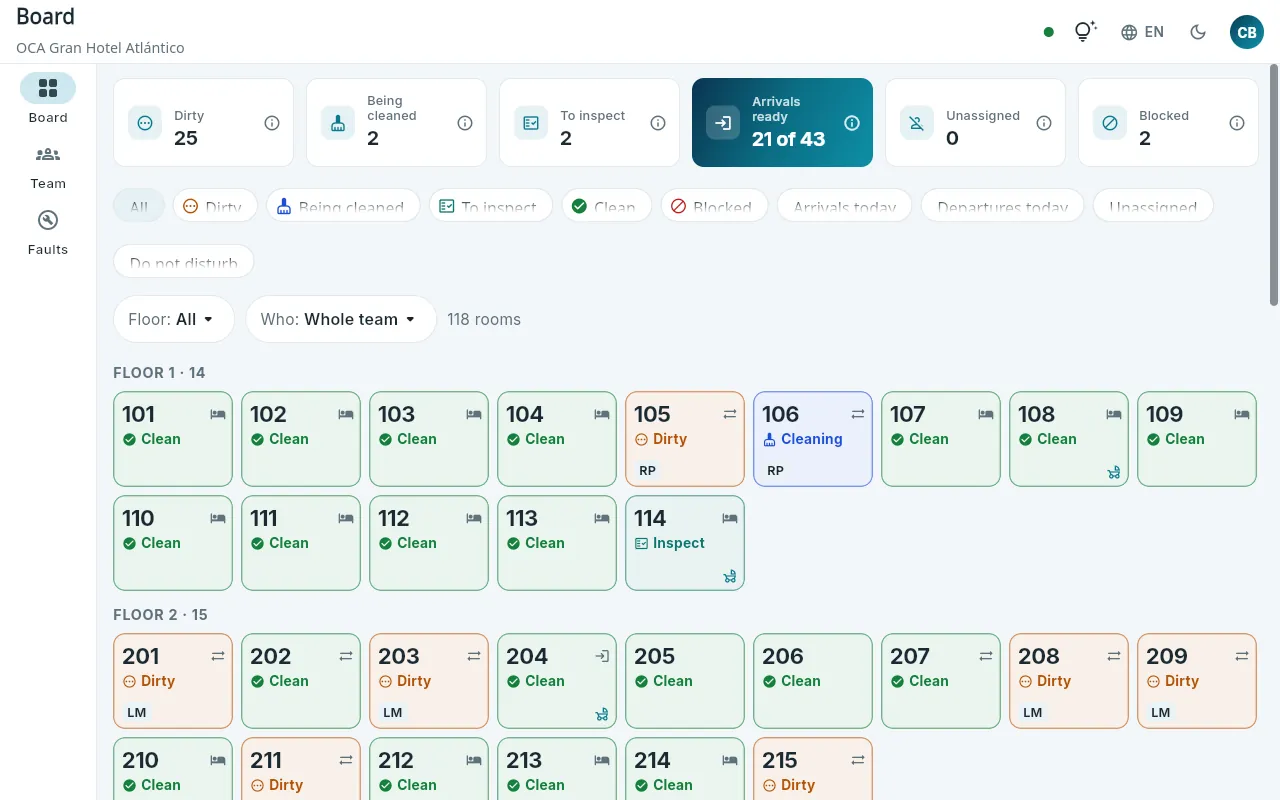 123456
- 1Board, Team and Faults.
- 2Dirty, being cleaned, to inspect, arrivals ready, unassigned and blocked, each with its ⓘ.
- 3The filters: by status, those arriving or leaving today, unassigned or with “do not disturb”.
- 4One floor or one room attendant.
- 5Each room: its status with its colour and icon, whether someone is leaving, arriving or staying on, who has it (their initials) and what needs preparing.
- 6Live, help, language, theme and their menu.
The squares are arranged by floor, with the colour and icon of their status: dirty, cleaning, to inspect, clean or blocked. The icon in the corner says whether someone is leaving today, someone is arriving or the guest is staying on; at the bottom, the initials of whoever has the room and, if a cot or an extra bed needs preparing, its icon. Everything changes by itself when a room attendant starts or finishes a room, or when the front desk checks a guest out (the green dot, live).
#Inspecting a room
At hotels that inspect rooms (in the demo, 101), a finished room becomes to inspect: it cannot be given to a guest until the housekeeper approves it. Tapping a room opens its screen with its actions: the room attendant’s and, in addition, the housekeeper’s.
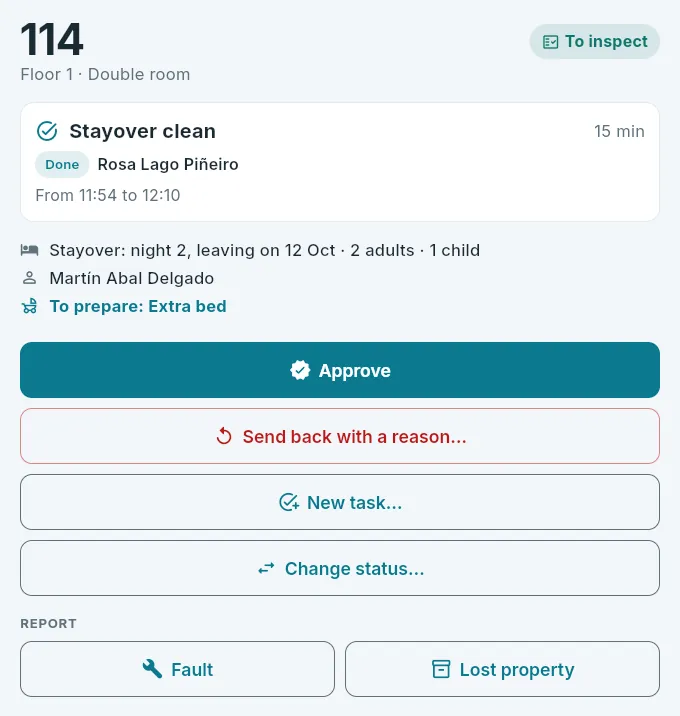 1234
1234
- 1Approve: it becomes clean and ready to give out.
- 2Send back with a reason…: it goes back to dirty with a touch-up.
- 3Create a task or change the status by hand.
- 4Report a fault or lost property.
 12
12
- 1The most common reasons, in one tap.
- 2Or type the reason: the room attendant will see it in the touch-up.
On the board, tap the To inspect filter.
Go to the room, inspect it and tap its square.
If it is fine, tap Approve. If not, tap Send back with a reason…, choose or type what needs a touch-up and tap OK.
From the same screen, Change status… sets the room to clean, dirty… by hand (marking it clean closes any task it has open), New task… creates a task (a touch-up, a deep clean) and Assign to… passes the task to another room attendant.
#The team
Team shows how each room attendant is getting on: how many rooms they have done out of how many, the minutes of work done and planned, and which room they are in right now. Tapping a person opens their list, to see what they have left and reassign whatever they will not have time for.
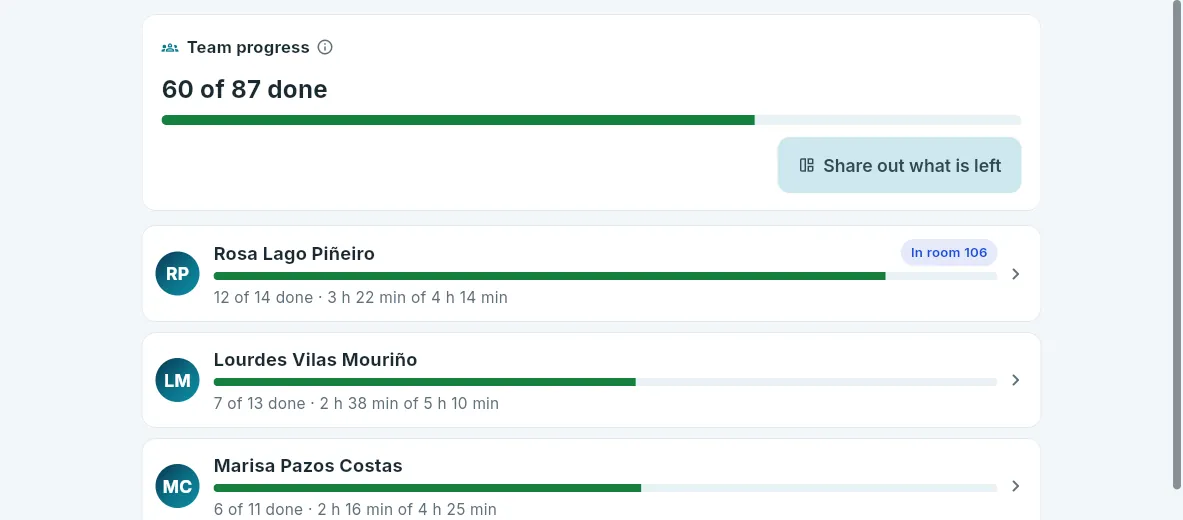 123
123
- 1The team’s progress: what has been done today against what was planned.
- 2Share out what is left: creates any missing tasks from today’s bookings and allocates those nobody has, by floor and by workload.
- 3Each room attendant: what they have done, the minutes and which room they are in. Tap one to see their list.
#Faults
Faults is the list of the hotel’s open faults, the most urgent first, with what is needed to follow them up from the floor: the category, the priority, since when, who spotted it, whether the room is blocked and the photo. With the permission to fix faults, the housekeeper (or maintenance) marks when the repair starts and when it is resolved.
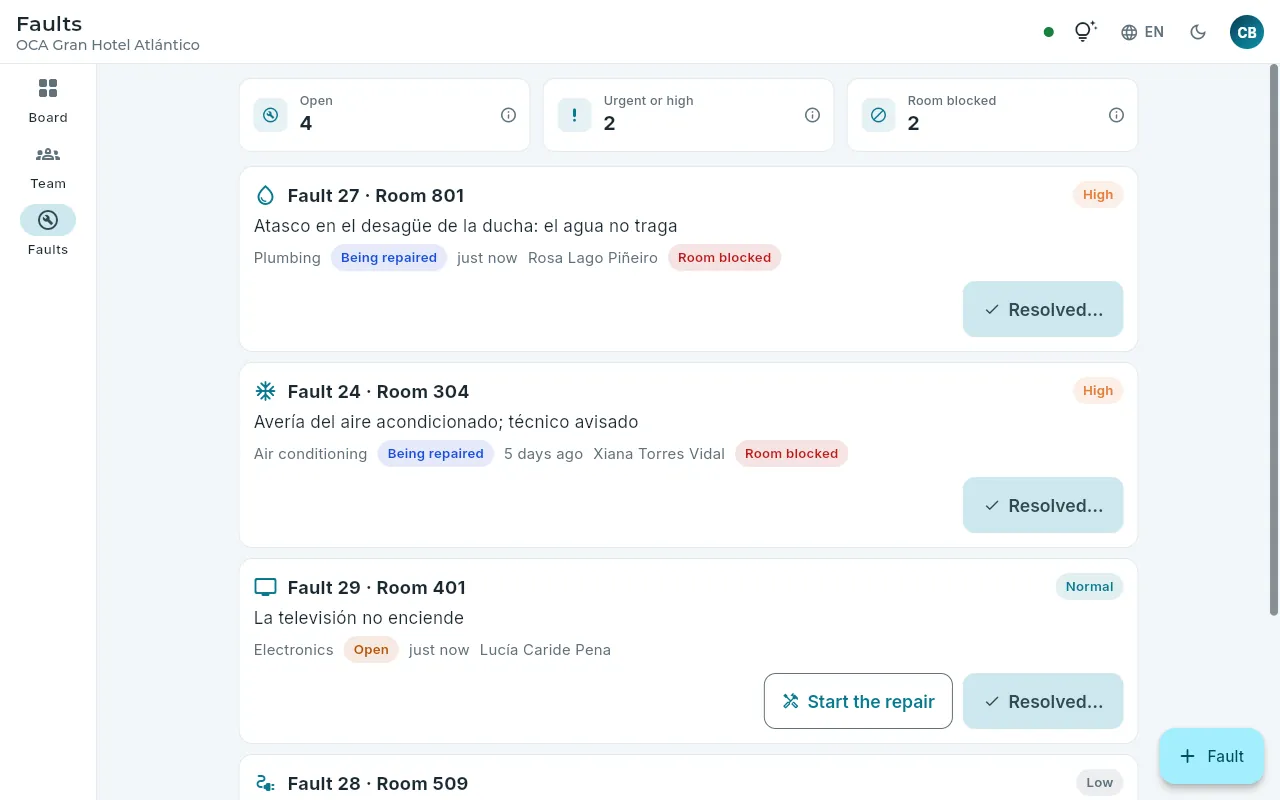 1234
1234
- 1Open, urgent or high, and with the room blocked.
- 2Each fault: where, the priority, what is wrong, the category, the status, since when and who spotted it; in red, if it blocks the room.
- 3Start the repair and Resolved… (with what was done: if the room was blocked, it goes back on sale and is left dirty, ready to be cleaned).
- 4Report a new fault.
#The shared tablet
If the room attendants do not use their mobiles, the housekeeper leaves a tablet in the housekeeping office in shared tablet mode (“kiosk mode”): each room attendant taps their name and works with their list, and what they do is recorded in their name, even though the session is the housekeeper’s (see The shared tablet in the housekeeping office). The tablet stays put: it does not let anyone go to other screens or sign out, help only shows the guides for the role, in large text, and if it restarts it goes back to the same mode.
 123
123
- 1The other hotel.
- 2Shared tablet mode.
- 3This tablet’s changes not sent yet (see Working offline).
 12
12
- 1The exit PIN, 4 to 8 digits, twice.
- 2Start: the tablet switches to “Who are you?”.
Sign in to the housekeeping app with your account, on the tablet.
Open your menu (your initials, at the top right) and tap Use as a shared tablet.
Enter an exit PIN of 4 to 8 digits, repeat it and tap Start.
 1
1
- 1The PIN set when it was opened or, if it has been forgotten, the password of the tablet’s account.
To leave shared tablet mode, tap the padlock at the top right and enter the PIN (or the password of the account that
opened it). Only a fingerprint (hash) of the PIN is stored, not the PIN itself. In the demo, the app address with
?quiosco=1 opens the shared tablet directly with the PIN 1234.
By role
Room attendant
A room attendant’s shift with the housekeeping app on a mobile: their list for the day, starting and finishing each room, the minibar, “do not disturb”, reporting a fault or lost property, and the shared tablet in the housekeeping office.
The room attendant works with the housekeeping app: an application designed for mobiles, with large text and buttons that are easy to press with your thumb, which tells them which rooms they have today, in what order and what needs doing in each one. Everything they do in it reaches the housekeeper, Housekeeping and the front desk instantly, and it keeps working offline (in a corridor with no signal, in the basement): what has been done is saved on the mobile and sent as soon as the network comes back (see Working offline).
- 1Their listThe day’s rooms, by priority: first those with an arrival waiting.
- 2StartOn entering the room: it becomes “being cleaned”.
- 3FinishWith what was restocked, what was removed and the minibar: it becomes clean or to inspect.
- 4ReportA fault or lost property, with a photo, as soon as it turns up.
#Signing in to the housekeeping app
The housekeeping app opens in the mobile’s browser, at the demo address ending in /pisos/ (in production it will be a
mobile app). In the demo, the sign-in screen offers the housekeeping accounts with one click: the room attendant at hotel
101 and the executive housekeeper. If the person works at several hotels, the app asks which one they are at and
remembers it on that mobile.
 1234
1234
- 1The housekeeping app, with the demo badge.
- 2The demo accounts: room attendant and executive housekeeper, one click away.
- 3Or your email and password.
- 4The language and light or dark mode.
#Your list for today
On signing in, the room attendant sees their list: the rooms the housekeeper (or the automatic plan) has assigned them for today, in the order it makes sense to do them.
 1234567
- 1Their list, for the hotel they are at.
- 2The green dot (live), help and their menu (changes not sent yet, refresh, language and sign out).
- 3Their progress: how many rooms they have done and roughly how much work is left.
- 4The room in progress, at the top, with its type of cleaning and its minutes.
- 5Finish: opens the screen to finish it.
- 6Start the next one.
- 7Report a fault or lost property, always to hand.
The list is in groups: in progress (the room being cleaned), to do (by priority and in order), do not disturb (those that had the sign up: they are tried again later) and done. Each room shows its type of cleaning (departure, stayover, linen change, touch-up, arrival set-up…) and its minutes, whether someone is leaving or arriving and at what time, whether the guest is staying on and which night it is, whether it is a priority (it must be ready before the next guest arrives) and whether there is anything to prepare: a cot, an extra bed…
The room attendant does not see guests’ names: they do not need them for their work (data minimisation, GDPR). The room, whether someone is leaving or arriving and when, the amenities and whether the guest is a VIP are enough.
#Starting and finishing a room
Tapping a room opens its screen, with everything you need to know and the buttons for what can be done in it depending on its status.
 123
123
- 1Its task: the type of cleaning, the minutes, whether it is a priority and who has it.
- 2Start: on entering the room.
- 3Do not disturb: if the sign is up; it is tried again later.
 123
123
- 1Finish…: opens the screen to finish it.
- 2Service refused: if the guest says they do not want the room cleaned today (it asks for confirmation).
- 3Report something in this room.
On finishing, the room attendant notes what they have restocked (toiletries, linen), what they have removed (dirty or damaged linen) and what has been taken from the minibar, with minus and plus buttons. The minibar is charged automatically to the folio of the guest staying in the room, at each item’s price. If there is nothing to note, the room is finished straight away.
 123
123
- 1Minibar consumption: it is charged to the guest’s folio.
- 2Minus and plus, one at a time.
- 3Finish the room (or “Finish with 3 items”).
 12
12
- 1What was restocked and what was removed, in the same way.
- 2Notes: anything the housekeeper should know.
In your list, tap Start (the triangle) on the room you are about to do. If it has the do not disturb sign up, open it and tap Do not disturb.
When you have finished, tap Finish (or Finish… on its screen).
Use the plus buttons to note what you have restocked or removed and what is missing from the minibar. If you like, write a note.
Tap Finish the room.
#Reporting a fault or lost property
A fault (a dripping tap, a blown bulb, air conditioning that does not cool) or a forgotten item is recorded on the spot, from the list or from the room’s screen, with a photo taken with the mobile. It reaches the housekeeper and maintenance instantly: see Faults and Lost property.
 1234
1234
- 1Where? In a room or in a common area.
- 2What kind?
- 3The priority: urgent faults email maintenance.
- 4Further down, what is wrong, the photo and, if needed, taking the room out of sale. Then, Send the report.
 12
12
- 1Where it was found.
- 2What it is, what kind, whether it is valuable (it goes to the safe) and the photo; then, Record the item.
#The shared tablet in the housekeeping office
In many hotels room attendants do not use their own mobile: there is a tablet in the housekeeping office, opened by the housekeeper in shared tablet mode (see Executive housekeeper). Each room attendant taps their name, works with their list – the same as on the mobile, with larger text – and what they do is recorded in their name. When they finish, or if the tablet is left untouched for three minutes, it goes back to “Who are you?” on its own, so that nobody works under someone else’s name.
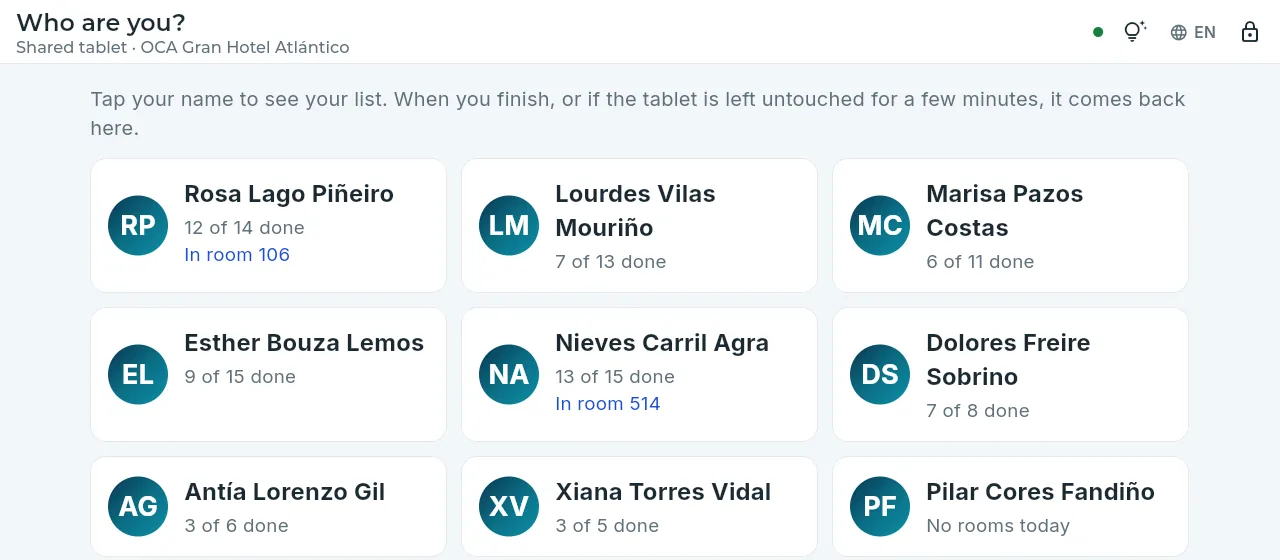 123
123
- 1Who are you?, at the tablet’s hotel.
- 2Each room attendant, with what they have done today and where they are.
- 3The padlock: only someone who knows the PIN can leave this mode.
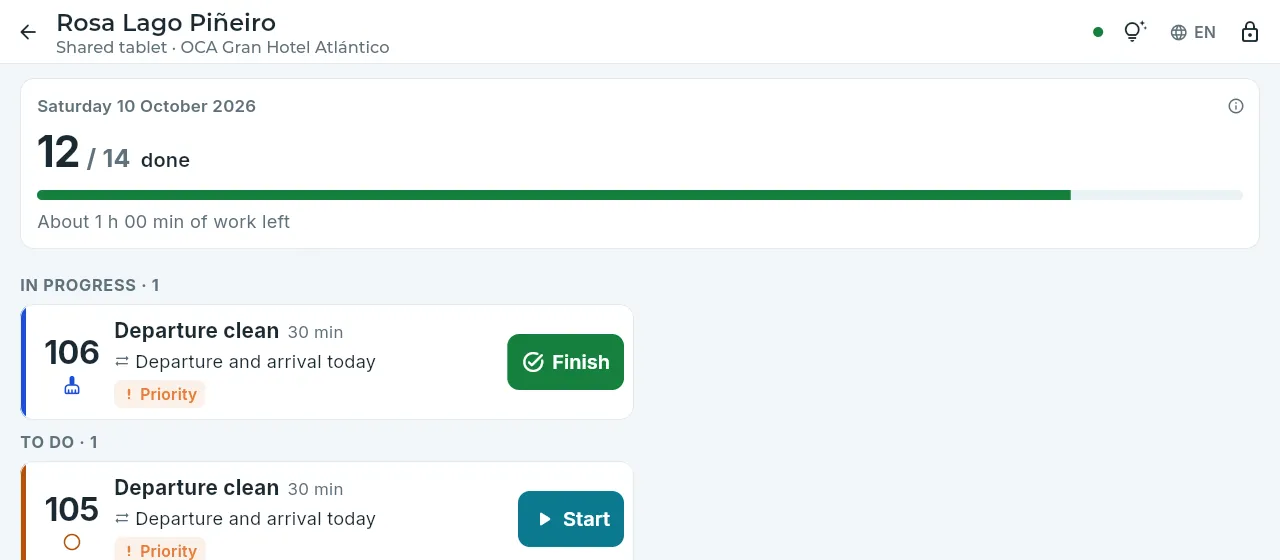 12
12
- 1Back to “Who are you?”.
- 2The same list, with larger text.
By role
Waiter
A waiter’s shift with the POS app on the dining-room tablet: choosing the terminal and signing in with a PIN, the floor plan, opening and running a table with its allergies, sending to the kitchen and bar, taking payment with a receipt or charging to the room, the shift Z report and what happens if the connection drops.
In the restaurant, café or bar, the waiter works with the POS app: an application for the dining-room tablet (or a touch terminal at the bar) with the floor plan, the menu, orders to the kitchen and bar, payment with a receipt and charges to the rooms of hotel guests. The tablet is shared: each waiter signs in with their name and PIN, and whatever they do is recorded under their name. Everything reaches the other terminals, the kitchen screen and the POS section of the management app at once, and it keeps working offline: the terminal numbers its receipts and stores what has been done until the network comes back (see Working offline).
- 1Open the tableWith its allergies (and its diners, in the restaurant).
- 2OrderFrom the menu, with each dish’s allergens in view.
- 3SendTo the kitchen and bar, by course: mains wait for “Call away”.
- 4Take paymentWith a receipt (cash or card) or by charging it to the room.
- 5Z reportAt the end of the shift, the terminal’s till is counted and closed.
#Signing in and choosing the terminal
The POS app opens in the tablet’s browser, at the demo address ending in /tpv/ (in production it will be a tablet app). In
the demo, the sign-in screen offers the POS accounts in one click: the waiter and management. After signing in, each device has
to know which terminal it is.
A terminal is a payment point of an outlet (the restaurant’s dining-room tablet, the café’s bar till…): it has its own till, its own receipt series (TA, TB, TD…) and its own chain of Verifactu records, because it issues receipts even when there is no connection. That is why a terminal is only used on one device at a time: when it is chosen, it is claimed for that device and the app remembers it; if another device claims it later, this one can no longer issue receipts in its series and says so in a red band.
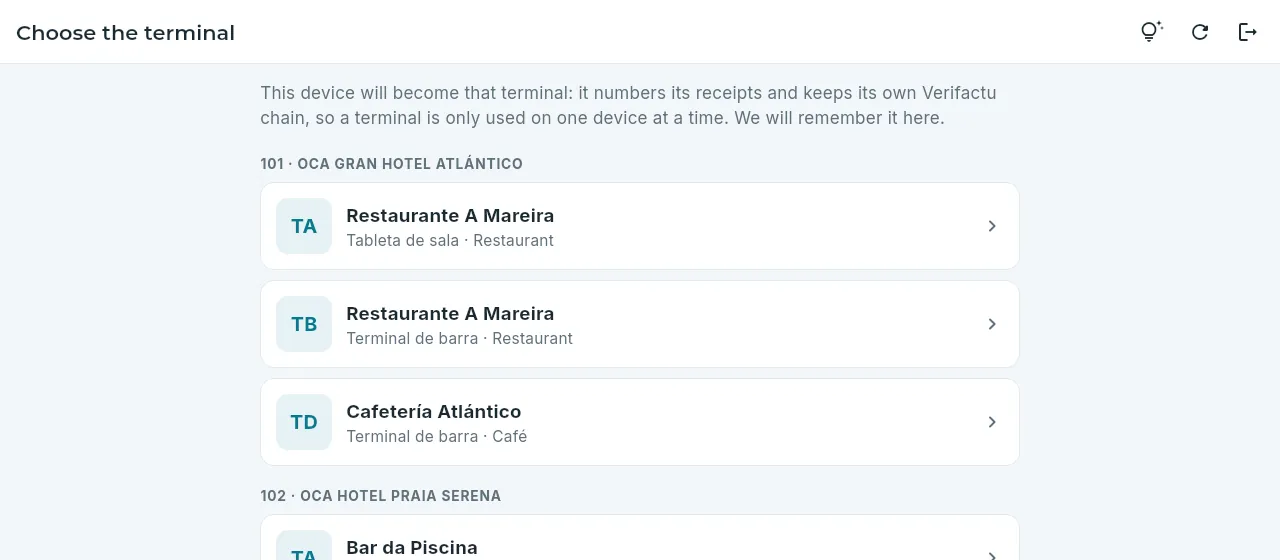 12
12
- 1The first time, the app asks which terminal this device is.
- 2The terminals of your hotels, by hotel and outlet: the code of its series, the outlet and what type it is. Tap yours. If another device is already using it, it says so in orange: if you choose it here, that device can no longer issue receipts.
With the terminal chosen, the tablet asks “Who are you?”: each of the outlet’s waiters taps their name and enters their PIN (4 to 6 digits, with the on-screen keypad). The PIN is checked on the terminal itself, even offline. From then on, whatever they do is under their name and with their permissions: the app only offers what their role allows (and the database checks it again).
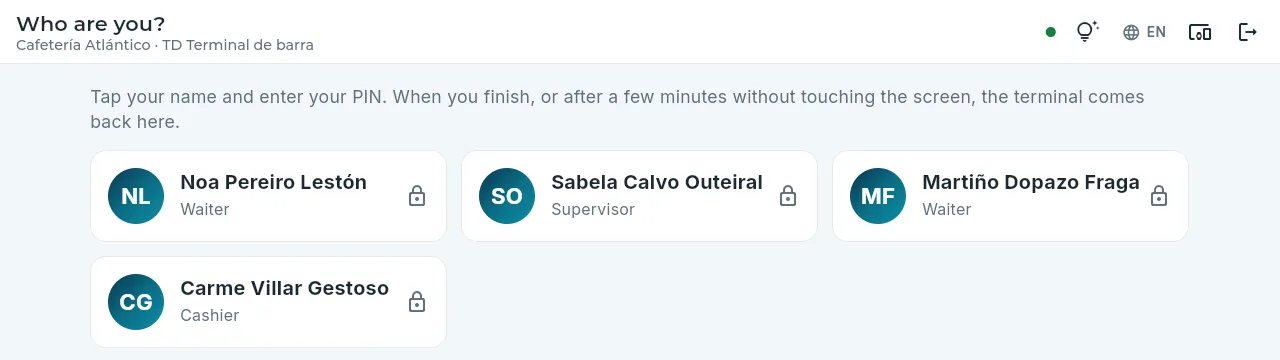 123
123
- 1The outlet and the terminal of this tablet.
- 2Each waiter, with their role: tap your name.
- 3Change terminal (online and with nothing waiting to be sent) and sign the device’s account out.
 12
12
- 1Enter your PIN: as soon as it is right, you are in.
- 2If you get it wrong, it is cleared and says so.
#The floor plan
The floor plan is the main screen: the outlet’s areas (the bar, the dining room, the terrace…) and, in each one, the tables in their place, with their shape and their status at a glance. It updates by itself with what the other terminals and the kitchen do.
 1234567
- 1The areas, with their occupied tables out of the total: tap one to see its plan.
- 2An occupied table, in colour: the time since it was opened and its total. Its icons say whether something is waiting in the kitchen or bar, whether something is ready to serve or whether the bill was requested; yours have an orange border.
- 3A free table, in white, with its seats: tap it to open it.
- 4The key (ⓘ): what each colour and icon means. Colour is never used on its own.
- 5Bar and tabs: bills without a table (a sale at the bar, a tab parked under a name). New opens one, also for a hotel guest.
- 6The green dot: live.
- 7Your menu.
Your menu has: switch waiter, the kitchen or bar screen, the latest receipts (to reprint one), open the till or run the Z report (with its permission), what is still to send, refresh, language and theme, change terminal and sign out.
#Opening and running a table
When you tap a free table, the app always asks “Any allergies at the table?”, with the 14 allergens that must be declared. In the restaurant it first asks how many diners there are and whether it is for a hotel guest: the bill then goes under their name, their allergies are already ticked and it can be charged to their room. With “Save” (or “None”) the bill is opened.
 12
12
- 1The 14 allergens: tick the table’s.
- 2Save opens the bill with them; with no allergies, None.
Tapping an occupied table opens its bill: the menu on the left and what has been ordered on the right, by course.
 12345678
- 1The table’s allergies, at the top: they can be added or changed at any time.
- 2The search box (also the barcode reader) and the menu families, each with its colour.
- 3Each item, with its price and its abbreviated allergens (Glu: gluten). Tap it to order it.
- 4What has been ordered, by course, with the status of each line: not sent, in the kitchen or bar, ready, served.
- 5Send to the kitchen and bar; Call away the next course.
- 6The bill and charge to the room.
- 7Take payment.
- 8More actions on the whole bill.
Tapping an item orders it: it stays not sent (if an identical one has not been sent yet, it adds one more unit). If it contains one of the table’s allergens, the button shows in red and, when tapped, the app warns and asks for confirmation (see Allergies). In the restaurant, the set menu opens the choice of its dishes (first course, main, dessert and drink, with their supplements): it is ordered as a whole and each dish goes to the kitchen in its course.
Order for the table by tapping the menu items (or search for them by name).
Tap Send: the order goes to the kitchen and the bar (one order for each, printed with the table’s allergies clearly shown).
In the restaurant, sending releases the first course (drinks and starters); mains and desserts wait in the kitchen. When the table is finishing the previous course, tap Call away and choose the course that goes out. In the café and the bar everything goes out straight away.
What the kitchen marks as ready shows on the floor plan with the bell: serve it and mark it served (by tapping the line).
When they ask for the bill, Bill prints it so they can check it; then take payment or charge it to the room.
Tapping a line opens what can be done with it: change the units and the notes for the kitchen (the quick ones from the menu, such as “No salt” or “Medium”, or a free one) while it has not been sent, put it on the house, a discount, remove it or mark it served. More actions (⋮) has what is done with the whole bill.
 12
12
- 1Its status, its amount and its allergens, and what can be done with it depending on your role.
- 2What has already been sent can only be removed by someone with the permission to delete sent items, with a reason.
 12
12
- 1Move to another table, merge with another bill, split it (whole lines or some units) and park it as a tab.
- 2A discount, put the whole bill on the house (with a reason) or cancel it.
#Kitchen and bar
What is sent reaches the kitchen screen (and the bar screen): on a kitchen tablet or, from the waiter’s menu, Kitchen screen. Each order appears in order of arrival, with its dishes by course; what is still waiting to be called away is greyed out, and the table’s allergies are in red, on the order and on each dish that contains them.
 1234
1234
- 1Kitchen or bar.
- 2Each order: the table, its number, the time, the waiter and how long it has been waiting (orange after 15 minutes).
- 3Tap a dish when it is done, or All ready.
- 4Ready items move to To serve (and to the waiter’s floor plan, with the bell) until they are served.
#Take payment
Take payment (at the bottom of the bill) opens the payment screen: on the left, what is being charged with the VAT breakdown, and on the right the payment methods. The terminal’s till must be open (if it is closed, the floor plan says so with Open the till).
 12345
12345
- 1What is being charged and the VAT breakdown (the base and the amount for each rate).
- 2The payment method. It can be paid in several: one part and then the rest.
- 3What you are given: Exact or the notes (or type it on the keypad).
- 4The change.
- 5Records the payment; then, Issue the receipt.
By card, choose Card and Present the card: the card terminal asks for the card to be presented and approves the transaction. Once everything is paid, Issue the receipt: the terminal numbers the receipt in its series (TD26-…) and, if the hotel’s company is under Verifactu, computes its chained hash and its QR code on the terminal itself, even offline. The receipt is shown on screen (and printed on the terminal’s printer) and the table is freed.
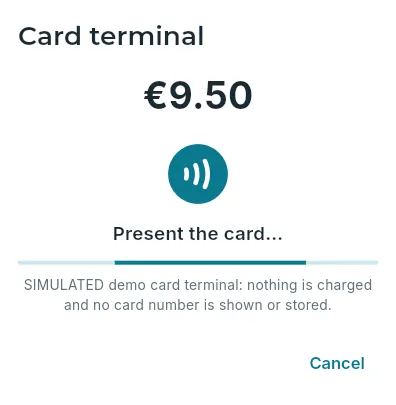 12
12
- 1The card terminal, with the amount being charged.
- 2It asks for the card and approves the transaction with its reference. In the demo it is simulated: nothing is charged and no card number is shown.
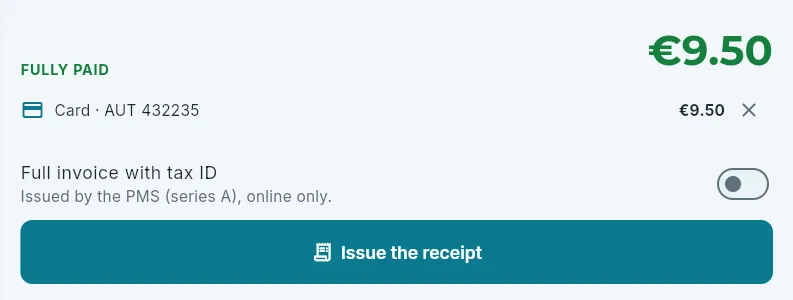 123
123
- 1All paid, with each payment and its reference (✕ removes it).
- 2Full invoice with tax ID: issued by the PMS (series A), online only.
- 3Issue the receipt.
#Charging to the room
If the table is a hotel guest’s, the bill can be charged to their room: it is added to their hotel folio and they pay it when they check out. Room (on the bill) opens the list of in-house guests, with a search by room or name, and what you need to know when serving them: their allergies and intolerances (in red) and whether they are a VIP, a returning guest or celebrating a birthday.
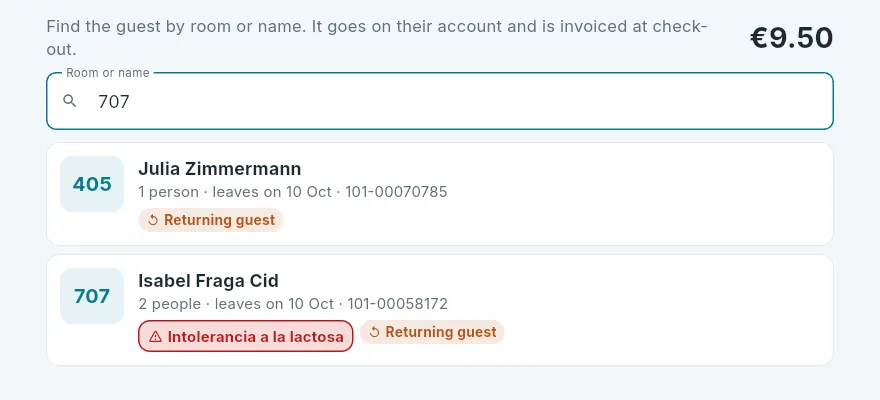 12
12
- 1Their room or their name.
- 2The guest: how many they are, when they leave, their booking reference, their allergies and their notices.
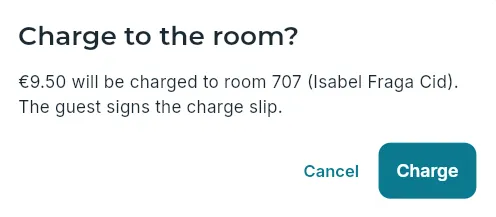 1
1
- 1Charge: it goes on their folio and is invoiced at check-out.
Charging brings up the charge slip, with what was consumed, the room and the booking reference, and a box for the guest to sign with a finger. The charge slip is not an invoice: what is charged is invoiced with the stay.
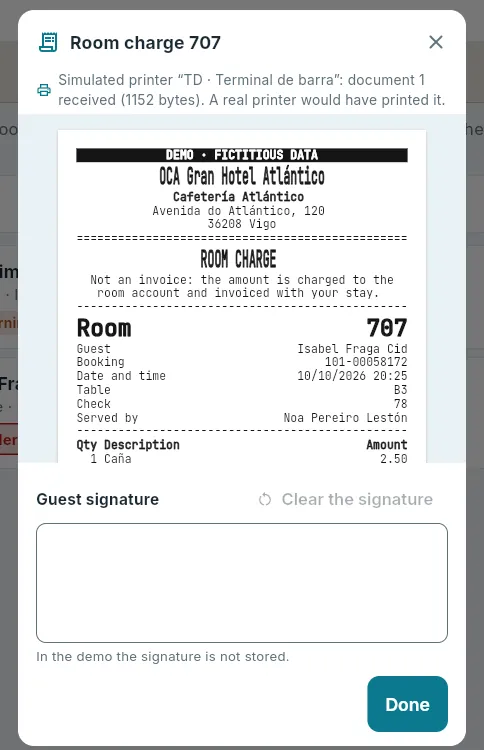 12
12
- 1The guest’s signature, with a finger (not stored in the demo).
- 2Done: back to the floor plan with the table free.
#Allergies
The table’s allergies stay with the bill the whole time: they are ticked when it is opened (a hotel guest’s come by themselves, from their preferences) and changed with Add allergies or Change. With them:
- On the menu, every item containing one of those allergens shows in red, with its warning.
- When it is ordered, the app warns and asks for confirmation: it is only added if the customer confirms it (for example, it is for another diner).
- What has been ordered that contains them is marked on the bill (“Contains: …”), on the printed order (“TABLE ALLERGIES” and “!! CONTAINS” on each dish) and on the kitchen screen.
Management keeps each dish’s allergens up to date on the menu (see POS · The menu and allergens).
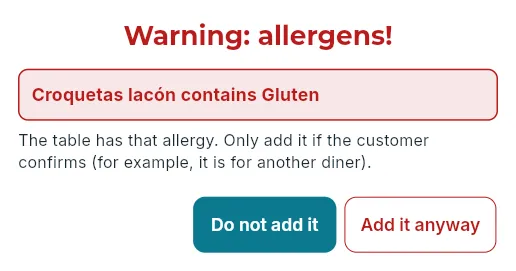 12
12
- 1The warning, with what it contains.
- 2Do not add it (the default) or, if the customer confirms it, Add it anyway.
#Closing the shift
Each terminal has its own till: it is opened at the start with its float (the cash in the drawer) and closed at the end of the shift with the Z report, from the menu, with the permission to close the shift. The cash is counted (in total or by notes and coins) and the card total (the card terminal’s batch), and the app compares them with what is expected: the float plus what was taken in that till.
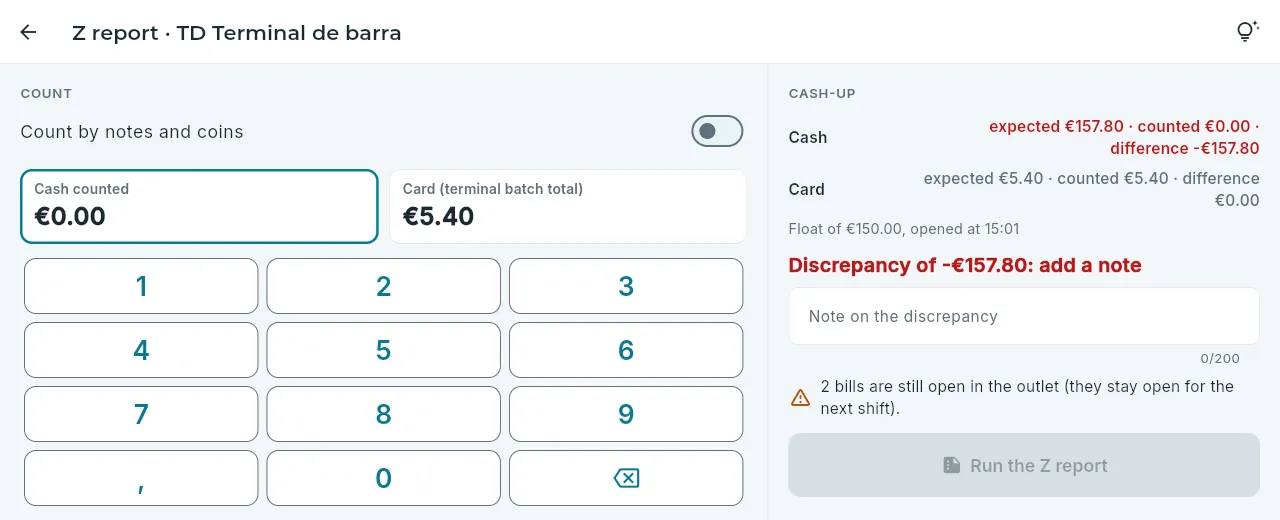 12345
12345
- 1Count by notes and coins (with + and −) or the total.
- 2The cash counted, with the keypad, and the card total (tap it if the card terminal’s batch says otherwise).
- 3The cash-up: what is expected, what was counted and the difference for each payment method, with the float.
- 4If it does not balance, a note: it cannot be closed without one.
- 5Run the Z report.
The Z appears on screen (and on the printer): sales by payment method, VAT, family, waiter and hour, with room charges, items on the house, discounts and cancellations of what had already been sent. A Z report is never changed; open bills carry over to the next shift. In the office they are consulted in POS · Z reports.
Latest receipts (in the menu) has the receipts issued on this device, to reprint one (it comes out marked “COPY”), and what was recently closed in the outlet; with the permission to void receipts, one can be voided from there.
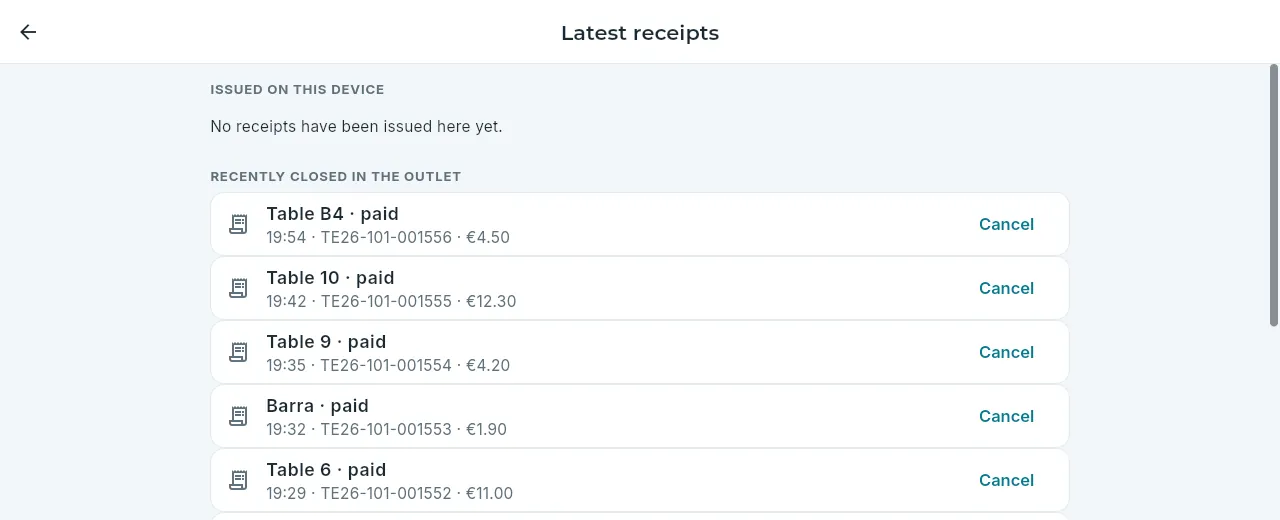 12
12
- 1Recently closed in the outlet (paid with its receipt, charged to the room, on the house or cancelled); above, the receipts issued here, to view or reprint them.
- 2Void a receipt: with its permission and online.
#If the connection drops
The POS does not stop if the network goes: the terminal keeps its menu, its tables, its waiters, the in-house guests and its numbering on the tablet. You can go on opening tables, ordering, sending to the kitchen (orders are printed), taking payment with a receipt and charging to rooms; each change waits on the tablet, in order and with its time, and is sent by itself when the network comes back.
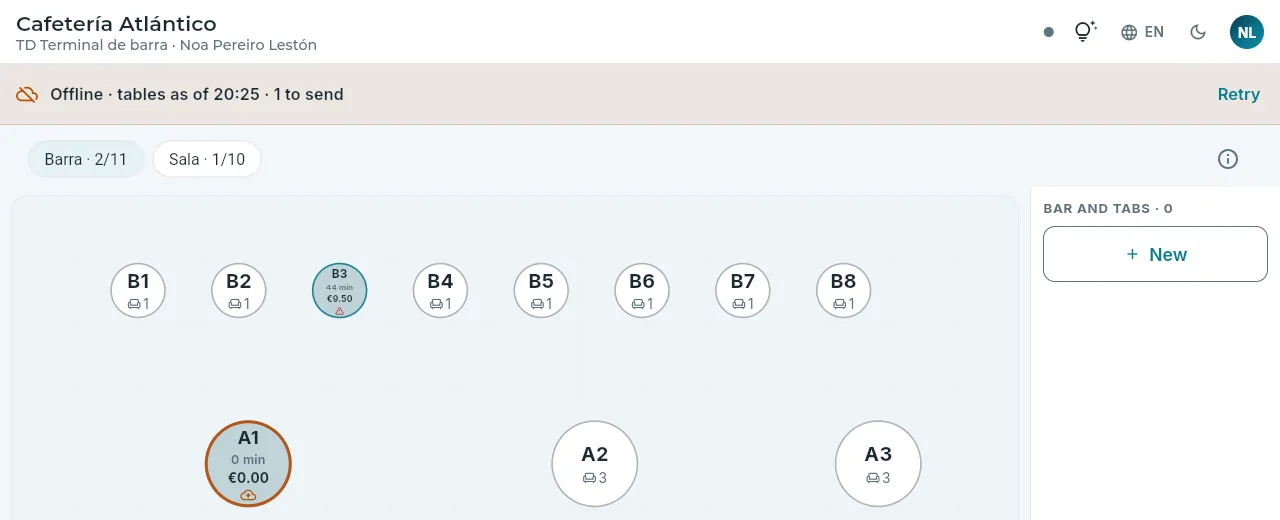 12
12
- 1Offline: the time of the floor plan and how many changes are waiting to be sent.
- 2The table opened here, with the cloud: not sent yet.
Offline you cannot: issue a full invoice with tax ID, void a receipt or change terminal (its numbering and its chain belong to this device). Whatever the server does not accept when it arrives is reported; if it was something already handed to the customer (a receipt, a charge slip), it appears as a serious issue on the terminal with what has to be done. All of it in Working offline.
#Frequently asked questions
I tapped the wrong item. How do I remove it? While it has not been sent, tap the line and Remove (or lower the units). If it has already been sent to the kitchen, only someone with the permission to delete sent items can remove it, with a reason: tell the supervisor.
The table has moved. On the bill, More actions on the bill → Move to another table (with the permission to move tables). To pay separately, Split the bill; for two tables that join up, Merge with another bill.
The customer wants an invoice with their tax ID. On the payment screen, turn on Full invoice with tax ID and type their details: the PMS issues it and it needs a connection. Above €3,000, the app asks for it by itself.
“Room” does not appear on the bill. Your role does not have the permission to charge to rooms, or the outlet does not accept room charges: take payment here or tell the supervisor.
The room charge is rejected. The guest is no longer in house, the front desk has turned off their POS charges or they have reached their credit limit: the bill stays open; take payment here or send them to the front desk.
The terminal’s till is closed and I cannot take payment. Open the till (on the floor plan or in the menu) with the float in the drawer.
It says “Another device has claimed this terminal”. Someone has chosen this terminal on another tablet: receipts can no longer be issued in its series from here. If this is the right one, Claim it (the other one will stop issuing); if not, change terminal.
Where can these sales be seen in the office? In the POS section of the management app: the live floor plan, sales, receipts and Z reports.
By role
Purchasing and stock
The day of whoever handles purchasing and stock for the hotels: what is urgent first thing, expired stock, order proposals, what arrives from suppliers and the weekly and monthly tasks.
Whoever handles purchasing and stock makes sure the kitchen, the bar and housekeeping never run short without surplus goods going to waste: they order from suppliers, receive what they bring, write off what expires, keep invoices up to date and count what there is. They work in the management app, in the Purchasing and stock section, and do the count, ideally, with a tablet while walking round the storeroom.
In the demo, the purchasing account covers two hotels, 101 and 102, with all the section’s permissions. It also sees the Dashboard and Hotels.
- 1First thingThe overview: what has expired, what the night audit proposes, what arrives today.
- 2Expired stockIt is removed and written off.
- 3The ordersThe proposals are reviewed and sent.
- 4What arrivesIt is received with its batch and use-by date.
- 5Every week and every monthInvoices and payments, the fresh-produce count and the stock count.
#First thing: the overview
The day starts in the section’s Overview. The night audit has already done its part: it has recorded this morning’s breakfasts, paid the direct-debit invoices that were due and left today’s order proposals and the list of expired stock.
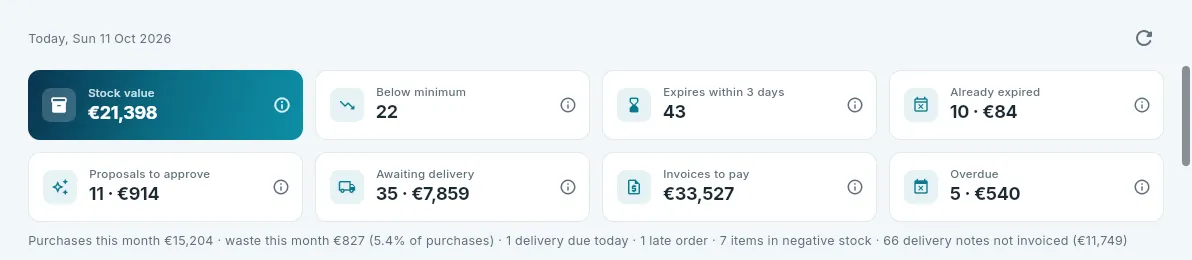 1234
1234
- 1Expired stock to write off.
- 2The proposals to review and send.
- 3What is due to arrive.
- 4What is overdue and unpaid: it should be zero.
With two hotels, the selector in the top bar switches between them; with All my hotels, the lists combine them (each storeroom shows its hotel in front).
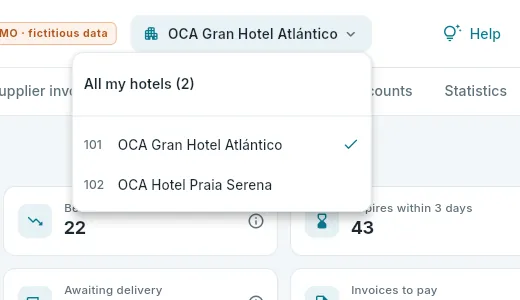 12
12
- 1Both hotels together…
- 2…or each one separately.
#Expired stock, out
First, remove what has already expired from the storeroom and write it off: that way it is not served, and the storeroom value and the proposals stop counting it. Then look at what expires over the next few days, to tell the kitchen to use it first.
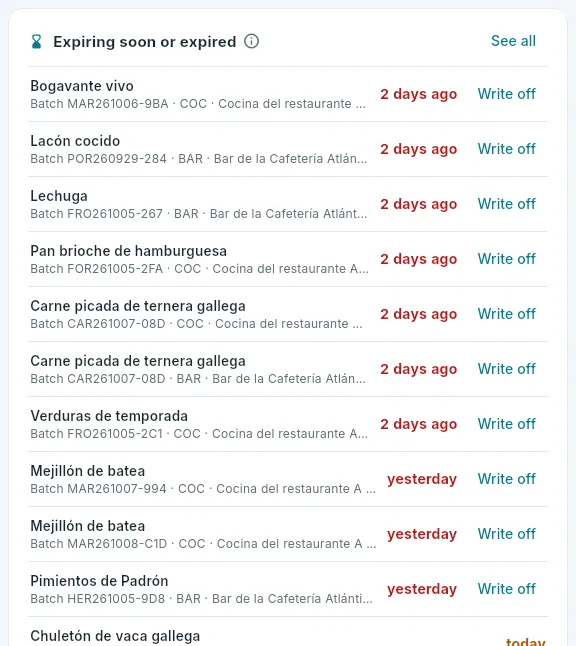 12
12
- 1Expired batches (in red) and those expiring within three days.
- 2Write off an expired batch.
Remove the expired batches on the list from the storeroom.
Write them off: one by one with Write off or all at once from Expiry dates (Write off expired stock).
Check what expires today and tomorrow and tell the kitchen and the bar.
#The order proposals
Next, the proposals: one per supplier and storeroom, with what needs ordering to last until each supplier’s next delivery. It is best to review them early: many suppliers have a cut-off time for next-day delivery.
 12
12
- 1Each proposal: supplier, storeroom, delivery, lines and amount.
- 2Review: open it, change it and send it.
Click Review on a proposal.
Go through the lines: the Why? explains each quantity. Adjust whatever you know that the calculation does not (a banquet, a dish coming off the menu, a supplier offer).
Click Approve and send. If you do not want that proposal, Discard.
Repeat with the rest (and with the other hotel).
If an item keeps running short, do not correct it by hand every day: raise its reorder point or its target in Settings. And if there is too much and it expires, lower them.
#What arrives
 12
12
- 1What arrives, by date; in orange, anything late (call the supplier).
- 2Receive: the delivery note, with what is outstanding on each line.
When a supplier arrives, before signing their delivery note, check what they bring: the quantities, the condition and temperature of fresh produce and the label on each batch (its number and use-by date). Then receive it in the app (see Receiving goods): what arrives on each line, the batch and use-by date of perishables and, if the price is not the one on the order, the one on the delivery note. Anything that arrives in poor condition is returned from the delivery note’s record.
#Every week and every month
- Invoices: as they arrive, they are recorded in Supplier invoices from their delivery notes. Those that do not match are recorded as the supplier states and sorted out with them. Bank transfers are paid before their due date (direct debits are paid by the night audit).
- The fresh-produce count, every Sunday: a stock count of the kitchen’s fish and meat only, counted batch by batch. It clears up SIN-LOTE batches and small differences before they grow.
- At month end: the full stock count of each storeroom, and the monthly invoices of suppliers who invoice that way.
- From time to time: the statistics (actual against theoretical margin, waste by reason) and the replenishment parameters for whatever runs short or is left over.
Procedures
Working offline
What happens when the housekeeping app or the POS app goes offline: what is stored on the device, the changes that wait on it and are sent by themselves when the network comes back, the receipts the terminal numbers itself and what to do with whatever is not applied.
A hotel has places with no signal: a basement, a corridor, the suites floor. The housekeeping app is built to keep working there: the room attendant sees their list, starts and finishes rooms, reports faults with a photo… and everything is sent automatically when the network comes back, in the same order and with the time it was done, not the time it arrived.
The management app, on the other hand, needs a connection: it is the one used by the front desk and head office, always on the hotel’s network.
- 1DoneEach change is saved on the mobile first, with its real time and a unique key.
- 2No networkIt waits on the mobile: the list already shows it as done, marked “not sent yet”.
- 3The network is backThe changes are sent automatically, one at a time and in order.
- 4AppliedThe database applies it (or, if it arrived late, keeps it in the history) and the list is brought up to date.
#When the connection drops
The app keeps the last list for the day it received saved on the mobile. If there is no connection when it is opened or refreshed, it shows that list with a strip at the top: Offline, and what time it is from. You can work with it just the same: whatever you do is noted on the mobile.
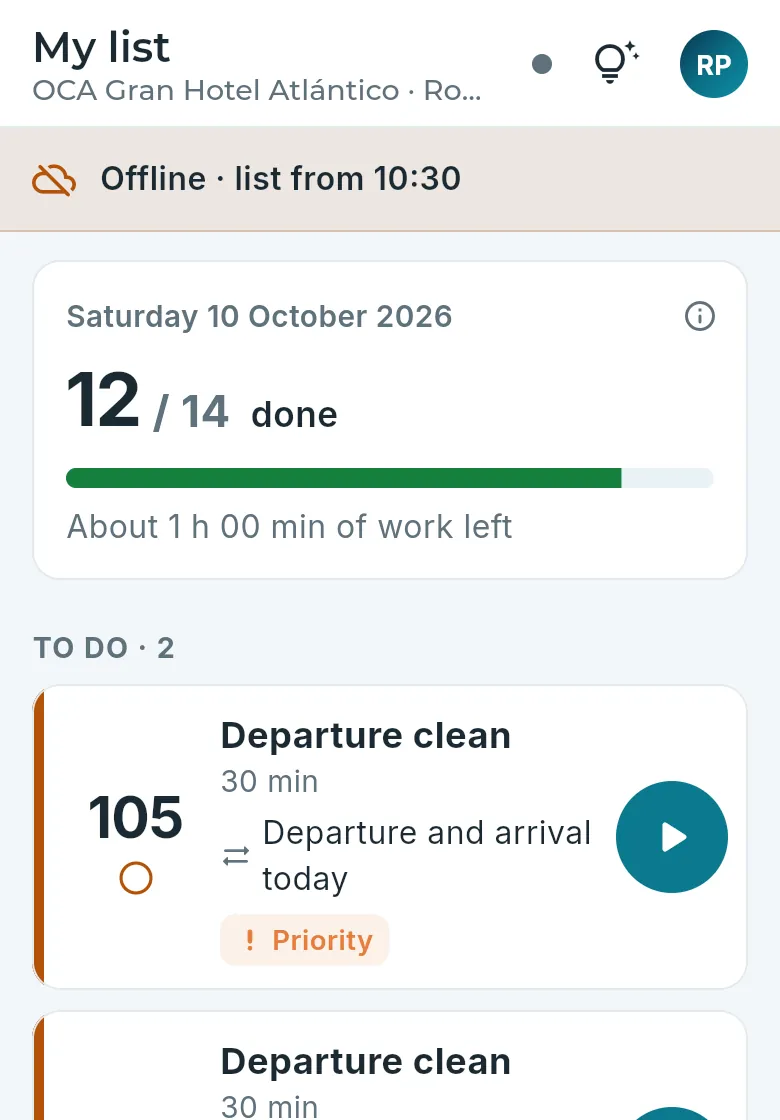 12
12
- 1Offline: the list is the one saved on the mobile, from the time shown.
- 2Everything is still to hand: the progress, the rooms and their buttons.
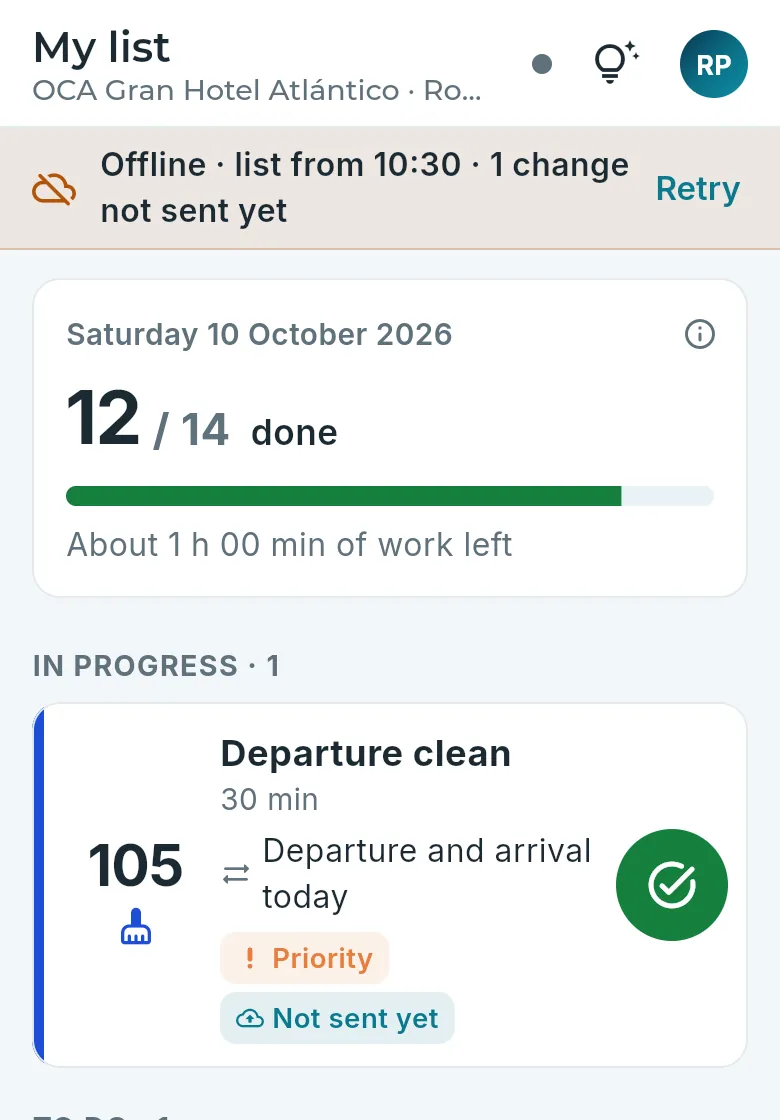 12
12
- 1How many changes not sent yet there are on the mobile.
- 2The room already shows as in progress, with the Not sent yet mark.
What is done offline shows as already done in the list on the mobile (the room that was started shows as in progress; the finished one, among those done) with the not sent yet mark. The rest of the hotel will see it when it arrives. The photos of faults and lost property also wait on the mobile: they are uploaded first and then the report that uses them.
#When the connection comes back
The app tries to send what is pending on its own: straight away and, if there is still no network, each time with a slightly longer wait (from 2 to 30 seconds); also when you go back to the app and as soon as the live connection comes back. You do not need to touch anything (although Retry, on the strip, tries straight away). When it is sent, a notice appears (“The changes saved on the device have been sent”) and the strip disappears.
Changes are sent one at a time and in order: if one cannot go out for lack of network, the next ones wait behind it so that nothing jumps ahead (a room that has not been started yet cannot be finished in the database). Each change carries the real time from the phone and a unique key: if a send arrives but the reply is lost, the retry does not repeat it.
When they have signal again, they just open the housekeeping app: the changes are sent automatically.
If the menu still shows changes not sent yet with a number, they tap it to see the list of what is pending (and how many attempts each one has had).
If the strip for changes not applied appears, they tap View: the reason says what happened. Whatever is needed (starting the room again, telling the housekeeper) is done again, now with a connection.
#The POS offline
The POS app does not stop either: the terminal keeps on the tablet everything it needs to sell (the menu with its prices and allergens, the floor plan and the open bills, the waiters with their PIN, the payment methods, the in-house guests and its numbering). Without a network, the waiter keeps opening tables, ordering, sending to the kitchen and bar (orders are printed just the same), taking payment with a receipt, charging to rooms (the charge slip is printed too) and even running the Z report, which is queued behind everything else. At the top, the Offline band shows the time of the floor plan and how many changes are waiting to be sent; each change waits on the tablet, in order and with its time, and is sent by itself when the network comes back (see the Waiter).
Each receipt is numbered by the terminal itself. When it is issued, the terminal gives it the next number in its series (TD26-…: the series belongs to the terminal, not to the company) and stores it on the tablet before sending it, so the next one already takes it into account. If the hotel’s company is under Verifactu, it also computes its chained record with the last hash of its own chain (each terminal is an installation of the invoicing system with its own chain, because it cannot wait for the company’s last hash) and its QR code. When it arrives, the server checks that the number follows the last one in the series, that the hash chains and that its time is neither in the future nor earlier than the previous record. That is why a terminal is only used on one device at a time.
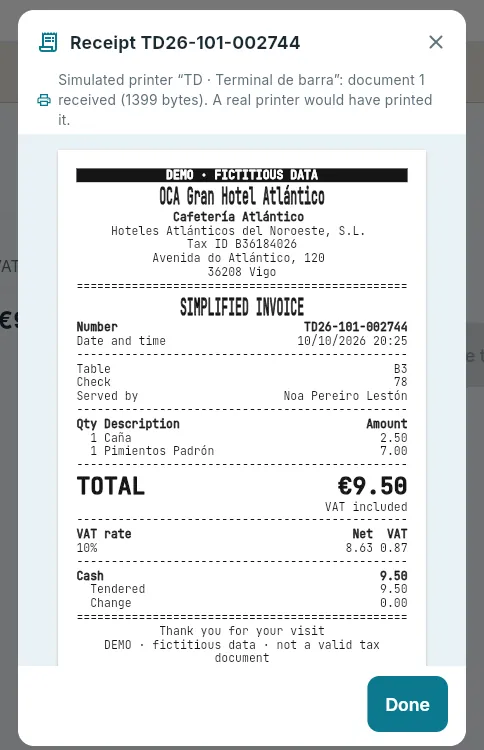 1
1
- 1The receipt, with the number from the terminal’s series, comes out even without a network.
 12
12
- 1This terminal’s changes waiting to be sent: the payment, with its receipt.
- 2Retry sends it now; otherwise it is sent by itself when the network comes back.
Offline you cannot:
- Issue a full invoice with tax ID. The PMS issues it (series A and its chain), not the terminal: it needs a connection.
- Void a receipt. It is a PMS credit note plus the refund from the terminal’s till, in the same step: online and with nothing from the terminal waiting to be sent.
- Change terminal. Its numbering and its chain belong to this device: everything pending has to reach the server first.
And two cases that sort themselves out: if another terminal opened the same table in the meantime, the bill is opened without a table (“Table 5 · 2”) and a warning is shown, with nothing lost; and if an item changed price after it was ordered, the price at the time of ordering stands.